Showing posts with label baking. Show all posts

Saturday, November 30, 2024

Homemade Buttery Flaky Pie Crust

This Buttery Flaky Pie Crust Recipe is super easy to make and delicious! So far I've used it for chicken pot pie, apple pie and pecan pie. This recipe makes is enough for a double crust but it can easily be cut in half to make just one crust (that's what I do when I make a pecan pie). You can also make the dough and refrigerate it in discs for up to 5 days before rolling it out, which helps around the holidays so you don't have to do everything in one day.

Making a pie always intimidates me because I'm not good at making the crust look nice, but this recipe is so simple and always tastes delicious - that's why it's my go-to pie crust recipe!

This link also has some more great tips!


Homemade Buttery Flaky Pie Crust

Recipe courtesy Sally’s Baking Addiction


This recipe is enough for a double crust pie. If you only need 1 crust for your pie, cut this recipe in half OR freeze the other half per the make ahead tip instruction below.


2½ cups all-purpose flour (spoon & leveled) plus more as needed for shaping and rolling

1 teaspoon salt

6 Tablespoons unsalted butter, chilled and cubed

2/3 cup vegetable shortening, chilled

½ cup ice water


For best results, chill all ingredients before using. Mix the flour and salt together in a large bowl and chill them.


Add the chilled and cubed butter and shortening to the chilled flour and salt mixture.


Using a pastry cutter or two forks, cut the butter and shortening into the mixture until it resembles coarse meal (pea-sized bits with a few larger bits of fat is OK). A pastry cutter makes this step very easy and quick.


Measure ½ cup of water in a cup. Add ice. Stir it around. From that, measure ½ cup water since the ice has melted a bit. Drizzle the cold water in, 1 Tablespoon at a time, and stir with a rubber spatula or wooden spoon after every Tablespoon added. Stop adding water when the dough begins to form large clumps. I always use about ½ cup of water and a little more in dry winter months (up to ¾ cup). Do not add any more water than you need.


Transfer the pie dough to a floured work surface. The dough should come together easily and should not feel overly sticky. Using floured hands, fold the dough into itself until the flour is fully incorporated into the fats. Form it into a ball. Cut dough in half. Flatten each half into 1-inch thick discs using your hands.


Wrap each tightly in plastic wrap. Refrigerate for at least 2 hours and up to 5 days.


When rolling out the chilled pie dough discs to use in your pie, always use gentle force with your rolling pin. Start from the center of the disc and work your way out in all directions, turning the dough with your hands as you go. Visible specks of butter and fat in the dough are perfectly normal and expected!


Proceed with the pie per your recipe’s instructions.


NoteS:

Make Ahead & Freezing Instructions: Prepare the pie dough through step 4 and freeze the discs for up to 3 months. Thaw overnight in the refrigerator before using in your pie recipe.

Shortening:  I use between 2/3 and 3/4 cup of cold shortening in this dough. Lately, I find 2/3 cup (which is 10 Tbsp + 2 teaspoons) works best.

Salt: Use regular table salt. If using kosher salt, use 1¼ teaspoons.

Thursday, August 22, 2024

Ankarsrum Assistent Original

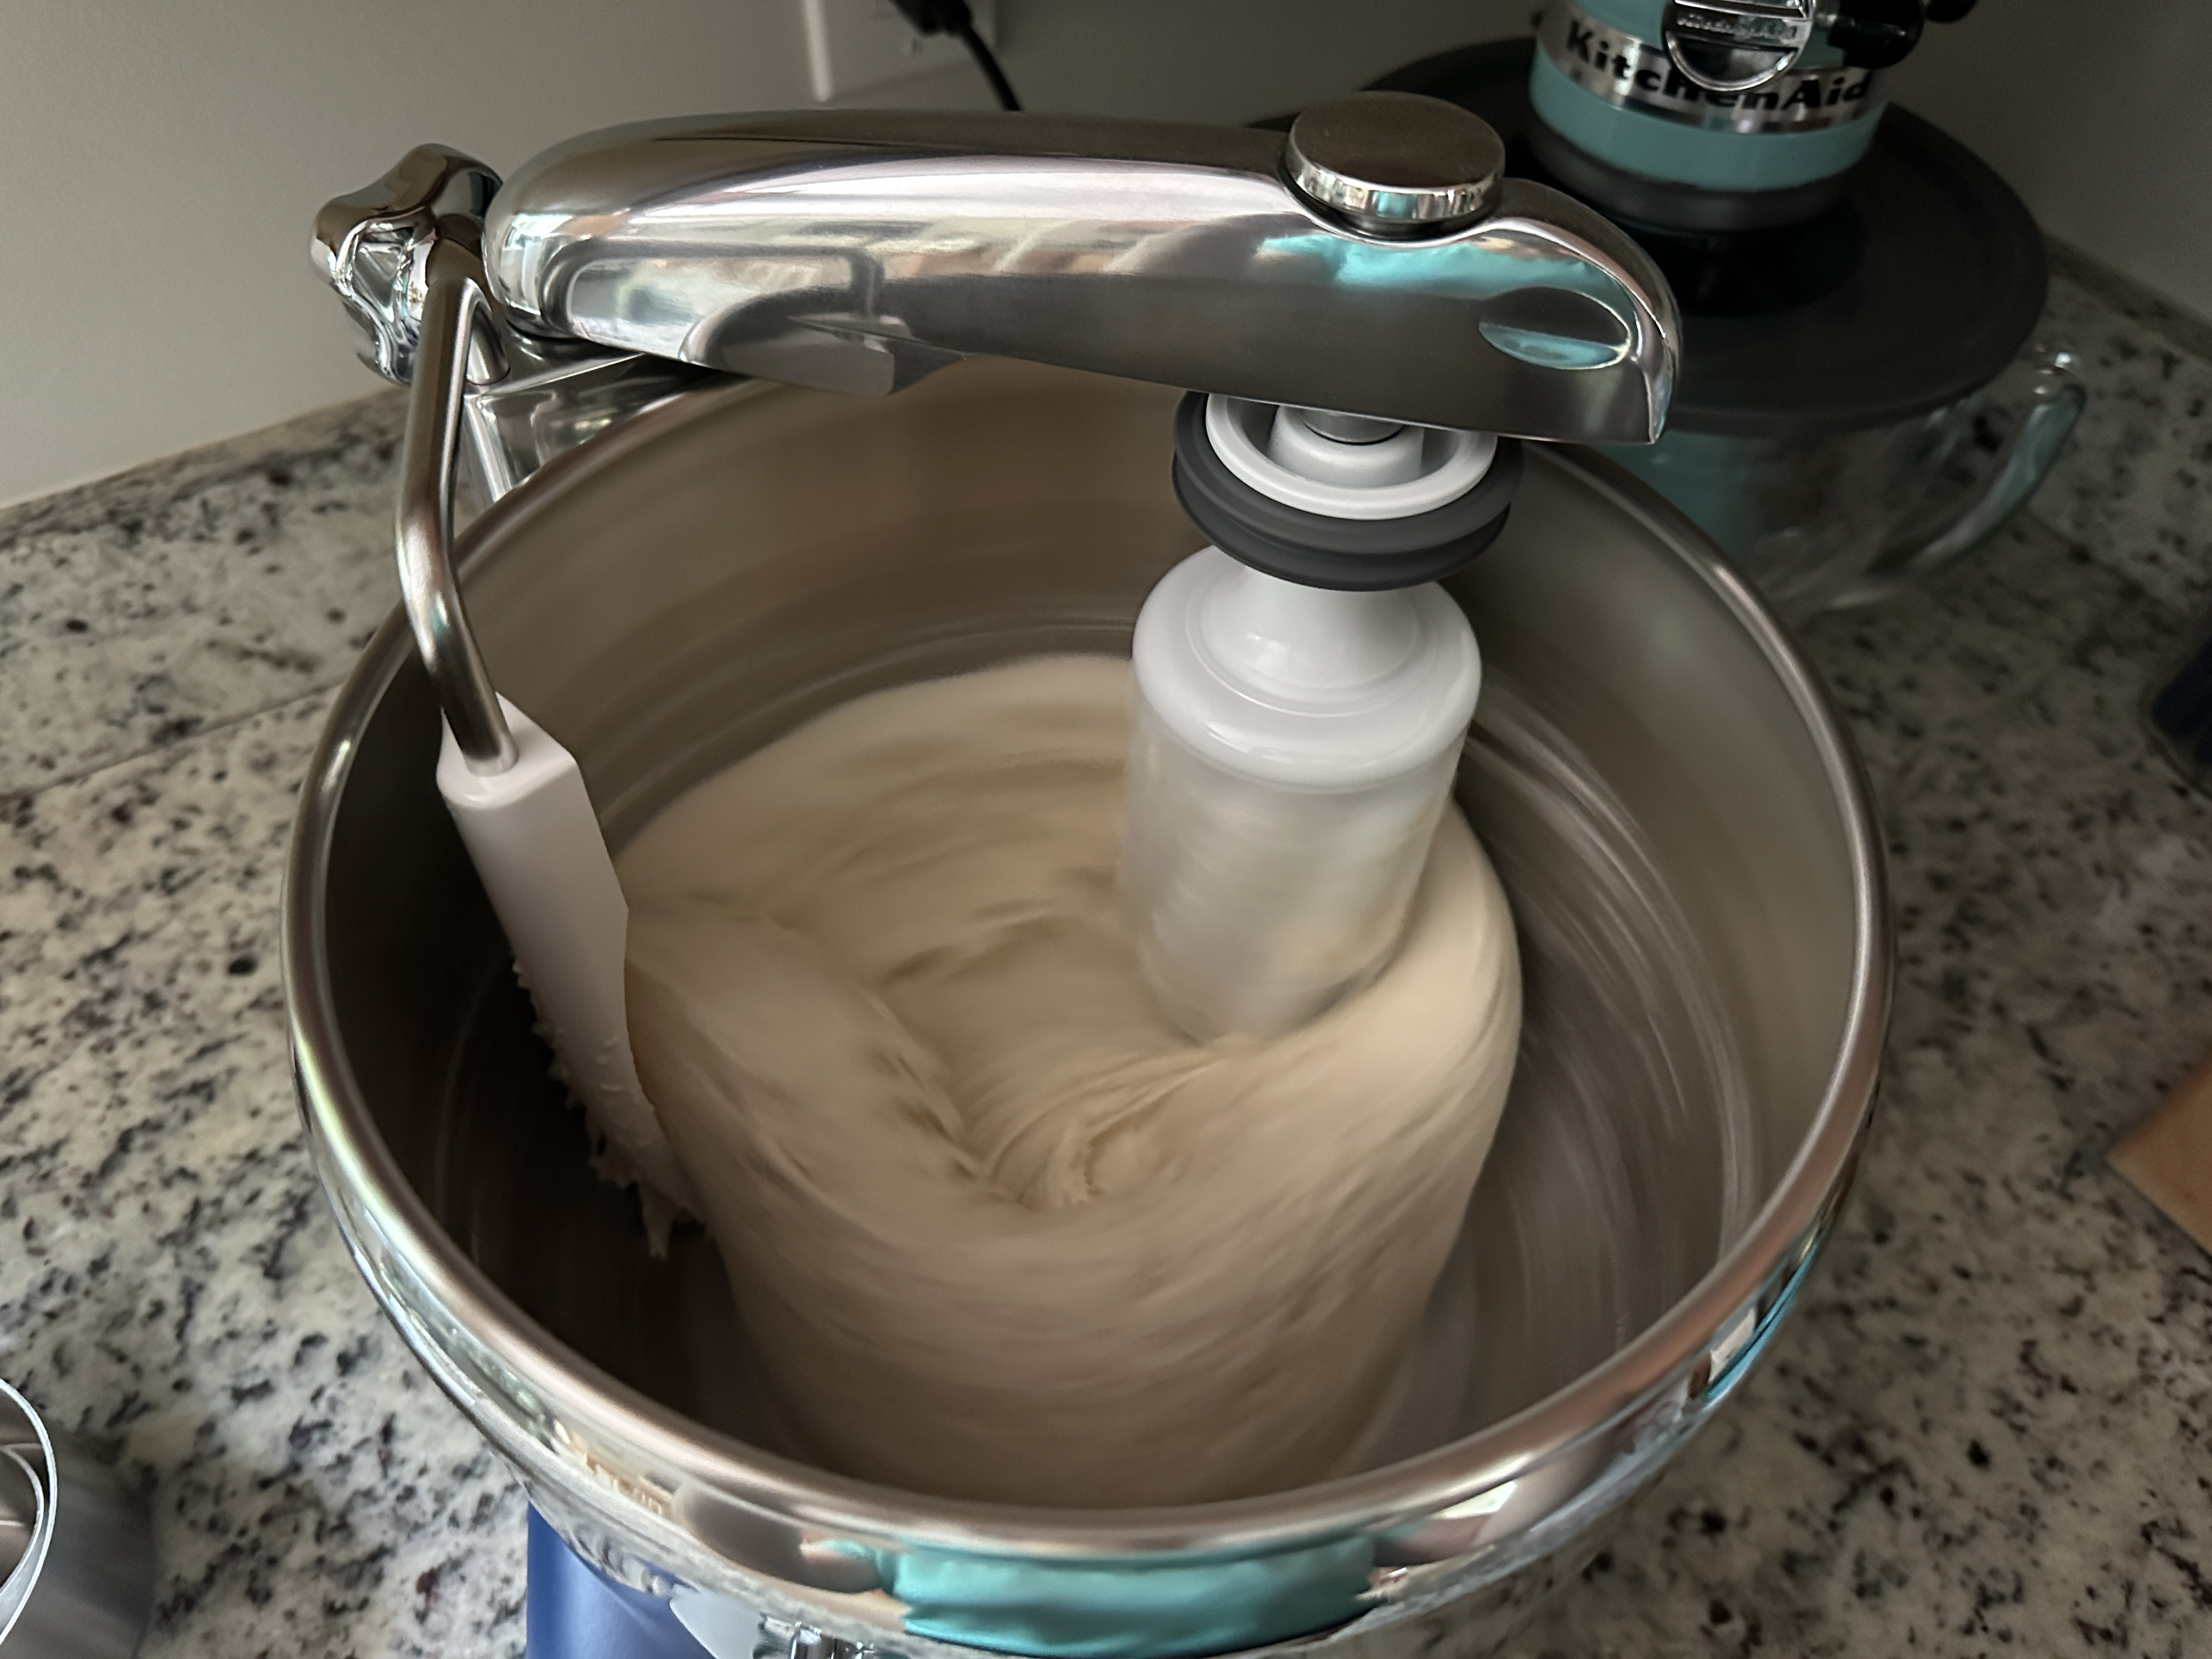
I've been making more pizza and bread dough lately and noticed my KitchenAid struggling a bit to knead it. When I was younger I made my grandmother's pizza dough by hand all the time, but once I moved out of my parent's house and no longer made a big batch using my grandmother's recipe, I started trying other smaller recipes that said to use a stand mixer to mix the dough. I had never even thought of that as an option before, but that is how I mix my dough now. I am usually only making pizza for my small family of 4, but occasionally make pizza for more people and have to make more than one batch of dough at a time in my KitchenAid. Most recently, I made 16 pizzas (4 recipes of Ooni pizza dough) on the 4th of July. It took me an hour, as it took about 15 minutes per batch to make and knead the dough in the mixer. I love my KitchenAid mixers and don't want to burn out the motor in either of them, so I started looking into what might be a better option. Of course, spiral mixers are the most obvious answer as the best mixer for pizza dough, but they are also huge, very heavy, and very expensive. I don't have a place to store one permanently, or want to spend that kind of money on a mixer that can really only do one thing (even if it does that one thing very well). It is overkill for my needs.

The other mixer that I kept coming across is called the Ankarsrum Assistent Original (Ankarsrum Original Kitchen Machine - formerly known as Verona, Magic Mill, Electrolux Assistent, DLX). It's a mixer that has been made in Sweden since 1940 and is very popular among bread bakers. You can read a little about the history of it here and here. Other than a few name changes over the years, little has changed from the original design. Unlike the KitchenAids, the motor is in the bottom of the mixer rather than overhead, and the bowl rotates. This leaves the bowl widely accessible from the top to easily add ingredients in and see the progress of the mixed batter or dough, which is very nice. It weighs less and since it's not top-heavy, it is easier to move. It comes with a 7-liter (7.4 quarts) stainless steel bowl, which is larger than both of my KitchenAids (I have a 6-quart bowl lift and a 5-quart tilt head). It also comes with a 7-year warranty, which is almost unheard of these days!

The mixer comes in 13 different colors (not as many options as KitchenAid offers, but still a good variety to choose from). I chose the color Royal Blue which has a matte finish. The only other blue option is Ocean Blue, but it has a very sparkly look to it which I don't like.

Royal Blue

The biggest complaint I've heard about this mixer is that there is a big learning curve. I have used KitchenAid mixers my whole life, so I imagined there would be a slight learning curve when moving to a new mixer that is this different, but I didn't think it would be impossible to use. I'm guessing that most people who have issues with this mixer either are not using it correctly, don't bake much to begin with, or don't have much patience. I've watched lots of videos and tutorials and it doesn't seem that difficult to use, but it is definitely very different from how the KitchenAid works. There are also some helpful tips on kneading dough. From what I've read, you have to always start with your liquids first in the mixer bowl, and salt should be added last (salt and yeast should not be added together). Oftentimes, you don't need as much flour as you would normally use when using a different mixer, so it's recommended not to mix other dry ingredients in the same bowl as your flour in case you don't use all of the flour.

The attachments are very different from the KitchenAid ones, so you have to learn how to use them. There is a dough roller and dough knife that can do every task. In fact, this is all the mixer came with when it was first sold, although they were made out of wood back then instead of plastic like they are now. Now they also include a dough hook, which was a later addition to this mixer once they started selling it in the USA. A lot of people don't seem to like or use their dough hook. The mixer also comes with a smaller plastic bowl, balloon whisks and cookie whisks that have plastic gears and look rather flimsy compared to the KitchenAid ones. You can purchase a stainless steel bowl that is the same size to use with the whisks, if you prefer to not use a plastic bowl. You also cannot use cold butter with the whisks because they and the plastic gears could break - you have to either use room temperature butter or cold butter that has been grated (not cut into chunks, for things like biscuits and pie dough). I plan to keep both of my KitchenAid mixers and continue using them for cookie dough, cakes, frosting, whipped cream, etc. so the smaller bowl and whisks don't matter as much to me, but I will probably try them out at some point. Most people say they use the roller and scraper for everything but whipping egg whites and whipped cream. One important thing to note when using either of the whisks is that they work faster than other mixers because there are two of them, so you should pay extra close attention to things that can easily get over whipped or over mixed. Another nice feature of this mixer is that the plug is removable from the machine.

7-liter stainless steel bowl with cover


Baking accessories for stainless steel bowl - dough roller, dough knife and spatula (included with mixer)


Dough hook for stainless steel bowl (included with the mixer)


Double beater set with 3.5-liter bowl (included with mixer)

Beater bowl in stainless steel (sold separately)

Another factor I considered that has annoyed me about my KitchenAids as I've gotten older is the sound of the mixer running. I developed Tinnitus (ringing in my ears) a few years ago, and certain sounds like a mixer running for 8-10 minutes (or much longer if making pasta!) make it worse. I read that the Ankarsrum is a lot quieter, which intrigued me, especially since I run my mixer the longest when mixing bread and pizza dough. Since the KitchenAid tends to "walk" (move on the countertop) as I'm making dough in it, I have to stay by the mixer which means that sound is right in my ear the entire time the dough is mixing. The Ankarsrum doesn't have that issue and won't move around, so you can go do other things while it is mixing or kneading dough. It also comes with a timer and will turn itself off once the timer runs out, which is pretty great!

KitchenAid also recently placed time and speed constraints on their mixers to prevent motor damage, especially for heavy kneading, which is wild to me. They say not to exceed speed 2 for kneading, not to exceed a total kneading time of 2 minutes per interval, and a total mixing and kneading time of 4 to 6 minutes, with a 20 minute wait period between batches. There are no such constraints with the Ankarsrum.

Speaking of pasta, the Ankarsrum has a lot of optional accessories you can buy for it, including a pasta roller and a few different pasta cutters. It does not have nearly as many accessories as KitchenAid, but there are some interesting ones. Unlike the KitchenAid where you attach these to the top of the mixer, on the Ankarsrum, you turn the mixer on the side and attach them. It looks pretty odd in my opinion, but I've read that the attachments work very well. I'm not sure that I would buy any of them, as I plan to use this primarily for mixing bread and pizza dough, but the pasta roller does intrigue me since this mixer is not as loud as the KitchenAid. You can also easily buy spare or replacement parts.

Pasta Roller Attachment

Now, for the price. It is $749.95 at the time of writing this review. This mixer is not cheap!  It is considerably less than a spiral mixer though. I have also heard of people who have owned this mixer for 20 or 30+ years and it is still like new. The motors don't burn out and they don't break the way KitchenAids do. These mixers also sell for the same price everywhere and seem to never go on sale. Luckily I found a company named The Bread Beckers that gives a 10% military discount and does not charge tax, so that is where I ordered mine from. I also earned $22.47 in "Bread Bucks" to use on a future order since I made an account on their website. The only other option I found to get one of these for a lower price (other than buying a used one, in which case there would be no warranty), is to buy a factory serviced machine, which is $124 less than a new one and comes with a 5-year warranty rather than a 7-year warranty.

I ordered this on July 9th and it arrived via UPS on July 12th. It was packaged very well (in a box inside a box inside a box - my kids were laughing at me opening 3 boxes before we got to the actual mixer). I'm happy with the pretty blue color I chose and the matte finish will help keep things looking clean. I washed everything right away so we could use it the next day. While washing the bowl I realized that one downside to the big stainless steel bowl that rotates is there is no handle on it, and I will definitely miss not having a handle because it really helps. On the other hand, using a bowl with a flat bottom will be really nice. Everything seems well-made and the included hardcover recipe book is a nice touch. Since this mixer is so different from anything I've ever used before, I read through the manuals and the tips in them, looked through the recipes and registered my mixer.

I initially thought this mixer was ugly, but it has grown on me, mostly because I have come to the sad realization that the KitchenAids are really not meant for making bread.

The day after I received this mixer I made a double recipe of Giada's pizza dough in it (using the large stainless steel bowl, roller and dough knife). The dough came out great and the pizza was delicious! I had never made this recipe in anything other than my KitchenAid before. I usually only make a double recipe but will be able to easily fit at least 4 recipes of this dough in this mixer!

I didn't intend to use this for baking other things like cookies and cakes, but I was curious how it compared to my KitchenAid, so the same day I made the pizza dough, I also made a pound cake (using the smaller clear plastic bowl and cookie beaters). It also came out great! The cake had a different consistency than I've ever gotten before from my KitchenAid mixer. It was really light and delicious. The next day I made two recipes (I made them separately, not in the bowl at once) of coffee cake, which also came out very well. It takes a little getting used to using a mixer bowl that is in the shape of a bundt pan, but I can confirm after using this bowl and these beaters three times that is does an excellent job with cake batter! If I continue to use it, I'll probably upgrade to the stainless steel beater bowl (edit: I ended up buying this bowl when it was on sale and using my "Bread Bucks" and it is great!). It's nice using a clear bowl, but it is not the most sturdy material and I've heard some complaints of the plastic cracking.

So far I've also used this mixer to make Homemade French Bread, which came out delicious! I really love how open the bowl is which makes it easy to add more flour when the mixer is already running.

I'm excited to use this mixer for so many things. If you're an avid baker and are having some issues with your KitchenAid, I highly recommend switching to this mixer!


Wednesday, August 21, 2024

Fresh Peach Muffins with a Pecan Crumb Topping

A few days ago my sister Maria was talking about a peach muffin recipe that my niece Emma gave her. I had a few peaches in my fridge and wanted to give it a try so today I made it and they were so good! I didn't have pecans so I used walnuts, but pecans would definitely taste better. I would even omit the nuts in the crumb topping and it would still be good, or omit the crumb topping all together.

This recipe does require you to soften the butter, and you have to let the cut up peaches and sugar sit for 1 hour before making the batter, so you do have to plan ahead a little bit. I used 1.5 big peaches for this recipe.

The recipe is easy to make and I will definitely be making this one again!


Fresh Peach Muffins with a Pecan Crumb Topping

Recipe courtesy Emeril Lagasse


MUFFINS:

2 cups finely chopped fresh or frozen peaches

1¼ cups sugar, divided

½ cup (1 stick) butter, at room temperature

2 eggs

1½ cups milk

3½ cups flour

4 teaspoons baking powder

1 teaspoon salt


PECAN CRUMB TOPPING:

½ cup flour

¼ cup brown sugar

¼ cup ground pecans

¼ teaspoon ground cinnamon

4 tablespoons cold butter, cut into pieces


Preheat the oven to 400°. Lightly Grease 24 (2 3/4-inch by 1 3/8-inch) muffin cups.


Place the peaches in a bowl and cover with ½ cup of the sugar. Mix thoroughly. Allow the peaches to sit for 1 hour.


Using an electric mixer, fitted with a paddle, cream the butter and remaining ¾ cup of sugar until smooth and pale in color, about 3 minutes. Add the eggs, one at a time, and beat until fluffy, about 2 minutes. In a mixing bowl, combine 3½ cups of the flour, baking powder, and salt. Remove the bowl from the mixer and alternately fold in the milk and flour mixture, being careful not to over mix. Fold in the peaches. Spoon ¼ cup of the filling into each prepared muffin cup.


In a small bowl, combine ½ cup flour, brown sugar, pecans, and cinnamon. Mix well. Add the butter. Using your hands, mix until the mixture resembles coarse crumb-like mixture. Sprinkle 1 tablespoon of the crumb mixture over each muffin cup.


Place in the oven and bake for about 15 to 20 minutes or until golden brown. Serve warm with butter.


Yield: 24 muffins.


Sunday, January 7, 2024

KitchenAid Mixer Review

This post has been sitting in my drafts folder for a long time. Since I just posted my Baking Essentials Review, I figured now would be a good time to post this as well.

One of the most used items in any baker's kitchen is their hand and/or stand mixer. I bought a hand mixer for myself when I was single and bought my townhouse, and registered for a stand mixer when I was engaged. My parents generously bought us the stand mixer. I registered for a 6-quart bowl lift model because that's what my mom had and what I was used to using (I actually had been using one of her old ones before she bought us one). I'm from a big family and I was used to baking at least 2 recipes at a time of anything I made, so the larger mixer made sense. Fast forward 6 years and I now have a husband and two children and I find myself baking mostly in single batches for us, with the occasional double batch for holidays or family parties. I love my stand mixer, but it doesn't mix small amounts in the big bowl as well as it mixes larger amounts. I recently began doing some research to find a smaller mixer that would be more for my everyday use, while keeping the 6-quart mixer for the times when I need to bake more than one batch of something. While I would not normally consider "downgrading" items in my kitchen, after using the larger stand mixer for several years I often wished I had a smaller one, especially over the past year as I have baked more with my toddlers. The smaller one also weighs less and I can more easily move it around the kitchen or onto the table where my kids can help me. My 6-quart mixer is big and heavy and cumbersome to move so it stays in the corner of our countertop and I move it out slightly to use it, then move it right back into the corner when I'm finished.

The hand mixer I have is the KitchenAid® 9-Speed Digital Hand Mixer in white. This is a great hand mixer and I use it often, always in my OXO Good Grips Stainless Steel Mixing Bowls. I like having 9 speeds instead of 5 or 7 offered on other models. I use this mixer whenever I can because it's easier to mix batter without having to scrape down the sides of the bowl so much since you can move the mixer around while holding it. I use this for cheesecake batter, cake batter, frosting/icing, pudding, whipped cream, and other light batters.

For thicker batters, larger batches, cookie dough and bread or pizza dough, I use my stand mixer. The stand mixer we were given by my parents is the KitchenAid® Professional 600 Stand Mixer in Blue Steel, which is a blue/grey color with a matte finish. When I registered for this mixer, I chose this color because our wedding colors were navy and grey. Not knowing what our future kitchen would look like or what color scheme we would have, I registered for mostly white and navy colored kitchen items and this mixer color went very well with them. I later used gift cards to purchase the KitchenAid® 6-Quart Glass Bowl with Lid and Mixing Tools. I like using this bowl when my kids are watching me bake. It is big and heavy compared to the stainless steel bowl though. I like that it has a lid so I keep this stored with my mixer on the countertop with the tools inside the lid and they don't get all dusty, and the stainless steel bowl and tools are stored in a cabinet.

The smaller stand mixer I purchased in the summer of 2021 is the KitchenAid Artisan® Series 5 Quart Tilt-Head Stand Mixer in Aqua Sky, a pretty turquoise color with a glossy finish. Turquoise and teal colored items have slowly taken over my kitchen over the years, and coordinate well with all of the navy items we also have. I also purchased the 5 Quart Tilt-Head Glass Bowl, as I know my kids will love being able to see the ingredients mixing together, and I like having an extra mixing bowl. This glass bowl has a ton of bad reviews, but so does the glass bowl I purchased for my 6-quart mixer and I've had no issues with it, so I was willing to give it a try. I also purchased the Stainless Steel 3 Piece Kit, to have a set for each bowl but also because I don't like the coated beaters that come with the 5-quart mixer. They should just stop making the coated beaters (which tend to chip over time) and provide the stainless steel ones with every mixer.


I have now owned the 5 Quart Tilt-Head Stand Mixer over two years, and I love it! The smaller size is a lot more manageable for me, it mixes better because there is not as much batter or dough left untouched at the bottom of the mixing bowl, it handles double batches well, and the bowls are easier to wash since they're smaller. I've made several double batches of cookie dough for Christmas and everything fit perfectly fine in the 5 Quart bowl. I thought I would have to use the bigger mixer for double batches so I am happy to find out I don't need to. I also love having the option of the two different bowls. If dough needs to rise or batter needs to be refrigerated after it's mixed I can keep it in the mixing bowl and use the other bowl for something else (this especially comes in handy when making a lot of different types of cookies). The glass bowl is also just a lot of fun for kids, so they can see how the ingredients come together. My boys love watching me bake using that bowl. My only complaint is that sometimes after mixing, the bowl can be difficult to twist out.

There are a ton of attachments that can be used with KitchenAid mixers. I have three. One was a wedding gift from my mom's cousin, the KitchenAid® 3-Piece Pasta Roller Attachment Set. This set is great for making homemade spaghetti. I also have the KitchenAid® Pasta Cutter Attachment (Set of 2) which has two more cuts of spaghetti. I also have the KitchenAid® Food Grinder Attachment which was a bridal shower gift. My husband wanted this attachment but neither of us have used it yet. I have debated also purchasing the KitchenAid® Pasta Press Attachment, but have not done so yet because I've heard it's difficult to clean and I'm not sure that I would use it much at all. A few of my cousins have made pasta with that attachment and it was really good. An added bonus of having two mixers is that when I use my KitchenAid pasta attachments, I can use the roller attachment on one mixer and a pasta cutter attachment on the other mixer, rather than having to keep switching the attachments.


I love my KitchenAid mixers. They are high quality and last for a very long time. They are definitely an investment, but one that is very worth it if you bake often. If I had to go back and choose just one at this point in my life, I would choose the 5 Quart because it is more suited to the baking that I do. The 6 Quart is more of a workhorse, which is nice to have at times but not completely necessary for me. I hope my review helped you decide which one or ones would be best for you!

Baking Essentials Review

A few years ago I posed a review on Mixing Bowls, Measuring Cups and Spatulas. I wanted to add an updated review with a few of my favorite baking products since some of them have changed.

My favorite mixing bowls are still the OXO Good Grips 3-piece Stainless Steel Mixing Bowl Set, so much so that I will probably purchase another set for myself. We use them so much for cooking, baking, marinating, and serving that it would be helpful to have 2 of each size. I can use my hand mixer in them too. I also let my pizza dough rise in them. I only use my other sets of mixing bowls if these are already in use. This set includes 1-1/2, 3 and 5 quart bowls. I like that they are stainless steel, but the white exterior makes them look nice, and the non-slip base is helpful to have when stirring and mixing. I also love that they nest together for easy storage.

My favorite spatulas are the Tovolo Flex-Core All-Silicone Spatulas. They are all one piece which means there are no little crevices for food or liquids to get stuck in. They are sold in a variety of colors, but I have the Deep Indigo ones. I prefer the dark color so they don't stain when using with tomato sauce and other foods that could stain them. You can purchase these individually in various shapes and sizes, but the most economical way to purchase them is in the 5-piece set. I find the various shapes and sizes to be very useful for different things. I used to love my OXO SoftWorks Silicone Spatulas, but I now use these Tovolo ones all the time and rarely use any of my others.

Two years ago I found the Sur La Table Stainless Steel Measuring Cups, Set of 8, which is a full set of measuring cups that includes a 2-cup size. This is such a helpful size to have for baking. What I love most is that this large set completely nests together so they are easy to store, and there are no crevices for food to get stuck in. This set includes 1/4 cup, 1/3 cup 1/2 cup, 2/3 cup, 3/4 cup, 1 cup, 1 1/2 cup, and 2 cup sizes. They also sell smaller sets of these cups which includes less sizes, but I highly recommend this full set. It is expensive but it goes on sale from time to time and is completely worth the money if you bake a lot! I like these so much more than the Williams-Sonoma stainless steel measuring cups that I originally loved, which had areas where food got stuck and were harder to clean, and also had rounded handles which made them uncomfortable to hold.


When I bought the measuring cups, I also purchased the matching Sur La Table Round Measuring Spoons, Set of 6 which includes a scraper, 1/4 teaspoon, 1/2 teaspoon, 1 teaspoon, 1/2 tablespoon, and 1 tablespoon sizes, along with the Odd-Size Measuring Spoons, Set of 7 which includes a pinch, 1/8 teaspoon, 2/3 teaspoon, 1 1/2 teaspoon, 2 teaspoon, 1/2 tablespoon and 2 tablespoon sizes. Again, they sell the measuring spoons in various sets, but I find it most beneficial to buy these two full sets so you have every size you could possibly need! It is really nice having the sizes that are not typically included with most other sets, like 1/8 teaspoon, 1 1/2 teaspoon, 1/2 tablespoon, 2 tablespoon. These sets go on sale as well. Both sets nest together into one, which makes these very easy to store. I still love and use my Williams-Sonoma stainless steel measuring spoons (an older set that is no longer sold), but I reach for these ones more and more since this set includes more sizes.


A new addition that I have not received or used yet is the Sur La Table Spice Measuring Spoons, Set of 6, which includes 1/8 teaspoon, 1/4 teaspoon, 1/2 teaspoon, 3/4 teaspoon, 1 teaspoon and 1 tablespoon sizes. These are narrowly shaped specifically to fit inside small spice bottles. These also nest together and like all of the measuring cups and spoons mentioned above, the sizes are etched into the stainless steel, so you don't have to worry about them rubbing off like they would on other sets.


For liquid measuring, I use Pyrex Measuring Cups. I have the 1, 2 and 4 cup sizes (these nest together for easy storage), along with the 8 cup with a lid, which I can't seem to find online anymore for a decent price. I use the 2 cup one the most, but find it helpful to have all of the sizes. This is a classic and timeless set of measuring cups that you can't go wrong with.


Sometimes it is more beneficial to weigh ingredients rather than measure them. I use the OXO Good Grips 11 lb. Stainless Steel Food Scale with Pull Out Display when I am making pizza or pasta dough. This scale is so great to have and I admit that I don't use it as much as I should. It is much better to measure ingredients for baking (especially flour) by weight to ensure accuracy.


Lastly, I love using my OXO Cookie Scoops for baking - I have the small, medium and large sizes. The small and medium I use for cookies and the large I use for muffins. These not only make it easy to scoop out batter, but they help give you consistently sized baked goods.


These are my most highly recommended baking essentials. These items have all held up very well over time, but I will add that I don't put any of them in the dishwasher. I hand wash them since it takes no time at all to do so. I hope this review has been helpful. If there is a specific baking item you are wondering about that is not mentioned here, feel free to ask!

Saturday, July 17, 2021

Original NESTLÉ® TOLL HOUSE® Chocolate Chip Cookies

I don't know why I haven't posted this classic chocolate chip cookie recipe before - it's the only chocolate chip cookie recipe I've ever made. It's super simple and delicious. I sometimes add walnuts and sometimes don't, depending on whether I have any at the time or not and who I am baking for since some people don't like nuts in their cookies. I use Crisco in place of butter, but otherwise don't change anything else.

I had been using parchment paper when baking cookies, but I just bought some Silpat half sheet baking mats on sale and this was my first time using them. I used a medium size OXO cookie scoop to drop the cookies on the cookie sheets, and got 38 cookies out of one recipe using that size - they were a bit bigger than I had anticipated. A few weeks later I used a small cookie scoop to make another recipe of these with walnuts, and got 74 cookies out of that recipe - those were a bit smaller than I had wanted. Next time I will have to go with overfilling a small cookie scoop to get the perfect size!

This is a great recipe to make with kids - my boys loved watching the batter come together (gotta love those glass mixing bowls) and tasting the results!


Original NESTLÉ® TOLL HOUSE® Chocolate Chip Cookies


The chocolate chip cookie that started it all! NESTLÉ® TOLL HOUSE® original chocolate chip cookies are a true classic and the go-to cookie for all occasions!


2¼ cups all-purpose flour

1 teaspoon baking soda

1 teaspoon salt

1 cup (2 sticks) butter, softened or shortening

¾ cup granulated sugar

¾ cup packed brown sugar

1 teaspoon vanilla extract

2 large eggs

2 cups (12-ounce package) NESTLÉ® TOLL HOUSE® Semi-Sweet Chocolate Morsel

1 cup chopped nuts (Optional – if omitting, add 1 to 2 Tablespoons of all-purpose flour)


Preheat oven to 375°.


Combine flour, baking soda and salt in small bowl. Beat butter, granulated sugar, brown sugar and vanilla extract in large mixer bowl until creamy. Add eggs, one at a time, beating well after each addition. Gradually beat in flour mixture. Stir in morsels and nuts. Drop by rounded tablespoon onto ungreased baking sheets.


Bake for 9 to 11 minutes or until golden brown. Cool on baking sheets for 2 minutes; remove to wire racks to cool completely.


Yield: 5 dozen cookies.


Waiting on cookies...


A few photos of a recipe made with walnuts: