Sunday, February 26, 2012

Cherry-Almond Bundt Cake

My sister made a bundt cake for a family Christmas party that was so delicious. I have been wanting to try it and finally did today. The night she made her cake I was so full from a huge Italian dinner and my grandmother's cookies that I only had a tiny sliver of cake and was very impressed with it. The almond extract gives the cake a great taste and the cherries are the perfect addition.

Since the only bundt pan I have is a heart-shaped one, that's what I used. My sister received the Heritage Bundt Cake Pan from Williams-Sonoma for her wedding and made hers in this. It makes such appetizing looking cakes.

Photo from Williams-Sonoma

I bought a bag of dried tart montmorency cherries from Costco and used a large chef's knife to chop them into smaller pieces. My sister used a food processor when she made her cake and said that worked well too. She gave me a few other tips - to check the cake earlier than the time in the recipe (I took mine out after 45 minutes and it could have been cooked a few minutes less) and to only make half of the glaze recipe (I only made half and still had a bit left over). I also mixed all of the cherries into the batter instead of doing what the recipe said. My sister had made this cake mixing the cherries both ways and thought that just mixing them all in distributed them more evenly throughout.

My cake came out pretty good, but next time I will check on it a little sooner. It may have overcooked a little. My cake was a little crumbly and I remember the one my sister made was more moist. I also would chop the cherries a bit smaller. When I was cutting the cake if the knife hit a cherry it pulled the cake apart a little and the cherry stuck to the knife. Other than that, this cake is delicious and I highly recommend it!

The original recipe can be found here.


Cherry-Almond Bundt Cake
Recipe courtesy Williams-Sonoma

Use a pastry brush to grease the Bundt pan thoroughly with solid shortening. Sprinkle some flour in the pan, hold it over a sink, and turn and tilt the pan to distribute the flour evenly. Then invert the pan and tap out the excess flour to prevent a buildup of grease and flour on the finished cake. When greasing and flouring, be sure to coat all the crevices in the pan so the cake will release easily and the design will be sharply defined.

CAKE:
2½ cups cake flour
2 teaspoons baking powder
½ teaspoon salt
1¼ cups chopped dried cherries
¾ cup milk
2 teaspoons almond extract
½ teaspoon vanilla extract
16 Tablespoons (2 sticks) unsalted butter
1 2/3 cups granulated sugar
4 eggs

GLAZE:
½ cup granulated sugar
½ cup water
1 Tablespoon amaretto
Confectioners' sugar for dusting

Have all the ingredients at room temperature.

Position a rack in the lower third of an oven and preheat to 350°F. Grease and flour a Bundt pan; tap out excess flour.

To make the cake, over a sheet of waxed paper, sift together the flour, baking powder and salt. Transfer 1½ tablespoons of the flour mixture to a small bowl, add the cherries and toss to coat; set aside.

In another small bowl, combine the milk and the almond and vanilla extracts; set aside.

In the bowl of an electric mixer fitted with the flat beater, beat the butter on medium speed until creamy and smooth, 1 to 2 minutes. Add the granulated sugar and continue beating until light and fluffy, about 5 minutes, stopping the mixer occasionally to scrape down the sides of the bowl. Add the eggs one at a time, beating well after each addition.

Reduce the speed to low and add the flour mixture in three additions, alternating with the milk mixture and beginning and ending with the flour. Beat each addition just until incorporated, stopping the mixer occasionally to scrape down the sides of the bowl. Using a rubber spatula, gently fold two-thirds of the cherries into the batter.

Spoon half of the batter into the prepared pan and sprinkle the remaining cherries over the batter. Spoon the remaining batter on top, spreading the batter so the sides are higher than the center.

Bake until the center of the cake springs back when touched and a toothpick inserted into the center comes out clean, about 55 minutes. Transfer the pan to a wire rack and let the cake cool upright in the pan for 15 minutes.

Meanwhile, make the glaze: In a small saucepan over medium heat, whisk together the granulated sugar and water and cook until the sugar dissolves, then boil for 1 minute. Remove from the heat, stir in the amaretto and let cool for 1 minute.

Tap the bundt pan gently on a work surface to loosen the cake. Set the rack over a sheet of waxed paper, invert the pan onto the rack and lift off the pan. Using a pastry brush, brush the warm cake with the glaze. Let the cake cool completely before serving. Dust with confectioners' sugar just before serving.

Serves 16.

NOTES: You can mix all of the cherries into the batter at once. Check the cake around 40 minutes. Half of the glaze recipe is more than enough.
 

Chopped dried tart montmorency cherries

Cherries tossed in flour mixture
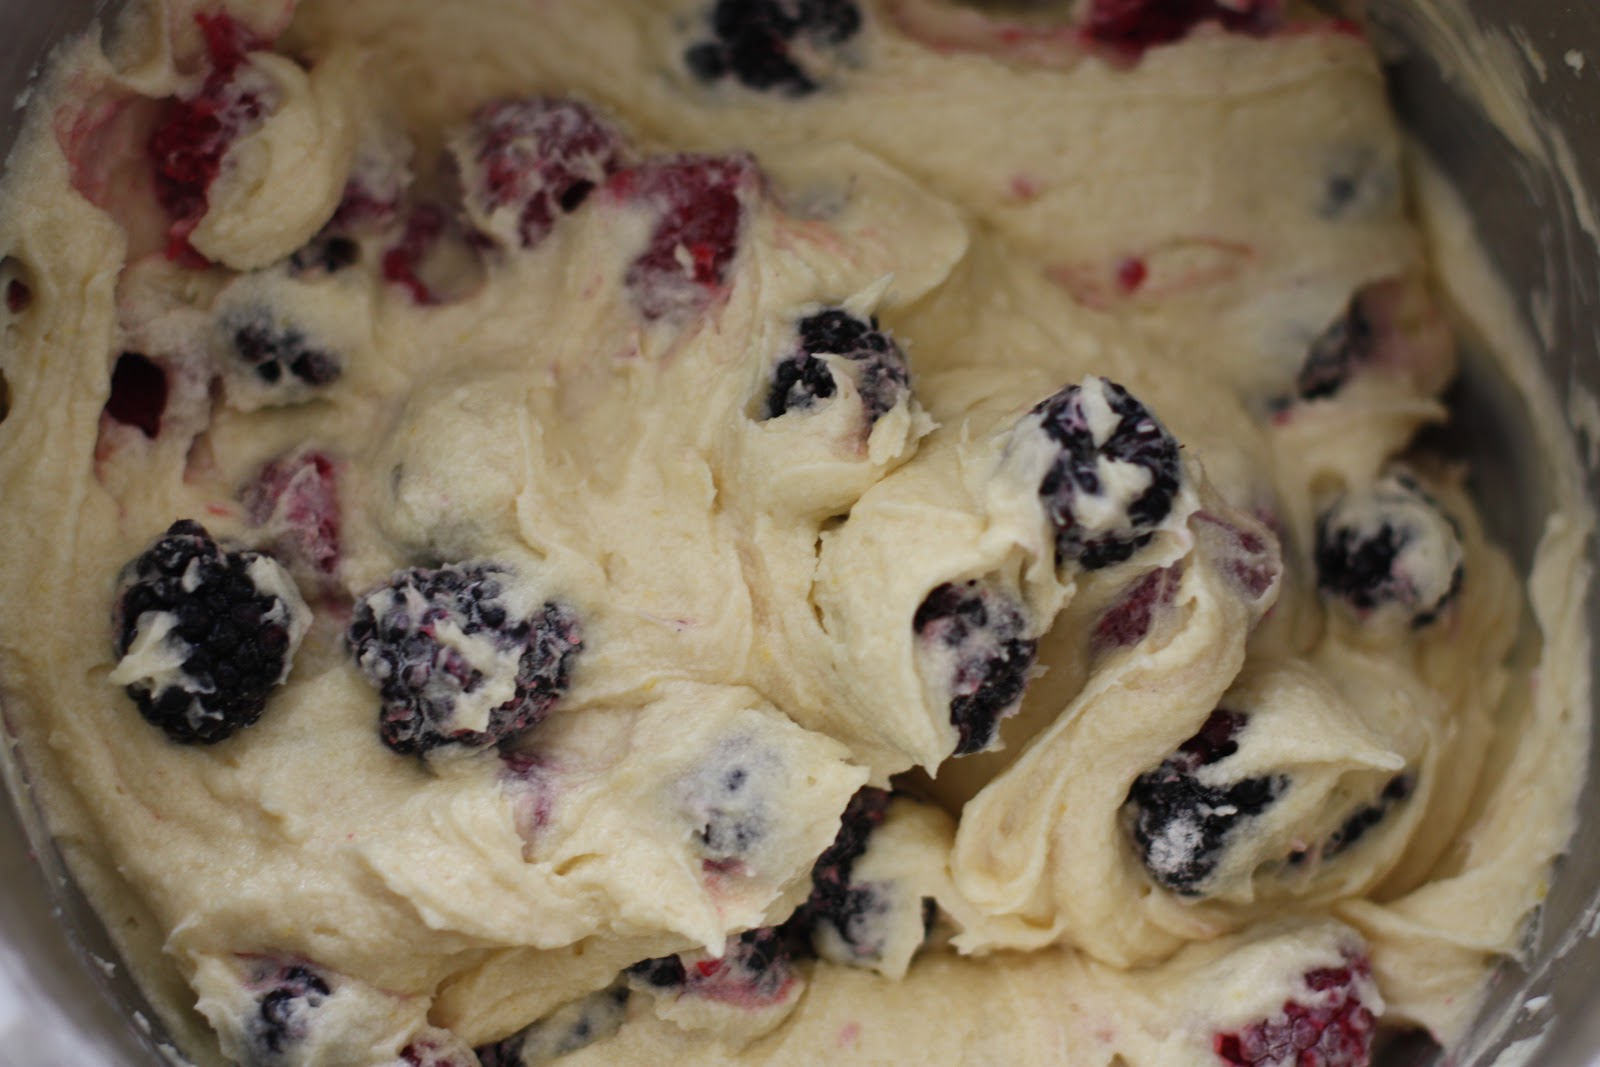
Cake batter

Batter with cherries, ready to go in the oven!

Right out of the oven


Add a little confectioners' sugar

Photos by JoJo

Pin It

Wednesday, February 22, 2012

Chicken Madeira

I recently babysat for my sister and brother-in-law when they went to the Cheesecake Factory for their anniversary. When they got home my sister told me she ordered Chicken Madeira. I had forgotten that the one time I had it, it was really good. I usually get Chicken Marsala and the two dishes are pretty similar so I tried it to see what the difference was. Chicken Madeira is made with Madeira wine and beef stock, while Chicken Marsala is made with Marsala wine and chicken stock. The Cheesecake Factory serves Chicken Madeira with asparagus (which I am not particularly fond of) and mashed potatoes, while they serve Chicken Marsala with bow tie pasta. Both dishes have mushrooms, which I love! My local wine and beer store only had Paul Masson Madeira Wine, so that is what I used. Since I had never made this before and was not sure how much wine/beef stock mixture would be left, I made pasta, because that leftover mixture over pasta tastes delicious!

Paul Masson Madeira Wine (photo from wine-searcher.com)

Photo from www.myboyfrienddatedachef.com

I found two recipes for this dish and the one made is adapted from the other. The comments on that recipe made it seem like a better choice. The only differences in the two are the amounts of beef stock and wine used and the addition of corn starch to thicken the sauce mixture up. The recipe I used can be found here.

I made a few changes to this recipe. First, I used chicken tenders rather than chicken breasts. I took the wrong ones out of the freezer by accident, but the chicken tenders were actually the perfect size and much easier to pound thin. Second, I did not make the asparagus or put mozzarella on top. I also made pasta instead of mashed potatoes. The chicken came out really good but I thought it could use a little salt. So next time I will add some salt into the sauce. Other than that, it was delicious and I will definitely be making it again!


Chicken Madeira

CHICKEN:
1 Tablespoon olive oil
4 boneless chicken breasts
8-12 asparagus spears
4 slices mozzarella

SAUCE:
2 Tablespoons olive oil
2 cups fresh sliced mushrooms
1½ cups Madeira wine
1 cup beef stock
1 Tablespoon butter
¼ teaspoon ground black pepper
3 Tablespoons corn starch

Cover chicken breasts with plastic wrap; pound to ¼-inch thick. Sprinkle each fillet with salt and pepper.

Heat 1 tablespoon of olive oil in frying pan over medium-high heat. Sauté fillets for 4-6 minutes per side until done and browned just a bit. Remove from pan and wrap in foil to keep warm while you make the sauce.

In chicken pan add olive oil and sliced mushrooms; sauté for about 2 minutes. Add Madeira wine, beef stock, butter, pepper and corn starch. Bring to boil, then reduce heat; cover and simmer for 20 minutes until reduced to about ½ original volume. When sauce is done it will be thick and brown.

While sauce is reducing, bring a pan of water to boil. Add salt to water at boil; blanch asparagus (3-5 minutes). Drop asparagus in ice water to halt cooking.

Set oven to broil. In baking dish arrange chicken: cross 2-3 asparagus stems over each piece of chicken and top with a slice of cheese. Broil until cheese melts.

To serve, top chicken with 3-4 tablespoons of sauce on each piece.

Recommended side: mashed potatoes are delicious with this dish.


Photos by JoJo

Pin It

Sunday, February 12, 2012

Mixed Berry Bundt Cake

I found a recipe a few months ago that I have been dying to make. I even bought the heart-shaped pan pictured with the recipe because I thought it looked so cute and would be perfect for various occasions (Valentine's Day, baby or bridal showers, etc.). The "Elegant Heart Bundt Pan" was not on Williams-Sonoma's website, but after a little bit of searching I was able to find it on here. It was the lowest price I could find online and I even found a set of 4 mini springform pans (also sold at Williams-Sonoma, but for more of course) and a few kitchen utensils which gave me enough items totaling $50 to get free shipping from the site. Even without the free shipping, this pan was cheaper than any of the other places I found it. The pan seems very sturdy and of great quality. And...it's a NordicWare pan, which means it's made in the USA!

Photo from www.cutleryandmore.com


Photo from Williams-Sonoma Website

I wanted to try this pan out for the first time for Valentine's Day. I went to the grocery store this morning to see how the berries looked. Blackberries were buy one get one free, so I got two cartons of them and one carton of raspberries. The blueberries they had didn't look too great, so I just stuck with blackberries and raspberries this time.

The recipe was very simple to make. I would suggest leaving the butter out for several hours until it reaches room temperature or even taking it out of the refrigerator the night before baking. If you don't have kirsch, search online for a substitute. My sister had some, so I borrowed hers. I used a paper towel to grease the pan with Crisco and then floured it. I would not recommend using baking spray.

If you already have a bundt pan, the one I used is a 10-cup pan. Once it was fully baked the cake filled the pan perfectly and came all the way to the top, so I would not use a cake pan any smaller! The cake came out of the pan easily and looked (and smelled) delicious. I was going to freeze it and take it out of the freezer Monday night to have on Valentine's Day (Tuesday), but it looked so good I couldn't wait a few more days to try it. Various members of my family had a piece and everyone seemed to like it.

Give this cake a try - the original recipe for it can be found here.


Mixed Berry Bundt Cake
Recipe courtesy Williams-Sonoma

Laced with juicy berries, this heart-shaped cake makes a delicious finale to a Valentine's Day celebration. Tossing the berries with a bit of flour prevents them from sinking to the bottom of the cake.

5 eggs
1 2/3 cups granulated sugar
20 Tablespoons (2½ cups) unsalted butter, at room temperature, cut into small pieces
2 Tablespoons kirsch or other fruit liqueur
2½ cups all-purpose flour
1 teaspoon baking powder
Pinch of salt
1½ cups raspberries (another 2 cups raspberries to fill hole in cake, optional)
1½ cups blueberries or blackberries
Confectioners’ sugar for dusting (optional)

Preheat oven to 325˚. Butter and flour an elegant heart bundt cake pan.

In a large bowl, blend the eggs and granulated sugar. Using an electric mixer, beat in the butter and liqueur until fluffy. Add all but 2 tablespoons of the flour and the baking powder and salt, and beat until well incorporated and no lumps remain.

In another bowl, combine 1½ cups of the raspberries and the blueberries with the remaining 2 tablespoons flour. Toss to coat the berries evenly with the flour. Using a rubber spatula, gently fold the berries into the batter.

Pour the batter into the prepared pan. Bake until a wooden skewer inserted into the center of the cake comes out clean, about 1 hour. Transfer the pan to a wire rack and let the cake cool in the pan for 20 to 25 minutes. Unmold the cake onto the rack and let cool completely.

Fill the center of the cake with the remaining 2 cups raspberries. Dust the cake with confectioners’ sugar.


Photos by JoJo


Pin It

Sunday, February 5, 2012

Fruit Smoothies

I love frozen drinks, especially smoothies. I had some leftover plain yogurt from the two dips I made recently, so I bought two bags of mixed frozen fruits so I could use the yogurt in smoothies. I usually add a banana to the frozen fruit so there is something soft in the blender, but the ones I had at home today were not ripe yet. Luckily I had some kiwi and I used one of those instead. Today's smoothie was pineapple, strawberry, peach, mango and kiwi!

Since I usually just make these for myself, I measure by filling whatever glass I am using with frozen fruit. Then I cut the ripe fruit and add it in. I dump the fruit into a blender and put either one small carton of yogurt or a few tablespoons of yogurt (if it's from a large container). I typically use plain or vanilla yogurt. If I'm using a flavored yogurt I try to stick with a flavor that is the same as one of the fruits I put in smoothie. Occasionally I use home-made yogurt from my sister, and when using that I add a bit of honey. To the fruit and yogurt I add a little bit of juice (usually orange juice). Blend together until all the fruit chunks are gone. If it's too thick, add a little more juice. Pour back into your glass and enjoy!

I never use ice in my smoothies since I use frozen fruit. You can also cut up fresh fruit and freeze it for smoothies. Just be sure to add one fruit in that is not frozen so it is easier to blend.

Smoothies are delicious, healthy and very simple to make. They're not cheap to buy from other places, and you can get as creative as you want making them on your own!


Photos by JoJo

Update on 4/3/2012:
Below are more photos from a smoothie I made using frozen mixed berries (strawberries, blackberries, raspberries and blueberries), a banana, blueberry yogurt, and orange juice.


Photos by JoJo

Pin It

Spinach Dip

Until this morning I didn't know where I'd be watching the Super Bowl, but I knew I wanted to bring something wherever I went. I have been feeling a little under the weather all weekend and just wanted to make something simple. So last night I made a spinach dip to take with me. I only had one cup of sour cream, not two like the recipe called for, so I substituted the second cup with plain yogurt. I defrosted the frozen chopped spinach on a low power in the microwave. There is a lot of water in the spinach, so be sure to drain it well, or even just squeeze it out with your hands. Getting the spinach ready took the most time, but other than that this recipe is a breeze and will go well with chips, crackers or raw veggies. It can also be served in a bread bowl if you prefer that. I found the original recipe here. Enjoy!


Original Ranch Spinach Dip

1 packet Hidden Valley Ranch Original Ranch Dips Mix
1 16-ounce container sour cream
1 10-ounce box frozen chopped spinach, thawed and well-drained
1 8-ounce can water chestnuts, rinsed, drained and chopped (optional)
Chips, crackers or raw vegetables for dipping

Stir together dips mix, sour cream, spinach and water chestnuts. Chill 30 minutes or until just before serving.

Serve in a bread bowl with cubed bread (using firm bread pieces as dippers), or with chips, crackers or raw vegetables.

Photo by JoJo

Pin It

Wednesday, February 1, 2012

Red Velvet Cheesecake

I've already posted one Red Velvet Cheesecake Recipe on here (that I have yet to make), but one day I came across another that looked even better. I love cake, cheesecake and cream cheese frosting, so these really appeal to me. It looks a little time consuming but I'm sure it will be worth it. If you don't like the idea of using red dye you could always just make a chocolate cake.

Red Velvet Cheesecake


All of the pictures for this cake from the Recipe Girl blog post look so good, I'm just going to post them all.

Photos from Recipe Girl blog


Pin It