Friday, December 31, 2021

Lasagna

Lasagna is one of those meals that is perfect for either an average night at home, to give away to a family or friend in need of a meal, or for a holiday. You can make it the same day you want to eat it, the day before, or even a while before and freeze it. I've always loved lasagna, but I really love it when my mom makes it with homemade ricotta (which is actually very easy to make). The photos below are from August but I kept forgetting to post this recipe - I have only made lasagna on my own once, but it was delicious. I made my own ricotta a day in advance, then made the bolognese sauce and assembled the lasagna and cooked it the following day. I also made a super simple dutch oven bread to serve with it.

Below is my Grandma Filomena's lasagna recipe, along with her bolognese sauce recipe. I always make my sauce a little different each time I make it. I usually use a mixture of half ground beef and half ground sausage. I chop the onion instead of browning it whole and I add 2 finely chopped cloves of garlic. Sometimes I also put 2 carrots and 2 celery stalks through a mini food processor and then add those to the sauce. If I have fresh basil I'll add some to the blender while blending the whole tomatoes. Sometimes I use cans of tomato sauce or other types of tomatoes, depending on what I have big cans of. If I have red wine, I add a generous amount to the sauce which makes it taste even more delicious. And finally, I add chopped fresh parsley to the sauce once it is finished cooking.

I made this in my Le Creuset 5.25-Quart Signature Rectangular Roaster, but it can be made in any lasagna or roasting pan. I chose to make it in this pan because the sides are higher than other pans I have so I didn't have to worry about it spilling over in the oven (but I still put a sheet pan underneath just in case). This made a lot for my small family of 4, so I gave some pieces to a friend and then we enjoyed the rest for leftovers for a few nights.

This lasagna was delicious! I hope to try it again soon and to one day use homemade lasagna noodles, when I can find the time to make them!


Lasagna


Bolognese Sauce: 


It is a good idea to make a double recipe of the sauce so that there is some left over to serve over the lasagna.


2 Tablespoons bacon drippings or olive oil

1 pound ground beef (chuck, sirloin, round)*

            * Variation: use part ground pork or add a piece of pork (browned)

Salt and pepper to taste

1 small whole onion, lightly browned

28-ounce Hunts Italian or Whole Tomatoes – blend in blender until smooth

6-ounce can Hunts Tomato paste

1 6-ounce can of water

Fresh parsley


Brown whole onion and ground meat in saucepan.  Add tomatoes that have been blended until smooth.  Add salt and pepper and cook for about 15 minutes.  Add tomato paste and water and continue cooking slowly for about 1½ hours.


Ricotta Mixture:


Mix together:

2 pounds Ricotta cheese

2 eggs, lightly beaten – increase number of eggs if ricotta is very dry

Salt and pepper to taste


½-¾ pound Mozzarella cheese (granted, chopped or sliced)

Parmesan or Romano grated cheese


Add lightly beaten eggs, salt and pepper to ricotta. This mixture is spread on the noodles. Mozzarella cheese and parmesan or romano cheese are sprinkled over the sauce.


Lasagna Noodles*:

Boil lasagna noodles in plenty of boiling water and add a couple of tablespoons of oil to water so that lasagna noodles won’t stick together. When noodles are al dente, drain.


13” x 9” Lasagna Pan: Add a small amount of sauce on the bottom of pan. Place one layer of noodles on the bottom of the pan. Spread one third of the ricotta mixture over the noodles, sprinkle with mozzarella cheese, add sauce and grated cheese. Repeat the process and finish lasagna with a layer of noodles, sauce and grated cheese.


*Variation:  Use Barilla Oven Ready/No Boil lasagna noodles. Carefully hold each noodle in your hand and spread the ricotta mixture on noodle. Leave a ½ inch edge on one long side of the noodle. Spread mixture on next noodle. Overlap the filled long side of second noodle on the ½ inch empty edge of first noodle. Continue to fill the bottom of the lasagna dish. The noodles can be broken to the size that is needed to fill the space in the dish. Continue with cheeses, sauce and begin next layer. End with layer of noodles, sauce and grated cheese.


Bake 30-45 minutes at 350°.  Cover with aluminum foil first 30 minutes and uncover last 15 minutes of baking.

If freezing lasagna: Freeze before baking.  When ready to use, thaw and bake approximately 15-20 minutes longer than if baking freshly made lasagna.


Homemade ricotta!

Ricotta mixture ready for the lasagna

Homemade bolognese

Ready to assemble!


Ready for the oven!

Dutch oven bread


Thursday, December 9, 2021

Winter Sweet Citrus Salad with Pomegranate & Pistachios

Last Christmas we decided to have our own small Christmas dinner at home. Our menu consisted of homemade spaghetti with shrimp, homemade rolls from my mom and a winter citrus salad recipe I found online. I originally got this salad idea from an Instagram post I saw from an Italian lady that I follow. I could not find a recipe on her website for the photo she posted so I started searching and found the one below, which looks pretty similar, and then I made some changes to it to try to make it more like the one I found on Instagram.

I'm not much of a salad person, but this salad looked irresistible so I tried it out and it was so good! I had never cut pomegranates before so I had to look up videos online on how to do it.

I added mozzarella on top of mine and omitted the red onion. Instead of mixed greens I used arugula, and instead of blood oranges I used Cara Cara oranges (my favorite!). This salad was so good and I enjoyed making it for several days after Christmas until I ran out of ingredients!


Winter Sweet Citrus Salad with Pomegranate & Pistachios

Recipes courtesy Home and Plate Blog


Celebrate Valentine's Day with a colorful arrangement of citrus on a bed of greens. Serve this Winter Sweet Citrus Salad with Pomegranate & Pistachios.


1 ruby red grapefruit

1 navel orange

2 blood oranges

1 sliced red onion

Mixed greens

1 tablespoon pomegranate arils

1 tablespoon pistachios

2 tablespoons champagne or white wine vinegar

2 tablespoons honey

¼ cup olive oil

Salt and pepper


To make the dressing mix together the honey, olive oil, vinegar, salt and pepper and whisk or shake well to incorporate the honey. (Warming in the microwave for 10 seconds helps to thin the honey.)


Peel the citrus, being sure to cut away the bitter white pith. Using a serrated knife, slice the citrus into thin rounds. Arrange two plates with mixed greens, placing the citrus and red onion on top. Sprinkle with pistachios and pomegranate arils. Drizzle the salad with the dressing and serve.


Inspiration


My Creation


Wednesday, December 8, 2021

Pizzelles

Growing up my sister Paula and I always made Pizzelles around Christmas time. Last year I thought about buying a Pizzelle maker but it was close to Christmas and I had already baked a lot of cookies so I didn't end up buying one, but a few weeks ago I had the idea again and started searching for a Pizzelle maker online. I wanted something with a traditional finish (not nonstick) like the one my mom has, and this CucinaPro one on Amazon had good reviews so I went for it. It's a pretty small appliance so it won't take up much storage room which I like.

A few days after receiving it, I made a recipe of batter from the included booklet to try it out. I don't like the licorice taste of Anise flavoring that a lot of people put in their Pizzelles, so I kept mine simple by just using vanilla extract. I had not made these since I was younger but it's very easy to do (and even easier when you're not making a ton of recipes at one time like we used to!). One recipe made 18 Pizzelles which was a good amount for my small family. My kids, husband and I ate a few after I made them and then I stored the rest in an airtight container and we ate them throughout the week. Sometimes we put Nutella on them, too.

You can get creative with these - when they first come off the Pizzelle maker they are soft, so you can quickly shape them into various things right after you take them off (cone, cannoli, bowl, etc.) before they harden. You can put custard or whipped cream in them and top with fruit, or ricotta cannoli filling. For my initial time making them, I just let mine cool flat on a cooling rack but I hope to try them in a cannoli shape soon. You can also get creative with the flavor by using whatever extracts you like. I think lemon or almond would taste delicious!

All of the recipes, instructions and tips below are taken directly from the CucinaPro Pizzelle Baker Manual


Pizzelles

Recipes courtesy CucinaPro Pizzelle Baker Manual


PIZZELLES

3 large eggs

¾ cup sugar

2 teaspoons vanilla extract

1 stick (½ cup) butter/margarine, melted and cooled

½ teaspoon anise seed (optional)

1¾ cups all-purpose flour

2 teaspoons baking powder


Melt butter and set aside. Beat eggs and sugar until light yellow, 2-3 minutes. Add melted butter and vanilla. Beat until blended. Sift together 1 cup of the flour and the baking powder, then combine with wet ingredients. Fold together until just blended, add remaining flour and fold again until just incorporated.


Heat pizzelle iron, place about 1 heaping tablespoon of batter on the center of the pattern. Bake until golden brown, about 40-50 seconds. Remove and cool on a rack. Repeat with remaining batter.


CITRUS PIZZELLES

Omit the vanilla and anise flavorings. Add 1 teaspoon finely grated lemon/orange/lime zest or flavorings or oils.


CHOCOLATE PIZZELLES

Using the first recipe in this book, omit the vanilla and anise flavors; add 3 tablespoons cocoa and 3 tablespoons sugar. Bake the same way in your iron.


ALMOND PIZZELLES

Using the first recipe in this book, omit the vanilla and anise flavors; add 1 tablespoon almond extract or 2 tablespoons Amaretto. Add one cup of finely chopped/ground almonds to the batter. Bake as usual in your iron.


SOUTHERN ITALIAN PIZZELLES

These tend to be thicker and heavier than a regular pizzelle.


6 large eggs

2 cups sugar

2 sticks (1 cup) butter/margarine, melted and cooled

2 teaspoons vanilla extract

7 cups all-purpose flour

1 teaspoon anise seed (optional)

4 Tablespoons baking powder


Beat eggs and sugar, add cooled melted butter, vanilla and anise seed. Sift flour and baking powder and add to egg mixture. Batter will have a dough like consistency. Bake the same way in your iron.


PIZZELLE BAKER INSTRUCTIONS


For best result, follow instructions. Note that when your Pizzelle Baker is new, you may notice slight smoking or odor. This is normal with many heating appliances and will not recur. This does not affect the safety of your appliance. Also, it is recommended that you discard the first two pizzelles from your baker.


Plug into a wall outlet. The indicator light will begin to glow, indicating that the baker has begun preheating. It will take approximately 5 to 8 minutes to reach baking temperature. When the proper baking temperature has been reached, the indicator light will turn off. At this point, you will see the light going on and off. This only means that the baker is maintaining the proper baking temperature, and NOT when to start or stop baking.


Before baking the first pizzelle of the day, use a pastry brush to carefully coat the entire surface of both halves of the Pizzelle Baker with vegetable oil or melted shortening. Spray shortening works very well for this purpose as well. Repeat this only at the start of each day that you bake pizzelles.


Place about 1 heaping tablespoon of batter on each grid pattern. You may want to use 2 spoons to place the batter on the grid, using the second spoon to push the batter off of the first spoon. With some experimentation, you will learn that by placing the batter slightly behind the center of the pattern your pizzelles will come out closer to a round shape because as you close the baker, the batter squeezes forward slightly.


Close the baker and clamp the handles together with the handle clamp. Baking will take approximately 50 seconds depending on your preference for browning, or the consistency of the batter.


Remove the pizzelles from the grid with a spatula. If a flat pizzelle is desired, place it on a cake rack to cool. If you wish to shape your pizzelle, do so by removing one pizzelle from the grid and shaping it immediately while it is still warm. For a cone shape, use a wooden cone roller. The other pizzelle will remain warm and pliable until you are ready to remove it for shaping.


If you need to take a short break, close the baker to maintain the heat. When you return to baking, you will notice that the first two pizzelles will bake much faster because extra heat has been allowed to buildup.


When you are through baking, simply unplug the power cord from the wall outlet to turn the baker off and leave the baker open to allow it to cool. After it has cooled, brush any crumbs from the grooves and wipe off the grids with a dry paper towel to absorb any excess margarine or shortening.


PIZZELLE TIPS


When you shape warm pizzelles, it is always easier to use an oven mitt. They are warmer than you think.


You can shape your warm pizzelles over a custard dish to make small bowls. Once they have cooled, you can melt some chocolate bits, coat the inside of them then serve ice cream, custard, or fruit.


You can form them into cones, once they are cooled put either a miniature marshmallow or snip a quarter of a large marshmallow in the bottom of the cone. Now you can use it for a small ice cream cone or fill it with custard and fruit.


You can use them to make ice cream sandwiches, or smooth a thin layer of jelly on one and cap it with another. Then when you pour a mug of coffee, place one of these on top of the mug and it will warm it nicely to nibble on while you enjoy your coffee.


You can roll them over a wooden spoon making “taco shell” shapes. Then have dishes out with whip cream, custard, fruits and other toppings so that people can make their own decadent little treats at showers.


My own favorite shower dish is to make chocolate pizzelle cones and let them cool. Melt some chocolate bits and dip the large open end so that it has a chocolate “lip”. You can also use the marshmallow bit in the bottom of the cone to prevent things squirting out of the bottom and put a bit of chocolate over that. Take berries (favorites seem to be raspberries and strawberries) and clean them. Cool Whip will stand up better if there will be some time between the making and eating, pipe this into the cones and then finish it off by sticking one berry right in the end of the cone. Refrigerate until serving.


Not bad for my first time making Pizzelles since I was a kid

Nutella on a pizzelle

Anthony approves!

Thursday, August 5, 2021

Reese's Chewy Chocolate Cookies with Peanut Butter Chips

Last weekend my husband and I hosted a party for my cousins and their spouses, which we usually have at Christmastime, but for the first time this past year we could not have it. The dessert for our Christmas party is always homemade cookies, so we kept that tradition for our summer version of the party. A few people brought various kinds of cookies, and my sister Caterina made these delicious Reese's Chewy Chocolate Cookies with Peanut Butter Chips. I had never made these before but decided to try them out today to bring on our upcoming beach vacation. My grandma always made tons of cookies to take on vacation, and the past few years I haven't had the time to make any, but that's a tradition I want to keep going so this year I made sure to set some time aside to bake before our trip.

I used Crisco instead of butter but otherwise followed the recipe. This cookie recipe is on the back of the Reese's Peanut Butter Chips bag, but that recipe is half of the amount of ingredients compared to the recipe that I found online, except that they both call for the same amount of peanut butter chips. So if you like a ton of peanut butter chips in your cookies, use two bags for the recipe below. I found one bag to be sufficient. I used a small cookie scoop and got 79 cookies out of this recipe.

I also recently purchased a KitchenAid Silicone Mixer Spatula that I used for the first time today, and I love it! It is the Aqua Sky color, which matches my mixer, but more importantly it is made specifically for use with the mixer bowl and scrapes batter from it so well. If you use a KitchenAid stand mixer often, I highly recommend this spatula. It would also make an excellent gift for the bakers in your life!

This recipe is very easy to make and doesn't take much time either. My husband and toddler taste-testers approved, and I'm sure your family and friends will too!


REESE'S Chewy Chocolate Cookies with Peanut Butter Chips


All the peanut butter chocolate bliss you can imagine made into an unbelievable cookie! Get your mixing bowl ready and stir together REESE’S peanut butter chips and HERSHEY’S cocoa for your new go-to cookie recipe. Eat these chewy chocolate peanut butter chip cookies straight out of the cookie tin or add a scoop of ice cream to the center of two cookies for an ice cream sandwich. Bake REESE’S chewy cookies for a special event or whenever you need a sweet dessert. You can’t go wrong with peanut butter and chocolate, right?


2 cups all-purpose flour

¾ cup HERSHEY’S Cocoa

1 teaspoon baking soda

½ teaspoon salt

1¼ cups butter or margarine (2½ sticks), softened or Crisco

2 cups sugar

2 eggs

2 teaspoons vanilla extract

1 2/3 cups REESE’S Peanut Butter Chips (10-oz. package)


Heat oven to 350°F. Stir together flour, cocoa, baking soda and salt; set aside.


Beat butter (or Crisco) and sugar in large bowl with mixer until fluffy. Add eggs and vanilla; beat well. Gradually add flour mixture, beating well. Stir in peanut butter chips. Drop by rounded teaspoons onto ungreased cookie sheet.


Bake 8 to 9 minutes. (Do NOT over bake; cookies will be soft. They will puff while baking and flatten while cooling). Cool slightly; remove from cookie sheet to wire rack. Cool completely.


Makes about 54 cookies.


Pan Recipe: Spread batter in greased 15½ x 10½ x 1-inch jelly-roll pan. Bake at 350°F for 20 minutes or until set. Cool completely in pan on wire rack; cut into bars. Makes about 4 dozen bars.


Ice Cream Sandwiches: Prepare "Chewy Chocolate Cookies" as directed; cool. Press small scoop of vanilla ice cream between flat sides of cookies. Wrap and freeze.


Waiting on cookies to cool off so he can taste them!


Wednesday, July 21, 2021

Mascarpone Cream Filling

Several years ago I posted a recipe for a Maryann Cake with Mascarpone and Berries. It is one of my favorite desserts. I am re-posting the recipe just for the Mascarpone Cream Filling because it can be used with other types of cake - pound cake, shortcake, with fruit and no cake, or even just eaten by the spoonful - it's that delicious! It tastes so good with summer fruit like berries and would even be good with cut up peaches. I absolutely love mascarpone (even just plain) so this cream filling always hits the spot for me. 

I used my hand mixer with the wire whisk attachment to whip the heavy cream, and used a mini spatula to mix everything else together. I just bought new spatulas and I love them - they are Tovolo Flex-Core All Silicone Spatulas and Spoonulas. I found these while looking for a jar spatula after my OXO one disappeared, but I didn't like how the new OXO ones are made. I love that these spatulas are all one piece and are a dark color (I got them in blue) so they won't get stained like some of my white ones have. I ended up buying all of them except for the deep spoon, which I'll probably get as well. I'll mostly be using these for baking, but they can be used for cooking too and will be perfect for using in my Le Creuset enameled cast iron pieces.


Mascarpone Cream Filling
Recipe courtesy Williams-Sonoma

Mascarpone is a soft fresh Italian cheese made from cream, with a texture reminiscent of sour cream. Delicate in flavor, this rich cheese pairs deliciously with fresh fruit.


FRUIT TOPPING:
2 cups mixed berries, such as blueberries, raspberries and sliced strawberries
2 Tablespoons granulated sugar

FILLING:
½ cup chilled heavy cream, beaten to soft peaks
6 ounces mascarpone cheese, at room temperature
1/3 cup sour cream, at room temperature
¼ teaspoon vanilla extract
2 Tablespoons granulated sugar
Confectioners’ sugar for dusting (optional)


Prepare the fruit topping: In a nonreactive bowl, combine the berries and 2 tablespoons of the granulated sugar and stir until well blended. Set aside.

Beat the heavy cream to soft peaks.

In a small bowl, using a rubber spatula, gently combine the mascarpone, sour cream, vanilla and 2 tablespoons granulated sugar. Fold in the whipped cream.

Serve the mascarpone mixture on top of pound cake or short cake. Arrange the berries on top of the mascarpone mixture.

Serves 12 to 16.

Whipped Heavy Cream

Finished Mascarpone Filling

Fruit Topping

On top of pound cake


Saturday, July 17, 2021

Original NESTLÉ® TOLL HOUSE® Chocolate Chip Cookies

I don't know why I haven't posted this classic chocolate chip cookie recipe before - it's the only chocolate chip cookie recipe I've ever made. It's super simple and delicious. I sometimes add walnuts and sometimes don't, depending on whether I have any at the time or not and who I am baking for since some people don't like nuts in their cookies. I use Crisco in place of butter, but otherwise don't change anything else.

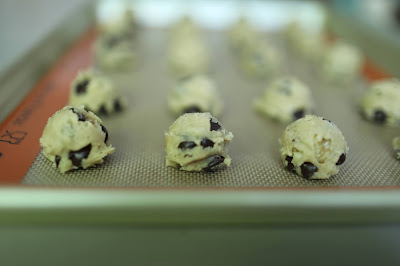
I had been using parchment paper when baking cookies, but I just bought some Silpat half sheet baking mats on sale and this was my first time using them. I used a medium size OXO cookie scoop to drop the cookies on the cookie sheets, and got 38 cookies out of one recipe using that size - they were a bit bigger than I had anticipated. A few weeks later I used a small cookie scoop to make another recipe of these with walnuts, and got 74 cookies out of that recipe - those were a bit smaller than I had wanted. Next time I will have to go with overfilling a small cookie scoop to get the perfect size!

This is a great recipe to make with kids - my boys loved watching the batter come together (gotta love those glass mixing bowls) and tasting the results!


Original NESTLÉ® TOLL HOUSE® Chocolate Chip Cookies


The chocolate chip cookie that started it all! NESTLÉ® TOLL HOUSE® original chocolate chip cookies are a true classic and the go-to cookie for all occasions!


2¼ cups all-purpose flour

1 teaspoon baking soda

1 teaspoon salt

1 cup (2 sticks) butter, softened or shortening

¾ cup granulated sugar

¾ cup packed brown sugar

1 teaspoon vanilla extract

2 large eggs

2 cups (12-ounce package) NESTLÉ® TOLL HOUSE® Semi-Sweet Chocolate Morsel

1 cup chopped nuts (Optional – if omitting, add 1 to 2 Tablespoons of all-purpose flour)


Preheat oven to 375°.


Combine flour, baking soda and salt in small bowl. Beat butter, granulated sugar, brown sugar and vanilla extract in large mixer bowl until creamy. Add eggs, one at a time, beating well after each addition. Gradually beat in flour mixture. Stir in morsels and nuts. Drop by rounded tablespoon onto ungreased baking sheets.


Bake for 9 to 11 minutes or until golden brown. Cool on baking sheets for 2 minutes; remove to wire racks to cool completely.


Yield: 5 dozen cookies.


Waiting on cookies...


A few photos of a recipe made with walnuts: