Saturday, December 19, 2020

Ranger Cookies

It's almost Christmas which means there is lots of cookie baking going on in my house. This year I finally tried out a recipe that some of my aunts, cousins and other family members have made for years. These Ranger cookies are so soft and good - they have coconut, oatmeal, Wheaties and chocolate chips. I made one recipe using softened butter, and wanted to use up more of the ingredients so I made a second recipe using Crisco. Both came out delicious but were a bit different - the ones with butter were more spread out and flat and the ones with Crisco were more round (kept their shape more). You can use whatever you have on hand. I personally like baking with Crisco in certain types of cookies (chocolate chip, for example). I used a medium cookie scoop to portion out the dough so all of my cookies would be about the same size. This is an easy and delicious cookie recipe that you should definitely try!


Ranger Cookies


1 cup margarine or butter, softened or Crisco

1 cup brown sugar

1 cup white sugar

2 eggs

2 cups flour

1 teaspoon salt

1 teaspoon baking soda

2 cups coconut

2 cups oatmeal

2 cups Wheaties

1 cup chocolate chips or raisins (optional)


Preheat oven to 375°.


Mix together the margarine and sugars until creamy, then add the eggs. Add the flour, salt and baking soda – mix until everything is well incorporated. Add the coconut, oatmeal and Wheaties. Stir chocolate chips in last.


Drop by rounded tablespoon onto greased cookie sheet. Bake at 375° for 10 minutes.


Yield: Approximately 4 dozen cookies.


NOTE: Do not double the recipe or it does not come out right!

Using butter or margarine will make the cookies come out more flat and spread out. Using Crisco will make them more round in shape. Both taste delicious!


Sunday, October 25, 2020

Chicken Italian

Chicken Italian is one of my favorite family meals. My mom and aunts made it for special occasions when I was younger - graduation parties, baptism, first communion and confirmation parties, prom dinners, etc. It takes a while to prepare and is so delicious. It is one of those dishes that brings back a lot of memories every time I eat it and I've always considered it a special meal.

I wanted to prepare a meal for my aunt and her family and this came to mind. I had not made this in so long that I had trouble figuring out how much of each ingredient I would need to fill a 9x13 and two 8x8 pans with chicken tenderloins (I used tenderloins instead of cutting chicken breasts into nuggets). I used a little more of the broth/wine mixture than the recipe calls for because I wanted to use the whole can of broth, and I also like extra juice to spoon over the chicken when serving it. To refresh my memory in the future, below is what I used, which would also fill two 9x13 pans.

  • 3 sections of a pack of fresh boneless skinless chicken tenderloins from Costco (32 tenderloins, approx. 3 lbs.) *these packs come with 6 sections. I froze the other 3 sections to use later on.
  • 4 eggs
  • Giant brand plain bread crumbs
  • 24-ounce container of whole white mushrooms from Costco (16 ounces would have been OK, but I wanted to use the whole container from Costco)
  • 14.5-ounce can chicken broth (approx. 2 cups)
  • 16-ounce bottle white cooking wine (approx. 2 cups)
  • Muenster cheese slices from Costco
Yesterday I cleaned the chicken and marinated it overnight in the eggs. This morning I cleaned and sliced the mushrooms. Today while my kids were napping I sautéed the mushrooms and breaded the chicken and fried it. I laid everything out into pans, divided the mushrooms between them and poured the broth/wine mixture over everything. I left one 8x8 pan out for tonight's dinner and wrapped the other two pans in plastic wrap and foil and froze them - those will be cooked next week. The Muenster cheese slices go on towards the end of baking, but that is the only thing left to add.

This is a great meal to make ahead of time for parties or if you want to make a meal for someone else, or even just to have an easy dinner of your own. All you have to do is thaw it, bake it, and add the cheese. I like to serve this with plain spaghetti and sautéed spinach, but any sides you like will work well.


Chicken Italian


This is a great recipe for dinner parties, graduations parties.  Everything can be done in advance, frozen and baked before serving.  Add cheese when baking – do not freeze with the cheese.


8 chicken breasts, skinned, deboned and cut into bite-size pieces

4 eggs

Fine bread crumbs

Olive Oil or Canola Oil

Pint of fresh mushrooms

3/4 cup chicken broth (homemade or canned)

3/4 cup white wine

Muenster cheese


Skin, debone, and cut chicken breasts into bite-size pieces. Marinate over night in 4 beaten eggs.


Next day, roll chicken pieces in fine bread crumbs. Fry in oil to a light brown.  Place chicken in a single layer in a 9” x 13” casserole.  Sauté fresh sliced mushrooms in oil or butter.  Place mushrooms over chicken.


Combine chicken broth and white wine. Pour over chicken and mushrooms. Top with sliced Muenster Cheese.  Cheese can be added 10 minutes before you remove it from the oven.  This method prevents cheese from getting too brown and crusty.


Bake at 350º uncovered for 30 minutes.


Can be prepared a day in advance and refrigerated. Remove from refrigerator and bake as indicated above.


FREEZING:

Complete above steps, except for baking.  Freeze, thaw, bake, serve.


Can be frozen after the chicken has been browned. Freeze chicken in layers separated by plastic wrap.  Complete remaining steps when you are prepared to serve. 


Saturday, October 24, 2020

Giada's Nonna's Lemon Almond Ricotta Muffins

My sister Maria shares some great muffin recipes with me, and this Lemon Almond Ricotta Muffin one is no exception. I actually had saved this recipe myself before she told me that she makes them, but I hadn't tried them until recently. I love almond and lemon flavored baked goods, so I think these are amazing. I always keep a few fresh muffins out and individually wrap and freeze most of them to enjoy other days. Give them a try!


Nonna's Lemon Almond Ricotta Muffins

Recipe courtesy Giada de Laurentiis


These muffins are perfectly light and fluffy, with subtle flavors from almond and lemon. They make the house smell amazing, and it’s such a great bite with morning coffee.


2 cups all-purpose flour

½ teaspoon baking powder

½ teaspoon baking soda

½ teaspoon salt

1 cup plus 1 teaspoon sugar or more as needed for sprinkling

½ cup (1 stick) unsalted butter, room temperature

1 Tablespoon finely grated lemon zest (from 2 lemons)

1 cup whole-milk ricotta cheese

1 large egg

1 Tablespoon fresh lemon juice

½ teaspoon almond extract

1/3 cup thinly sliced almonds


Line 12 muffin cups with paper liners. Preheat the oven to 350°. 


Whisk the flour, baking powder, baking soda, and salt in a medium bowl to blend. Using an electric mixer, beat 1 cup sugar, butter, and lemon zest in a large bowl until light and fluffy. Beat in the ricotta. Beat in the egg, lemon juice, and almond extract. Add the dry ingredients and stir just until blended (the batter will be thick and fluffy). 


Divide the batter among the prepared muffin cups. Sprinkle the almonds and then the remaining 1 teaspoon of sugar over the muffins. Bake until the muffins just become pale golden on top, about 20 minutes.


Cool slightly. Serve warm or at room temperature.


Yield: 12 muffins.


Monday, July 6, 2020

Homemade Drop Biscuits

My sister Maria recently sent me a recipe for Homemade Drop Biscuits. These are very easy to make, especially because you use melted butter instead of cutting cold butter into the flour mixture, and since they're drop biscuits there is no need to roll out the dough and use a biscuit cutter. I use a large cookie scoop which makes it very fast and easy! I also found that these biscuits still taste great a day or two or even three days later. They don't dry out like most biscuit recipes I've tried. These are delicious, and I will definitely be making them a lot more often!

Edit February 2022: I make these biscuits all the time - sometimes I make them in a cast iron skillet or even a heart-shaped pie dish as seen below. They may need to bake for a few extra minutes but they come apart easily and taste even better this way!


Homemade Drop Biscuits
Recipe courtesy “Finding Zest” Blog

2 cups all-purpose flour
1 Tablespoon baking powder
1 to 3 Tablespoons sugar (depending upon how sweet you like them)
¼ teaspoon salt
½ cup butter, melted
1 cup milk (whole milk preferred)

Heat oven to 450°. Mix together flour, baking powder, sugar and salt.

Let melted butter cool a bit, then add melted butter and milk to dry mixture. Stir just until moistened.

Immediately drop by heaping tablespoons (15 biscuits) onto lightly greased or parchment paper/silicone baking sheet lined large cookie sheet.

Cook for 10 to 12 minutes or until edges turn golden brown.


Yield: 15 biscuits.


Monday, May 4, 2020

Skillet Chocolate Chip Cookie

I recently ordered a 12" Le Creuset Cast Iron Skillet that finally came in today. I've been pretty excited to receive it and had in mind the perfect food to try in it first - I've never made a skillet cookie, pizza cookie, pizookie, or whatever you want to call it - it's just a giant cookie made in a skillet! This morning I received an email that my skillet was on the FedEx truck for delivery, so I searched specifically for a 12" skillet cookie recipe (most of them were for 8" or 10" skillets and I didn't want to have to adjust the recipe). I quickly found one that looked promising and had great reviews, so I took 2 sticks of butter out to soften and patiently waited for the skillet to arrive.

Just after lunch time, FedEx pulled up and delivered my package. After my kids went down for their naps, I checked the butter and it was softened enough to get started. This recipe is very simple to make. Waiting for the butter to soften is the hardest part!

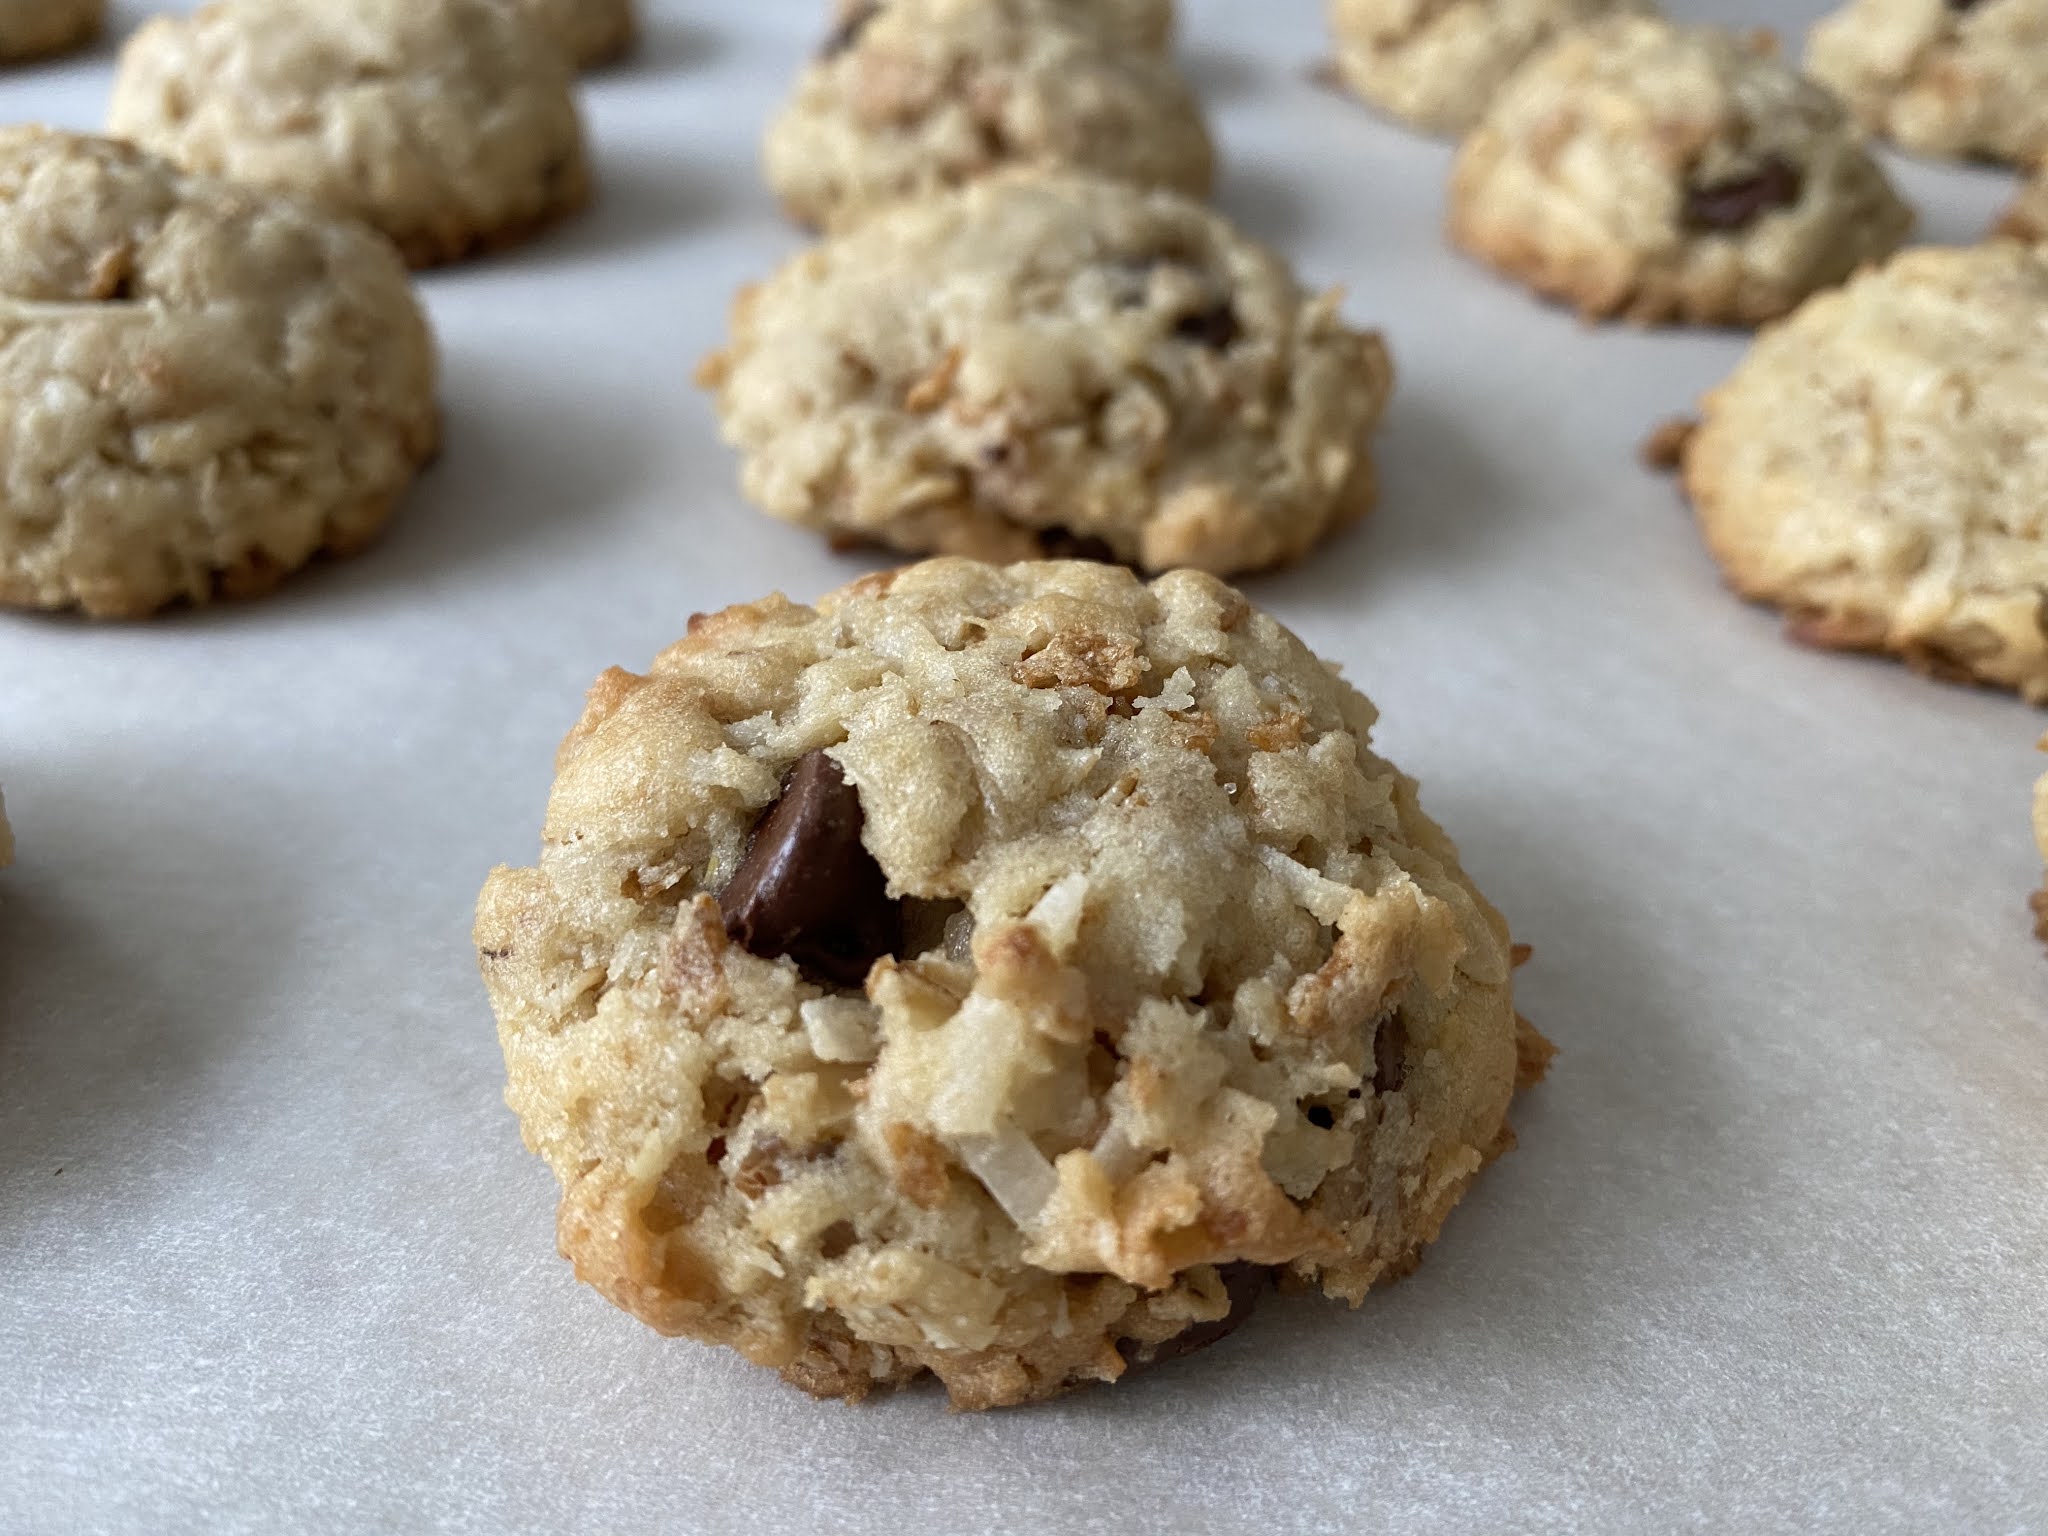
Although adding coarse sea salt on top is optional, I highly recommend doing it. It just adds a nice little touch that you can taste in every bite. This is a fun dessert that can be customized however you like - I would have added chopped walnuts if my kids weren't eating it. Crushed potato chips is another great idea of something to add in to make it salty and sweet. You can use chocolate chunks instead of chocolate chips, or different flavored chips altogether.

I baked this while my twin toddlers were napping and it was cooled down just enough to give them each a slice once they woke up. The reviews were in - one of them said it was "delicious" and "yummy" (while rubbing his belly, which I've never even seen him do before!) and the other was too busy eating to comment, but was asking for more before he was even finished!

A lot of people seem to top these with ice cream while it's still warm and dig in with a spoon. Messy isn't my style and a 12" cookie is also huge for the small amount of people currently in our house, so instead I used a nylon spatula to cut the cookie like a pizza. I actually froze two "quarters" of it separately, since I didn't want to be eating too much of it or have it go to waste. I left one quarter out for us to enjoy tomorrow!

This would be perfect for making when you have a small crowd over, but it's just as great to enjoy with the family on any day of the week. Give this recipe a try, you won't regret it!


The Ultimate Skillet Chocolate Chip Cookie
Recipe courtesy “Just A Taste” Blog

3 cups all-purpose flour
½ teaspoon kosher salt
1 Tablespoon baking powder
1 cup (2 sticks) unsalted butter, at room temperature
1¼ cups sugar
½ cup packed light brown sugar
3 large eggs, at room temperature
2 teaspoons vanilla extract
2 cups semisweet chocolate chips or chunks
1 cup crunchy mix-in, such as chopped walnuts, crushed potato chips or pretzels (optional)
1 teaspoon flaky or coarse sea salt (optional)

Preheat the oven to 350°F and grease a 12-inch cast iron skillet with butter or Crisco.

In a medium mixing bowl, whisk together the flour, salt, and baking powder. Set the bowl aside. 

In a stand mixer fitted with the paddle attachment, cream together 1 cup (2 sticks) unsalted butter with the sugar and light brown sugar. 

Add eggs, one at a time, until mixed in; then add the vanilla extract and beat until combined. 

Add the flour mixture into the stand mixer and mix just until the dough comes together. Beat in the chocolate until combined, and nuts or any other mix-ins that you desire. 

Scrape the dough into the skillet, then sprinkle it with the sea salt. 

Bake the cookie for 30 to 35 minutes until it is barely cooked in the center, or until it is done to your likeness. 

Remove it from the oven and allow it to cool for 10 minutes before serving. Top with ice cream, if desired, and eat with a spoon directly from the skillet, or cut into wedges like a pizza and dish out individual pieces.

Serves 8.


Tuesday, April 28, 2020

Chicken Salad

I'm not much of a salad person, but eating sandwiches every day has gotten old and I need to switch things up. In my attempt to eat a little healthier I remembered that when I was pregnant with my twin boys, I made up a chicken salad recipe that I loved. I knew I had a photo of it saved on my laptop under a folder entitled "cravings" which also included pictures of steaks, hamburgers, and cheesesteaks. This salad was the only healthy thing I craved during that entire pregnancy! Luckily I wrote down what I put in the salad at the time, because it's been a long time since I've made it and my memory is terrible. I hope to make this again soon once I have all the ingredients.


Chicken Salad

1 rotisserie chicken, cut into bite-sized pieces
2 celery stalks, chopped
2 bunches of red grapes, sliced in half
2 bunches of spring onions, chopped
Handful of sliced almonds
Olive Oil
Fresh Lemon Juice
Salt & Pepper
Arugula lettuce
Shaved parmesan, romano & asiago cheese

Mix chicken, celery, grapes, spring onions and sliced almonds together, and then mix with olive oil, lemon juice, salt and pepper. When ready to eat, put the chicken salad on top of arugula lettuce and top with shaved cheese. Enjoy!


Sunday, April 26, 2020

Le Creuset Braiser Review

I just noticed this review sitting in my drafts folder from January 2017 - oops! I still love this braiser and it is great to use for making fall recipes (it is fall, isn't it?? it sure feels like it!). If you're interested in Le Creuset pieces, I have seen them sold at Home Goods before, or sometimes people sell them (both used and brand new) on Facebook Marketplace and Craigslist.

A while ago, I posted a Le Creuset Dutch Oven Review, and I now have another piece of Le Creuset to rave about. I had been wanting to buy the 3.5-Quart Braiser (also called an Everyday Pan) for a while, but since it is so expensive I waited until I had enough gift cards to cover the majority of the cost. It took a while, but at one point I finally had $230 worth of Williams-Sonoma gift cards to put towards it and couldn't wait any longer. With their generous 15% military discount, I was able to purchase the $285 braiser for only $27! The color I chose was only available online, so I went to the store to place the order and was told there was free overnight shipping - I had the box on my doorstop in less than 24 hours!

Once I started reading reviews about this braiser a few years ago, I knew I wanted it, but I couldn't decide which color to get. Our two dutch ovens are both matte navy - a color exclusive to Williams-Sonoma, and the braiser is not made in that color. As someone who likes everything to match or coordinate well and look good together, I began looking for a color that would go well with navy, since most of our kitchen items are either white or navy (and our KitchenAid mixer is a matte navy/grey color). I debated long and hard between the Matte Mineral Blue (to keep with the matte trend) or the Caribbean. After going to Aruba with my husband for our 1-year anniversary, I decided the Caribbean would be a nice reminder of how beautiful the Caribbean Ocean is, and it's also a prettier color than the matte mineral blue. As a bonus, it pairs nicely with our blue byzantine and turquoise melamine dinnerware! Turquoise is also one of my favorite colors, so even though it doesn't match everything in our kitchen, it seemed like the right choice!

My husband kept asking me why we needed another pan when we have a full set of stainless steel pots and pans, two dutch ovens, and some cast iron skillets. But I knew the braiser would be perfect for some of the foods he likes to cook - like pork, chicken, and fish. It is also very different from a dutch oven, which is used to cook foods with a lot of liquid like soup, stew, chili, and sauce. A braiser is better for things like meat dishes with little liquid in them. Some people even bake in braisers but I have never done that.

I was told the 3.5-quart size is good for 2-4 people, while the larger 5-quart size is good for 6-8 people. We've been using this braiser a lot the past few months - to make tacos, fajitas, pork tenderloin, leg of lamb, chicken, etc. It really is a very versatile pan!

3.5-qt. Braiser in Caribbean color

The first meal I made in the braiser - pork tenderloin and vegetables

All-Clad Stainless Steel D3 Tri-Ply Cookware Review

A few years ago I posted a review on the Calphalon Tri-Ply Stainless Steel Cookware that my husband I received as wedding gifts. Due to my extreme boredom during this Coronavirus stay-at-home order, I am going to give you an update!

I really loved this cookware, but last summer I noticed that water was getting trapped in the glass lids and that mildew was forming in there - yuck! I never would have noticed this if one of the lids on my most-used pot hadn't developed a mildew smell. It took me a while to figure out what was causing the smell, but once I saw the water moving around and mildew in the lid, I was pretty disgusted. I initially thought the issue was only with this one pan, so I brought it to Bed Bath & Beyond at the end of June since I could not get ahold of Calphalon, after attempting to several times by calling and filling out online forms. After much hassle from Bed Bath & Beyond's customer service due to their new return policy, they agreed to replace the pan for me. When I received the new pan I noticed water was still getting stuck in the lid, and then I looked at all of my other lids and noticed water moving around in every single one of them!

I was extremely disappointed because our big cookware set was gifted to us by my aunt and her daughter and daughter-in-laws for my bridal shower and the other individual pieces were wedding gifts from a few other family members and friends. I thought it would last us forever and was disappointed that after less than 4 years of marriage, there was an issue with it.

Water trapped in old lid

I contacted Calphalon again towards the end of July since they claimed to have a lifetime warranty. At first, they apologized and sent me a new set of lids for every piece of cookware I had, which was quite a few lids. In the clean new lids, it was even more apparent that water was getting trapped in them. No amount of air drying or towel drying could remove this water. It remained in the lid even after leaving them to dry overnight.


Water trapped in new lid

I contacted Calphalon again in the beginning of August, not knowing what they would do to remedy this, and to my surprise they offered to give me a full refund for my entire set of cookware. They sent me pre-paid FedEx labels and I had to mail everything back which was a small inconvenience just because of the amount of pots and pans we have and the weight of the cookware, but I was happy that I would no longer have to cook with mildew in my lids. I eventually ended up receiving the full refund, but it took a few months and SEVERAL phone calls and emails to Calphalon before they gave me all of the money that was owed to me. It was such a huge hassle to have to keep calling them, spending a lot of time on hold waiting to actually talk to someone (during my precious "free time" when my twins were napping), explaining the same thing over and over again to each new person I talked to even though everything was in their notes from the last time I had called in, and not getting anywhere with the refund for a long time. They initially only paid me less than half of what I was owed even though they told me the refund would be based on MSRP prices. No one ever contacted me to let me know why the amount was less. I had to contact them several more times to find out what was going on. I went on their website and added up the cost for everything I had shipped back to them, and determined the MSRP total, yet their own employees could not figure this out! Luckily since I knew what was owed to me and I was persistent, I eventually received the correct amount of refund. I shipped all of my cookware to Calphalon on August 8th, received the first refund on November 8th and the second on December 21st. This entire process since I first noticed the water stuck in the lids and contacted Calphalon until I received the full refund took 6 whole months! Can you imagine if I had been without any cookware for all of that time? Needless to say, after this experience with their customer service and lack of follow-up on their part, I will never purchase another Calphalon product again for myself or anyone else.

Since I sent back all of my cookware I set out on a search for a new set and ended up deciding to go with a highly rated well-known classic, All-Clad Stainless Steel D3 Tri-Ply. This was the other set that I was originally trying to decide between before I registered for the Calphalon set. Ironically, I chose the Calphalon set over the All-Clad because I wanted glass lids - what a mistake! The reality is that once the lids steam up you can't see well in them anyway. All-Clad is more expensive, but I was able to purchase everything on sale which helped me justify the upgrade. Although these two cookware sets are pretty similar, I can definitely tell a difference after cooking in both of them. The All-Clad is a nicer set all around. It cooks better and cleans up easier. If you are looking for a new set of cookware to purchase or register for, I definitely recommend going with All-Clad D3 Tri-Ply. Since their lids are stainless steel, you won't have to worry about water getting trapped in them!

Below are the All-Clad pieces that I purchased. I spent some additional money beyond the Calphalon refund for these. I wanted to get everything I thought I would need in the coming years. I looked for the best deals and purchased these online from different places, including Macy's and Bloomingdale's (they go on sale for 30% off on both of these websites plus they came with additional free pieces!), Williams-Sonoma (one of the pans was an exclusive there and I had a 25% off coupon), and the Navy Exchange website (lower prices and tax-free for military).

The big set that I purchased is the All-Clad D3 Stainless Steel 10-Piece Cookware Set. There are a few different sets that you can choose from but this one had pieces that I knew I would use. I decided to purchase the other pieces I wanted separately, rather than buying a set with more pieces that I didn't need. This is a great starter set that includes:

  • 8" fry pan
  • 10" fry pan
  • 2-qt. covered saucepan
  • 3-qt. covered saucepan
  • 3-qt. covered sauté pan
  • 8-qt. covered stockpot

10-piece Cookware Set

Some websites sell a very similar set with a different 3-qt. pan - they call it a "casserole pan" or "soup pot" instead of a sauce pan which just means it has two small loop handles instead of the long stick handle. I personally preferred the sauce pan in this particular size. With the purchase of the 10-piece set, I also received a "free gift" of an All-Clad Stainless Steel 15" Oval Baker and Pot Holder Set. I have yet to use this, but I'm sure it will come in handy one day. Due to a mix up with my order, I actually received two of these oval bakers and was told by Macy's to keep them both, so I ended up giving one to my sister Paula, who is my only sibling with the same All-Clad set that I have.

Oval Baker & Pot Holder Set

In addition this this great set, I purchased some individual pots and pans to go with it, based on what I knew I would use.

I also purchased the 1.5-qt. Covered Saucepan for a great price from the Navy Exchange website so I would have an additional small saucepan. It's the perfect size to heat up a serving of food, a bowl of soup, etc. I'm glad I found this for a great price because I use this one quite often.

1.5 quart Saucepan

Two pans that I had in my old set that I did not now have were a 12" fry pan and a Wok. I didn't use either of these super often but there were times I needed the larger size pans. In place of these two pans, I purchased a 4-qt. Covered Weeknight Pan. This is a great, large pan that can be used for lots of different dishes. I love this pan, and I don't miss the 12" fry pan or Wok at all!

4 quart Weeknight Pan

I also wanted more stock pots. The 8-qt. size that comes with the set is great, but I wanted some smaller and larger options for making pasta, sauce, soup, etc. I used my 25% off coupon to order the 4-qt. Soup Pot with Ladle, which can only be found at Williams-Sonoma. There is another 4-qt. option that is a saucepan with a long handle available at other stores, but I liked this one more, and the ladle that it comes with is a nice bonus! This is the stockpot that I use the most right now for my family of 4 (including two toddlers who don't eat much yet), as it fits a pound of pasta perfectly. I also use it to make small soup recipes.

4 quart Soup Pot with Ladle

Since there is a pretty big difference between a 4-qt. stockpot and an 8-qt. stockpot, I wanted a size in between them as well. I ordered the 6-qt. Covered Stockpot, which I originally didn't even like and was considering returning because it is more wide and shallow than I am used to for a stockpot. It turns out that I have used this stockpot more than any of the other larger sizes so far. It's perfect for cooking spaghetti, soup, pasta dishes and so many other things. I'm so glad I kept it and I highly recommend it!

6 quart Stockpot

Coming from a very large family, I knew I would need some even bigger stock pots, so I waited for the best sale I could find and after a while I also purchased the 12-qt. Covered Stockpot and the 16-qt. Stockpot with Lid. While these may not get used often, they are great to have for when I want to make a big pot of soup or sauce. These are rather expensive stockpots so I waited until they were 30% off, and I also received a "free gift" of the All-Clad Petite 14" x 11" Stainless Steel Roaster with Rack.

I had already purchased the All-Clad Large 16" x 13" Stainless Steel Roaster with Rack on clearance from the Navy Exchange website for a very low price. I previously had a similar Calphalon roaster that I returned with all of the cookware and I will say that there is a very clear difference in quality between the two, with All-Clad being far superior. Even just from picking them up I could feel the difference in quality.

12 quart Stockpot

16 quart Stockpot

Small Roaster

Large Roaster

That concludes the All-Clad pots and pans that I purchased. It was helpful that I knew what types and sizes of pots and pans I cook with most often to be able to narrow down the set and additional pieces that would be best for me. If I had registered for these pans when I was engaged, I would not have known what I would be using most. Between all of these and my collection of Le Creuset, we are set for life! However, after seeing how nice the quality of All-Clad was, I got a little out of hand and purchased a few All-Clad accessories when I found them on sale for 25% or 30% off or had a coupon or gift card.

My old set of cookware had a steamer and a double boiler, which I now no longer had since I returned them with the cookware. I initially purchased the All-Clad 3-qt. Stainless Steel Steamer with Lid, but did not like how the bottom of it was oddly shaped, so I returned it and purchased the All-Clad Stainless Steel 3-qt. Steamer Insert, which I like much more and can be used with lids I already have. All-Clad also makes a larger 8-qt. steamer but since we don't use a steamer much, I opted for the smaller size.


3 quart Steamer Insert

I also purchased the All-Clad Stainless Steel 3-Piece Mixing Bowl Set. These can be used as double boilers, but obviously have so many other uses as well. I love the handles on these and find them very helpful. I read some reviews that said they scratch easily, so I do not use my hand mixer in them - problem solved!

Mixing Bowl Set

I have a few plastic colanders already, but never registered for or purchased stainless steel ones. I found the All-Clad Stainless Steel Colanders, Set of 3 on sale and used gift cards to purchase them which brought the cost down considerably. I would not have paid anywhere near full price for these just because they are so expensive, but they are very sturdy and nice quality. This set includes a 1.5-qt, 3-qt. and 5-qt. colander, but they can all be purchased separately as well. These nest into each other for storage. After all these years, it's so nice to have a stainless steel colander set!

Colanders

The last thing that I purchased were some kitchen tools. I have a lot of OXO nylon kitchen tools which I really like and use every day, especially because they will not damage my Le Creuset pieces, but I wanted some good quality stainless steel tools that I could use in all of this new cookware. I used a coupon and gift card to purchase the All-Clad Stainless Steel Kitchen Tool Set w/Caddy from the Navy Exchange website. I also purchased the All-Clad Stainless Steel Skimmer, Pasta Ladle, Pierced Spatula/Large Slotted Turner, and Set of 2 Turkey Forks from Bloomingdale's when they were all 30% off. I purchased these extra tools along with the two largest stock pots, which helped me get the "free gift" of the small roaster. These tools are all very nice quality.

6 Piece Tool Set with Caddy

This is our whole All-Clad collection. The All-Clad pots and pans are all made in the USA, but all of the accessories are made in China. There seems to be some confusion about what is made where so I wanted to clear it up! I can tell by the excellent quality that these will last us forever, and since I purchased such a variety of pots, pans and accessories, I don't anticipate needing to add any more to our kitchen.

I also wanted to mention that cleaning this cookware is very easy. A lot of people complain that food gets stuck on stainless steel cookware and that is just not true if you cook in it correctly. It is not like using non-stick cookware if that is what you're used to. You should never cook above medium heat on stainless steel cookware (or cast iron) unless you are boiling water. You should also let the pan heat up and add oil or butter to it before adding food. To clean, simply wait for the pan to cool down and then soak it in hot water for a while, then just use a non-abrasive sponge (I use the yellow Dobie pads) and it should be easy to clean. Never put a hot pan in cold water - that will cause thermal shock and could ruin your pan. I never use steel wool on my pans. For any stubborn stains, using Bar Keeper's Friend works wonders and makes your pots and pans look as close to like-new as they will ever get!

This was a long, detailed post but I hope you found this review helpful! Since this stay-at-home order will not be lifted any time soon, I will post a review of my Le Creuset cookware soon.


Our All-Clad cookware and accessories, minus the 16-qt. stockpot, oval baker, two roasters and turkey forks

Vegetables in mixing bowl

Pasta in 4-qt. stockpot

Beef soup in 4-qt. stockpot

Chicken in 3-qt. sauté pan

Pasta in 6-qt. stockpot

Chicken soup in 12-qt. stockpot