Monday, January 31, 2022

Raspberry White Chocolate Bundt Cake

While I'm on a white chocolate raspberry kick, here is another great recipe. My sister Regina and I both found this Raspberry White Chocolate Bundt Cake recipe online but she tried it a few weeks ago and today I tried it. My raspberry layer was a little runny so I could not keep it from running to the sides, but it didn't really matter. I did not put the ganache on it this time either. It was very easy to make and it was delicious!

This is another recipe that would be perfect for Valentine's Day, breakfast, brunch, or any spring or summertime party.


Raspberry White Chocolate Bundt Cake

Recipe courtesy Alpine Ella website


Soft and fluffy bundt cake stuffed with white chocolate chips and a raspberry swirl. It's then covered in a white chocolate ganache.


RASPBERRY WHITE CHOCOLATE BUNDT CAKE:

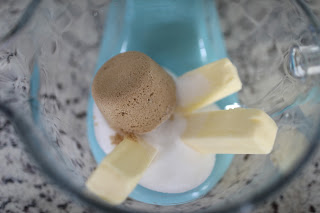
1 cup unsalted butter, room temperature

1¾ cups sugar

1 teaspoon fine sea salt

1 teaspoon vanilla extract

4 eggs, room temperature

3 cups all purpose flour

2 teaspoon baking powder

1 cup buttermilk, room temperature

½ cup raspberry jam

1 cup white chocolate chips


WHITE CHOCOLATE GANACHE:

10 ounces white chocolate, chopped

⅔ cup heavy cream

1 Tablespoon unsalted butter, room temperature


Preheat your oven to 350°F. Generously butter your bundt pan using a pastry brush and softened butter (or you could use a spray), making sure you get every bit of the pan.


In a stand mixer fitted with the paddle attachment, cream together the butter, sugar and salt for 2-3 minutes until fluffy.


Add the eggs one at a time, beating well after each one. Scrape the bowl with a rubber spatula after each one. Add the vanilla.


Whisk together the flour and baking powder. Add the dry ingredients in three additions, alternating with the buttermilk. Start and end with the dry ingredients.


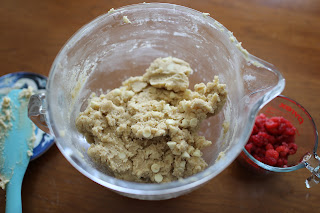
Scoop out ½ cup of batter and place it into a small bowl. Mix in the jam and whisk until smooth.


Fold in the white chocolate chips with the rest of the batter.


Pour half of your batter into the bundt pan.


Use a spoon to pour in the raspberry batter, making sure it stays in the middle of the batter and doesn't touch the sides (otherwise you'll see it on the outside of the cake once it's baked – this  way it stays more 'hidden' until you slice into it).


Pour over the rest of the batter, trying not to disturb the raspberry layer.


Bake for 45-60 minutes. If your bundt pan is a dark metal it will take about 45 minutes, but it will take 10-15 minutes longer if your pan is a light metal.


A toothpick inserted will come out with no crumbs. Let it cool for 10 minutes, then place a cooling rack on top of the pan. With your oven gloves on, flip the cake pan so now the cooling rack is on the bottom. Carefully lift your bundt pan off. Let cool completely.


Place your white chocolate in a heat proof bowl. In a small saucepan, bring your heavy cream to a simmer. Pour over your white chocolate and leave for a minute. Take a rubber spatula and slowly mix it until the white chocolate has completely melted. Add in your butter and continue stirring. You'll have to leave it until it is the consistency you want - either very pourable and like a glaze or until very thick.


NOTES:

Butter: I use European style butter, like Kerry Gold, in my recipes. This will make your finished bake much creamier and richer.


Storage: Keep your cake covered at room temperature for up to 4 days. 


Pouring Ganache: The best way to pour ganache is to pour it into a jug, and then pour on top of the cake. I like to put my cake on a stand and slowly turn the stand while pouring. 


Freezing: Slice the cake without the ganache, wrap tightly and freeze for up to 2 months. Let it thaw out in the fridge before serving.


Monday, January 24, 2022

White Chocolate and Raspberry Cookies

Last month my cousin John's fiance Emilee brought White Chocolate and Raspberry Cookies to our annual cousin's Christmas party. I was so full from all of the homemade pasta, meatballs, bread, and salad that I didn't even have any dessert (a first for me!), but these cookies looked delicious, and everyone who tried them said they were too. My sister Regina asked Emilee for the recipe and tried them a week or two ago and sent me a picture of hers, which then prompted me to buy raspberries when I saw them on sale this week and give them a try too. I should add that I don't like white chocolate unless it is paired with raspberries! It's just not my thing - I'm a dark chocolate kind of girl...but these cookies are amazing.

I used a 6-ounce package of raspberries which was exactly enough for a double recipe. I also used Ghirardelli white chocolate chips. I had a Ghirardelli white chocolate bar that I could have chopped up but I decided to save that for when I make something that needs melted white chocolate. I used a medium cookie scoop for the first tray of cookies, but thought they were a bit big. I used a small cookie scoop for the remaining trays, and they were a bit small. Next time I'll overfill the small scoop a bit.

My cookies did not look as appetizing as my sister Regina's did because my raspberries bled a little bit and left some parts of the cookies blue. Next time I will wash them further in advance and let them dry completely. I had them drying on a paper towel but they were not completely dry when I added them to the cookie dough. The cookie dough was also thick, so it was difficult to fold in the white chocolate and then "gently" fold the raspberries into it without crushing them too much. My baking helper and taste-tester Anthony approved of these cookies, and that is all that matters in my book!

These cookies would make a great dessert for Valentine's Day. They would also pair very nicely for any spring or summer gathering with the Lemon Burst Cookies that I posted a while ago (and have yet to make myself, but hope to soon). These were delicious, so give them a try!


White Chocolate and Raspberry Cookies

Recipe courtesy Cookie Dough Diaries website


These white chocolate and raspberry cookies are soft and chewy and so easy to make! They're ready in under 20 minutes, there's no chilling required, and they can be made using fresh, frozen, or freeze-dried raspberries!


¾ cup butter, softened

½ cup light brown sugar

½ cup white sugar

½ Tablespoon vanilla extract

1 egg

¾ teaspoon baking soda

2 cups + 2 Tablespoons all-purpose flour

¾ teaspoon salt

½ cup raspberries, roughly chopped (fresh, frozen, or freeze-dried)

½ cup white chocolate, chopped (or white chocolate chips)


Preheat oven to 350°F and line two baking sheets with parchment paper.


In a medium bowl, combine flour, salt, and baking soda.


In the bowl of a standing mixer with the paddle attachment or a handheld mixer, combine butter and both sugars, mixing until light and fluffy, around 2 minutes.


Add in the egg and vanilla extract, and mix until combined.


Mix in the dry ingredients (flour, salt, baking soda) until combined. Do not over-mix! Fold in the white chocolate.


Gently fold in the raspberries. (Careful not to squish them too much into the dough!)


Use a cookie scoop or your hands to form 1.5 tablespoon sized balls of dough. Place the dough onto the baking sheets, around 3-4 inches apart and bake one sheet at a time, for 8-10 minutes.


Refrigerate remaining cookie dough while the first baking sheet is in the oven. The edges will be slightly golden brown and the tops will look set, but soft.


Let the cookies cool on the baking sheet for 10 minutes, then transfer to a wire rack to cool completely.


Makes about 40 cookies.


NOTES:

WHITE CHOCOLATE: You can use white chocolate bars chopped up, or white chocolate chips. This can be regular white chocolate or dairy free white chocolate. For gooey puddles of white chocolate in your cookies, press a couple more pieces of white chocolate into each cookie before baking.


RASPBERRIES: This recipe calls for fresh raspberries, but you can also use frozen or freeze-dried raspberries. If using fresh raspberries, I don't recommend adding more than the recipe calls for, or else your dough may be too wet.


Storage and Freezing: Store the cookies in an airtight container or ziploc bag at room temperature for 3-5 days.


The baked cookies can be frozen in a freezer bag for up to 2 months. Thaw at room temperature when you're ready to eat them.


White chocolate chips

Alternative - white chocolate bar


My helper sneaking some chips!


He approves!


Friday, January 21, 2022

Imperia MilleGnochi

Earlier this month it snowed and I really wanted to make homemade pasta, so I used my Imperia pasta machine that my grandmother gave us for a wedding gift, and the Imperia MilleGnochi attachment that was another wedding gift. We've been married 6.5 years and this was my first time using either of these! This attachment makes three pasta shapes - Gnocchetti Sardi, Cavatelli and Rigatelli.

I searched online for info on this attachment and unfortunately could not find much. I used Anna 00 flour for the pasta. I made this on my new dough board that I recently purchased. It was on sale for $90 when I bought it but has gone up in price since then. This board is great and I've used it for bread dough, cookie cut outs, and pasta so far. I clipped my pasta machine to it because I didn't want to attach it to my table. It worked well but when I went to take it off afterwards, I noticed that there were black marks on the wood from where the feet of the pasta machine were. I was able to rub some of it off but not all of it, so next time I will have to be more careful of that.

This pasta was pretty easy to make. I started to mix the dough in my KitchenAid mixer with the dough hook, but it wasn't mixing well so I ended up mixing it on my dough board with my hands. The dough recipe was very vague and did not provide an amount of water that should be added, or how much salt. I ended up leaving the salt out and just added small amounts of water at a time until the dough looked right.

Once the dough was ready it took me about an hour to make the pasta. The hardest part was rolling the dough into "breadsticks" by hand, as it just did not roll well for me. Next time I may try rolling out the dough with a rolling pin and cutting it into strips instead and see if that works better. I ended up with about 1 pound 9 ounces of pasta. It was about 6 cups worth. I cooked half of it for dinner with bolognese sauce that was in my freezer and froze the other half in a ziploc bag to enjoy another night. It took a bit longer to cook than I anticipated (I'm used to cooking homemade spaghetti which only takes a few minutes to cook), but the pasta was delicious! I've only made spaghetti on my own once, but this was my first time making pasta on my own and I was very pleased with the results.


Pasta Dough for Imperia MilleGnochi Attachment 

1/2 kg (500 grams) flour

3 eggs

Water

Salt


Mix all ingredients. If the dough is too hard, add a little more water. Knead until smooth.


Form into a ball and place dough in a plastic bag or a covered bowl to rest for 30 minutes or more. Knead again. Dough should not be hard.


When the dough is ready, cut off small sections and form into long cylindrical shapes (like breadsticks). Make sure to keep the unused portion of the dough covered at all times so it does not dry out. Sprinkle the "breadsticks" well with flour and place into the appropriate hole of the MilleGnochi attachment. Turn the crank and the pasta will start to fall out of the attachment (place a bowl there to catch it!)


After forming the pasta, spread it out and flour it a little bit to prevent the pieces from sticking, then dry the pasta. Once it is dry, put it into zip lock bags to freeze until needed. They freeze very well.