Showing posts with label dough. Show all posts

Saturday, November 30, 2024

Homemade Buttery Flaky Pie Crust

This Buttery Flaky Pie Crust Recipe is super easy to make and delicious! So far I've used it for chicken pot pie, apple pie and pecan pie. This recipe makes is enough for a double crust but it can easily be cut in half to make just one crust (that's what I do when I make a pecan pie). You can also make the dough and refrigerate it in discs for up to 5 days before rolling it out, which helps around the holidays so you don't have to do everything in one day.

Making a pie always intimidates me because I'm not good at making the crust look nice, but this recipe is so simple and always tastes delicious - that's why it's my go-to pie crust recipe!

This link also has some more great tips!


Homemade Buttery Flaky Pie Crust

Recipe courtesy Sally’s Baking Addiction


This recipe is enough for a double crust pie. If you only need 1 crust for your pie, cut this recipe in half OR freeze the other half per the make ahead tip instruction below.


2½ cups all-purpose flour (spoon & leveled) plus more as needed for shaping and rolling

1 teaspoon salt

6 Tablespoons unsalted butter, chilled and cubed

2/3 cup vegetable shortening, chilled

½ cup ice water


For best results, chill all ingredients before using. Mix the flour and salt together in a large bowl and chill them.


Add the chilled and cubed butter and shortening to the chilled flour and salt mixture.


Using a pastry cutter or two forks, cut the butter and shortening into the mixture until it resembles coarse meal (pea-sized bits with a few larger bits of fat is OK). A pastry cutter makes this step very easy and quick.


Measure ½ cup of water in a cup. Add ice. Stir it around. From that, measure ½ cup water since the ice has melted a bit. Drizzle the cold water in, 1 Tablespoon at a time, and stir with a rubber spatula or wooden spoon after every Tablespoon added. Stop adding water when the dough begins to form large clumps. I always use about ½ cup of water and a little more in dry winter months (up to ¾ cup). Do not add any more water than you need.


Transfer the pie dough to a floured work surface. The dough should come together easily and should not feel overly sticky. Using floured hands, fold the dough into itself until the flour is fully incorporated into the fats. Form it into a ball. Cut dough in half. Flatten each half into 1-inch thick discs using your hands.


Wrap each tightly in plastic wrap. Refrigerate for at least 2 hours and up to 5 days.


When rolling out the chilled pie dough discs to use in your pie, always use gentle force with your rolling pin. Start from the center of the disc and work your way out in all directions, turning the dough with your hands as you go. Visible specks of butter and fat in the dough are perfectly normal and expected!


Proceed with the pie per your recipe’s instructions.


NoteS:

Make Ahead & Freezing Instructions: Prepare the pie dough through step 4 and freeze the discs for up to 3 months. Thaw overnight in the refrigerator before using in your pie recipe.

Shortening:  I use between 2/3 and 3/4 cup of cold shortening in this dough. Lately, I find 2/3 cup (which is 10 Tbsp + 2 teaspoons) works best.

Salt: Use regular table salt. If using kosher salt, use 1¼ teaspoons.

Saturday, July 3, 2021

Best Sugar Cookie Recipe

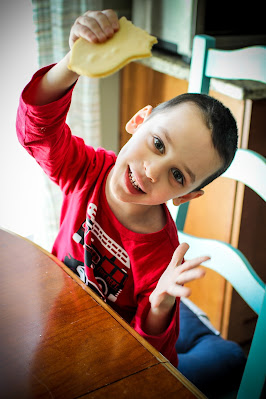
My kids love using Play-Doh, but I hate it. The smell and finding dried up bits of it everywhere afterwards just gets to me. Whenever I use it with them, I think of the other things I'd rather be doing with them with real dough like baking cut-out cookies or making homemade pretzels or pizza. I didn't have any cookie cut-outs (other than an umbrella one that was a party favor from my cousin's bridal shower) so I bought a few Ann Clark ones online. I searched on Amazon and found a few Ann Clark sets but most of the sets only had 1 or 2 I liked in them and the rest in the set I knew I would never use. I really wanted a heart, a star, some other patriotic ones, and some vehicles or other things I knew my boys would like, so I went on the Ann Clark website and ordered 14 individual ones. They were $1.99 each and $4.50 for shipping, so in my opinion not too bad for having ones I know we will use without having a bunch laying around that we won't. I ended up purchasing the Helicopter, Airplane, Firetruck, Fire Hydrant, Police Car, Police Badge, Train, Vintage Truck, Cross, Labrador Retriever, USA Map, Flag, Star and Heart. I held off on getting holiday-themed ones for now, but the Ann Clark website has tons of options if you are looking for something specific, and they're made in the USA! Just be sure to hand wash and immediately towel dry them, or even put them in the warm oven on a cookie sheet to get any remaining water off. Do not soak them even for just a few minutes - I made this mistake and they look like they have rust on them. I did not read the FAQ's on the Ann Clark website before doing this but it clearly states how to correctly clean them - oops!

Next I needed a recipe. I have never made cut-outs on my own. My sisters and I used to make them on Christmas Eve when we were growing up, but my older sisters always made the dough. I know some of them still make cut-outs with their kids so I asked my sister Maria what recipe she uses and she sent me this one. She said it doesn't make a ton but it's easy and doesn't need chilled first and they taste good, which all sounded perfect to me.

The dough was very easy to make and to work with. I use a large Silpat mat when working with dough (update March 2022: now I used a wooden dough board which I like even more) and then used an OXO Cut and Serve Nylon Turner to gently lift the cookies off the mat and place them on the cookie sheet, which I lined with parchment paper (update March 2022: now I use Silpat half sheet baking mats).

And finally, I needed something to decorate the cookies with. I'm simple so I just used red and blue sugar sprinkles, and my toddlers excitedly told me which colors to put on which cookies. I got about 30 cookies out of this recipe, but some of the cookie cutters were pretty big (update December 2021: I made these again with Christmas cookie cutters and got 46 cookies out of one recipe, but they were not as thick as the first time I made them and the cookie cutters were not as big). After dinner, my boys each picked which shape they wanted. My foodie picked the heart (the biggest cookie!) and his twin brother followed along, picking the second heart. My cookie testers approved, so we will definitely be making these again soon!

Update March 2022: I recently purchased a Cookie Rolling pin, which has made rolling out the cookie dough so much easier. It makes 1/4" thick cookies. I get about 23 cookies out of 1 recipe using this rolling pin, but they look much better since they are all the same thickness. I recommend making a double recipe! I plan on icing these plain police car and police badge cookies later, so stayed tuned for an icing recipe soon.

Update January 2026: If making a double recipe, use a larger mixer or make them one recipe at a time. My 5-quart mixer was struggling with a double recipe.

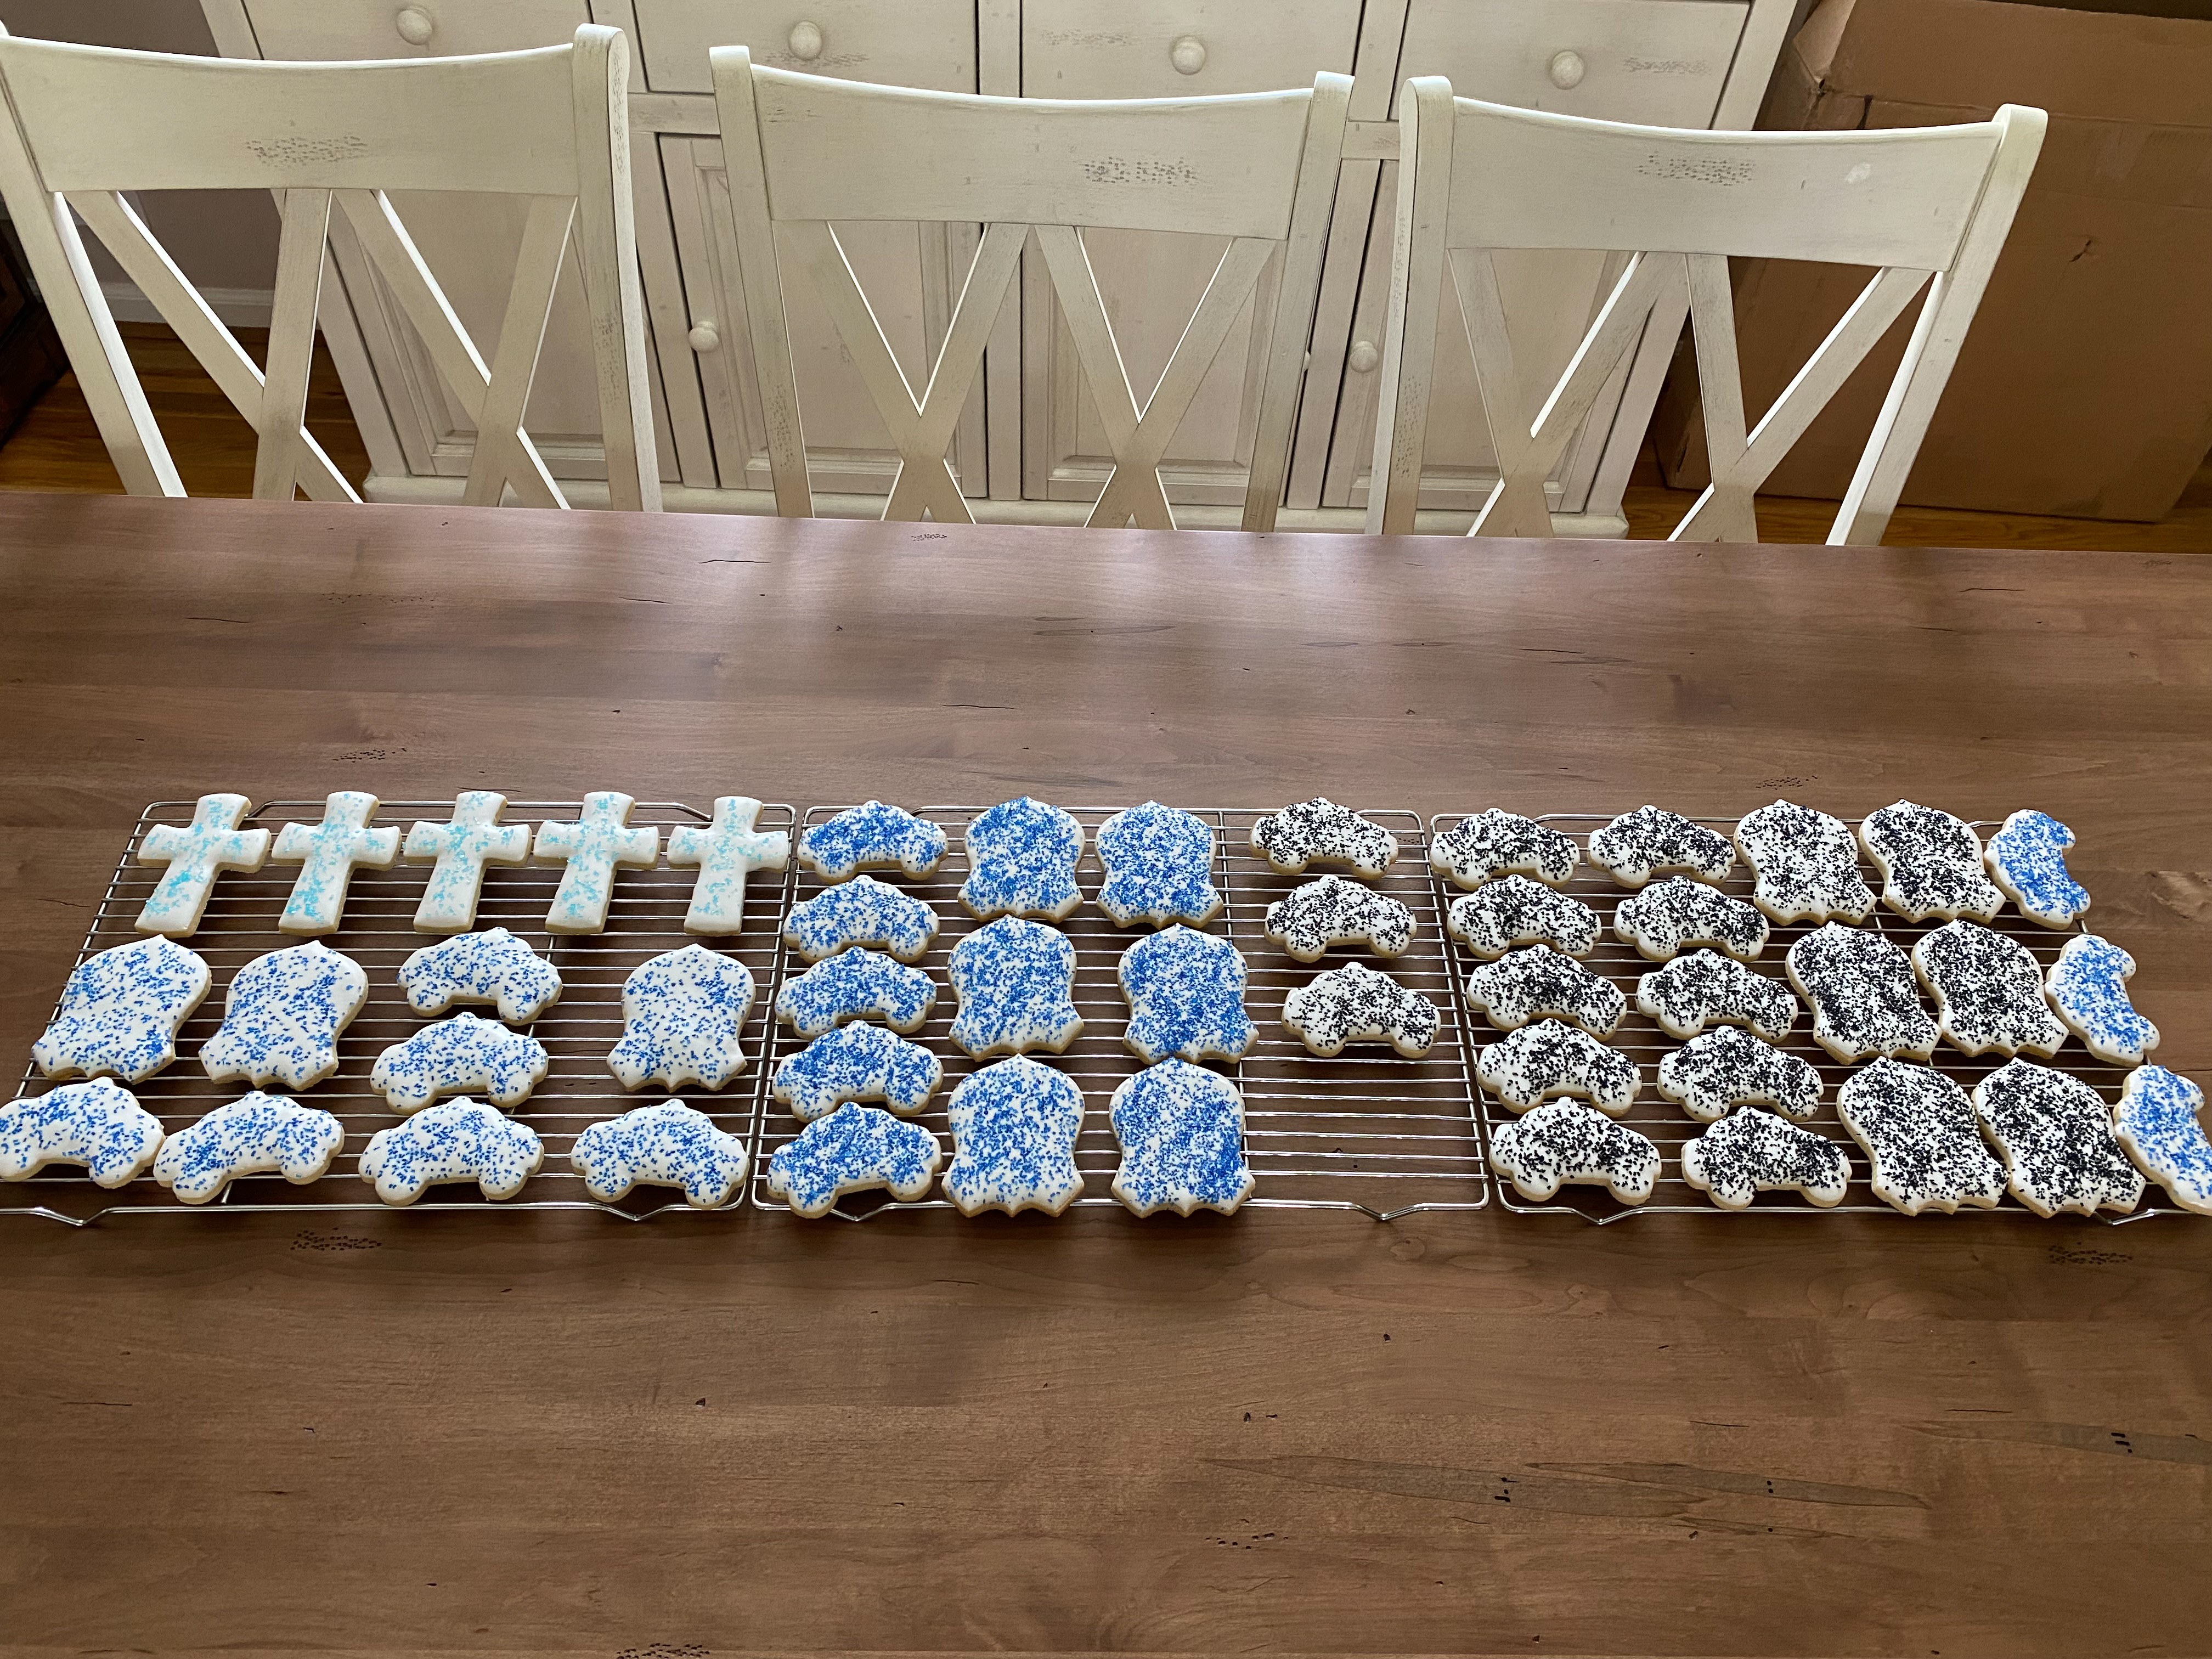
A double recipe made 54 cross cookies (for my sons' and nieces' First Communion party).


Best Sugar Cookies

Recipe courtesy In Katrina’s Kitchen website


Soft cut out sugar cookie recipe that keeps its shape and dough does not need to be chilled before baking – perfect edges every time!


1 cup unsalted butter, room temperature

1 cup granulated white sugar

1 teaspoon vanilla extract

½ teaspoon almond extract (optional – if not using, replace it with an equal amount of vanilla extract)

1 egg, room temperature

2 teaspoons baking powder

½ teaspoon salt

3 cups all-purpose flour


PREHEAT oven to 350°.


In the bowl of your mixer, CREAM butter and sugar until smooth, at least 3 minutes.


BEAT in extracts and egg.


In a separate bowl, COMBINE baking powder and salt with flour and add a little at a time to the wet ingredients.


IMPORTANT NOTE: If the dough looks crumbly keep mixing for 30 seconds to 1 minute longer. The dough should be pulling away from the sides of the mixer.


If the dough still looks too dry or stiff for your mixer, turn out the dough onto a countertop surface, flour surface as needed. Wet your hands and finish off kneading the dough by hand.


DO NOT CHILL THE DOUGH. Divide into workable batches (2-3 chunks), roll out onto a floured surface, and cut. You want these cookies to be on the thicker side (closer to 1/4 inch rather than 1/8). Add sprinkles on top of cookies before baking.


Bake at 350° for 6-8 minutes for smaller cookies or 8-9 minutes for larger cookies. Let cool on the cookie sheet until firm enough to transfer to a cooling rack.


Yield: 36 cookies.


Photos from March 2022 for my brother-in-law's retirement party:


Photo from April 2022 using royal icing and sprinkles:


Photo from December 2022:


Photos from January 2023 for my twin boys' 5th Birthday - a double recipe made 64 cookies! I brought some to school for them (on 2 separate days since they are with different groups of kids) and used the rest for their birthday party at home. Everyone loved them!:


Photo from January 2026 for my twin boys' 8th Birthday - a double recipe made 54 cookies. I used dye-free sprinkles on these.


Monday, January 28, 2019

Giada's Pizza Dough

A few years ago I posted a recipe for Bobby Flay's Pizza Dough, but I haven't made it in a long time. As someone who enjoys cooking and baking and always prefers homemade food over store-bought, I'm a bit ashamed to say my husband and I have been using store-bought dough lately, since life has been a bit hectic in our house (especially dinnertime). I ran into my cousin Christine yesterday and she told me that she makes Giada's Pizza Dough regularly, so I decided to give it a try last night. This recipe is very simple and quite delicious. It reminded me a lot of my grandmother's pizza, but took a lot less time to make since it's for just 1 pizza and not 12! This was the first time I made homemade pizza for my 1-year-old twins, and they approved! I kept it simple for them and made half of it with sausage and half of it with cheese. I froze most of the remaining pizza slices, wrapped individually, as an easy lunch or dinner option for them.

I started the dough around 2:00 pm after putting my boys down for their naps. The timing worked out perfectly so that I was able to spread the dough in the pizza pan (coated with olive oil first), put the sauce and toppings on, and bake it in time to be ready for our 6:00 pm dinnertime.

For the sauce, I just stirred some basil, oregano, salt and pepper together with an 8-ounce can of tomato sauce and spread it on the dough, then added my sausage and shredded mozzarella, and topped with grated cheese. I baked it at 425 degrees for 15-20 minutes.

If you're looking for a pizza dough recipe for just a few people, this is a great one to try. You can also easily double the recipe. I made it in a jelly roll pan and it fit perfectly (per my cousin's suggestion), but I normally make a double recipe and get 3 14" round pizzas out of it - see pics below! I personally think it is a bit too much dough for 2 round pizzas so I make 3, but my sister prefers thicker crust and makes 2.

Edit January 2022: I made this pizza tonight using Anna 00 Flour. I had never used 00 Flour before so I was interested to see the difference (I usually use King Arthur All-Purpose Flour). The dough was very easy to spread. I usually separate the dough, shape it into round balls and let it rest on the oiled pizza pans for a few minutes, then spread the dough a bit, then let it rest for a few minutes, and then finish spreading it. I was able to spread the dough completely out on the first try. As usual, I made 3 pizzas with a double recipe. Once the pizza was baked it had a very thin crust, but it was delicious! I actually think this was the best pizza I've made.

Edit April 2023: Today I made 4 recipes of dough which made 6 pizzas. This is probably the max amount of recipes I could make at one time in my larger 6-qt. KitchenAid mixer. I'm still using the Anna 00 Flour and the pizzas were so delicious!

Edit November 2024: If you don't want to use honey, you can use 1 teaspoon of sugar in its place. I also usually need to add more flour than the recipe calls for, about 1/4 cup to 1/2 cup extra per recipe. I've been making this recipe often for years now and it's my favorite recipe to make!

Bake at 450 degrees for 10-12 minutes and enjoy!

Giada’s Famous Pizza Dough

Recipe Courtesy Giada De Laurentiis


This is one of Giada’s most beloved recipes: her go-to famous pizza dough. It’s so easy to whip up, and turns out beautifully every time.


1 cup warm water

1 teaspoon active dry yeast

1 teaspoon honey

2¼ cups all-purpose flour

1 teaspoon kosher salt

Extra virgin olive oil


To the warm water, add the yeast and honey. Stir to dissolve. Allow the mixture to sit for 3 minutes to make sure the yeast is alive. It should foam and start to bubble.


Place the flour and salt in the bowl of an electric mixer fitted with a dough hook. Add the yeast mixture and mix on low speed until the mixture starts to come together. Turn the speed up to medium and mix for 8 minutes. The dough should start to pull away from the sides but still remain soft and slightly sticky at the bottom of the bowl. Add an extra tablespoon of flour if needed.


Coat your hands in a bit of olive oil and form the dough into a ball. Place the dough in a bowl that is coated in olive oil. Cover with a towel and allow to sit in a warm place for 1 hour or until doubled in size.


Knock down the dough and cut into 4 equal pieces if making small pizzas or simply reform into a ball and allow the dough to proof for an additional 1 hour.


The dough is now ready to use.


For basic cooking instructions, roll the pizza dough out on a floured surface to your desired thickness. Transfer the dough to a baking sheet or pizza peel, and top with your favorite toppings. Bake at 500° for about 8 to 10 minutes, or until crisp and golden brown. Drizzle the crust with extra olive oil if desired. Slice and serve hot.


Serves 4.


Thicker crust when I used to use King Arthur All Purpose flour


Great recipe to make with kids!


Thinner crust using Anna 00 Flour - my preferred way!

Double recipe for 3 14" pizzas

Wednesday, January 27, 2016

Pizza Dough

Growing up in a large Italian family, homemade pizza was always one of my favorite meals. My mom made it all the time when I was a kid. From an early age, I started helping her and later started making my grandmother's recipe of about 12 pizzas on my own, sometimes even doubling the recipe for pizza parties! Since I moved out and am now only cooking for 1 or 2 people in a small townhouse kitchen, I started using a pizza stone and pizza peel instead of pizza pans and found a recipe that makes 2 pizzas. I've been snowed in for the past few days and now that most people are out and about again, I didn't want to head to the grocery store in case it is low on food or packed with shoppers. So I decided I would make pizza for dinner so I can take it in my lunch for the two remaining work days this week. Luckily I already had all the ingredients!

This Pizza Dough Recipe is pretty simple to make and only needs to rise for an hour, plus another 10 minutes once you divide the dough in half. Following the dough recipe are baking instructions for the pizza stone that I have - adjust as needed for however you are baking your pizzas.

Pizza Dough
Recipe Courtesy Bobby Flay

3½ to 4 cups bread flour*, plus more for rolling
1 teaspoon sugar
1 envelope (2¼ teaspoons) instant dry yeast
2 teaspoons kosher salt
1½ cups water, 110º F
2 Tablespoons olive oil, plus 2 teaspoons

Combine the bread flour, sugar, yeast and kosher salt in the bowl of a stand mixer and combine. While the mixer is running, add the water and 2 tablespoons of the oil and beat until the dough forms into a ball. If the dough is sticky, add additional flour, 1 tablespoon at a time, until the dough comes together in a solid ball. If the dough is too dry, add additional water, 1 tablespoon at a time. Scrape the dough onto a lightly floured surface and gently knead into a smooth, firm ball.

Grease a large bowl with the remaining 2 teaspoons olive oil, add the dough, cover the bowl with plastic wrap and put it in a warm area to let it double in size, about 1 hour. Turn the dough out onto a lightly floured surface and divide it into 2 equal pieces. Cover each with a clean kitchen towel or plastic wrap and let them rest for 10 minutes.

Makes 2 14-inch pizza crusts.

Note: *Using bread flour will give you a much crisper crust. If you can't find bread flour, you can substitute it with all-purpose flour, which will give you a chewier crust.

This recipe does not come with instructions for baking the crust. If you are using a pizza stone, preheat the oven to 500º with the stone on the middle rack for 20-25 minutes (longer for a crispier crust).

Use a rolling pin to spread the dough on a lightly floured surface. Sprinkle your pizza peel with cornmeal and transfer the spread dough to it - crimp the edges to make them thicker and higher so the sauce and toppings do not slip onto the stone. Add cheese, sauce and toppings to your pizza. Gently shake the pizza back and forth on the peel to make sure it will slide off easily onto the stone.

Once the oven is preheated, sprinkle cornmeal on the stone to help prevent the dough from sticking. Reduce the oven temperature to 475º. Gently slide your pizza from the peel on to the stone. Bake for about 10 to 12 minutes.

While the first pizza is baking, prepare the second on the pizza peel.

Use a spatula to transfer the baked pizza to a large cutting board since the second one will be on the peel. Slice the pizza with a pizza wheel or pizza chopper and enjoy!

Combine dry ingredients

Mix with water and oil

Knead into a ball and let rise for an hour

Separate into two dough balls and let rise for 10 minutes

Spread dough using a rolling pin

Crimp edges of dough


Add toppings

Bake for 10-12 minutes on pizza stone


Slice and enjoy!


Photos by JoJo