Showing posts with label summer. Show all posts

Sunday, May 10, 2026

Best Key Lime Pie

My dad is turning 80 (!!!) this week and my mom is throwing him a big birthday party tomorrow. He loves pie so she and my sister Regina had an idea to serve a bunch of different kinds of pie for dessert. Regina is making banana cream pies, another sister is making apple pies, another is making gluten-free chocolate pies and my mom is making cherry pies. I wanted to add something different to the mix but wasn't sure what - then I thought of key lime pie, which I've never made before. My husband and I went to Key West for our honeymoon so we obviously had delicious key lime pie several times while we were there. I don't think I've hade key lime pie since then though! My sister's Godmother used to make it and bring it to parties at our house. I don't have her recipe but I looked online and found several. The main difference between the recipes I found are that some use egg yolks (more traditional) and some use sour cream (more modern) and others use a combination of both. I decided to use a recipe with sour cream. Key limes aren't sold near me, but instead of juicing a ton of regular limes, I used Nelly & Joe's Key West Lime Juice, which most grocery stores carry. I made this in a classic Pyrex pie dish. I made two since there are 70 people coming to his party!

This pie is very easy to make - it starts with a graham cracker crust that you bake for a few minutes. One packet of graham crackers came out to exactly 1.5 cups of crumbs - use a measuring cup to flatten out the crumb mixture on the bottom and sides of your pie plate. While the crust is cooling off, mix together the pie filling ingredients (I only zested one lime and it was plenty of zest) and bake the pie (hint: put the pie dish on a baking sheet in the oven so it is easier to take out of the oven without getting your finger or an oven mitt in the pie!). Let the pie cool to room temperature and then refrigerate it for several hours or overnight. Make some homemade whipped cream and put it on the pie just before serving. Don't forget to add some lime zest or very thinly sliced pieces of lime on top of the whipped cream to make the pie look nice!

This is a great recipe to make a day ahead, and one that I hope I'll be making more often. Next up - I need to try a recipe with a meringue topping like the one we had in Key West - the photos below are from our honeymoon in 2015!

This pie was delicious - give it a try!

Key Lime Pie from Blue Heaven in Key West


Key Lime Pie from Blue Heaven in Key West


Best Key Lime Pie

Recipe from Mom On Timeout Blog


The Best Key Lime Pie recipe EVER! Tart and sweet and incredibly easy, this Key Lime Pie is sure to be a family favorite! A delicious graham cracker crust filled to the brim with an incredibly creamy filling that is just so quick to make! You won’t be able to stop at just one slice!  


Graham Cracker Crust:

1½ cups graham cracker crumbs

1/3 cup granulated sugar

6 Tablespoons butter, melted


Key Lime Filling:

28 ounces sweetened condensed milk

½ cup light sour cream

¾ cup key lime juice

Zest from 2 regular limes or 4 key limes


Whipped Cream Topping:

1 cup heavy whipping cream

½ cup powdered sugar

1 teaspoon vanilla extract


Graham Cracker Crust:


Preheat oven to 375°.


Mix graham cracker crumbs, sugar, and butter in a small bowl. Press the crumb mixture into an 8" - 9.5" pie pan. Bake for 7 minutes. Cool for at least 30 minutes.


Key Lime Filling:


Preheat oven to 350°.


Whisk together sweetened condensed milk, sour cream, lime juice, and lime zest in a medium bowl. Pour into prepared graham cracker crust and bake for 10 minutes.


Let pie cool slightly before chilling. Chill for at least 3 hours.


Whipped Cream Topping:


Beat heavy cream and sugar together in a mixer until stiff peaks form. Beat in vanilla. Spread or pipe the whipped cream on top of the cooled pie. Top with additional lime zest if desired.


Sunday, January 21, 2024

Berry Mascarpone Layer Cake

This vanilla cake recipe is the same as the vanilla cupcakes that I just posted. I've never found a vanilla cake recipe that I liked enough to make it again. I'm hoping this cake comes out as good as the cupcakes because they were not dry at all and were so good! I'm not making this full recipe today though - I'm just making the vanilla cake, but I wanted to post the full recipe because it sounds delicious! I love berries and mascarpone so this is definitely my kind of cake!

This vanilla cake recipe is for 3 8" round cake layers. You could also make it into 2 9" round layers or a 9x13" cake instead, which is what I made today. You just have to adjust the baking time.

The whipped mascarpone frosting sounds delicious, but unfortunately I don't have any mascarpone and it's snowing pretty heavily so I can't get to a store today. I'll be pairing my vanilla cake with this whipped frosting that I've made before and already have the ingredients for. It has cream cheese instead of mascarpone, but the general idea is the same. It's a light frosting that is so good paired with fresh fruit. Even though I'm making this in the winter, this recipe sounds perfect for spring or summer!

This is one of the easiest cakes to make. It doesn't have butter in it so you can make it last minute without waiting for butter to soften. The batter comes together so easily. I used my hand mixer for it, but you could even just use a whisk and spatula.

The bake time for my 9x13" cake was about 40-42 minutes. My cake had a big crack in it - I'm not sure why, but it will be covered with frosting anyway so it doesn't matter.

Update - I brought this to a big family celebration and everyone seemed to enjoy it, so I think I've finally found a vanilla cake recipe that I will keep making!


Monday, January 24, 2022

White Chocolate and Raspberry Cookies

Last month my cousin John's fiance Emilee brought White Chocolate and Raspberry Cookies to our annual cousin's Christmas party. I was so full from all of the homemade pasta, meatballs, bread, and salad that I didn't even have any dessert (a first for me!), but these cookies looked delicious, and everyone who tried them said they were too. My sister Regina asked Emilee for the recipe and tried them a week or two ago and sent me a picture of hers, which then prompted me to buy raspberries when I saw them on sale this week and give them a try too. I should add that I don't like white chocolate unless it is paired with raspberries! It's just not my thing - I'm a dark chocolate kind of girl...but these cookies are amazing.

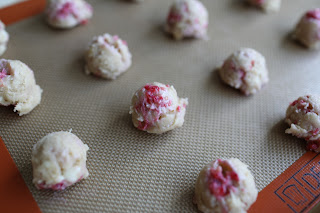
I used a 6-ounce package of raspberries which was exactly enough for a double recipe. I also used Ghirardelli white chocolate chips. I had a Ghirardelli white chocolate bar that I could have chopped up but I decided to save that for when I make something that needs melted white chocolate. I used a medium cookie scoop for the first tray of cookies, but thought they were a bit big. I used a small cookie scoop for the remaining trays, and they were a bit small. Next time I'll overfill the small scoop a bit.

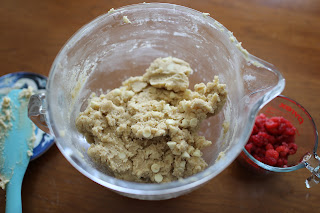
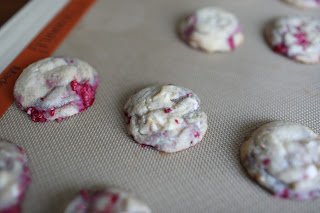
My cookies did not look as appetizing as my sister Regina's did because my raspberries bled a little bit and left some parts of the cookies blue. Next time I will wash them further in advance and let them dry completely. I had them drying on a paper towel but they were not completely dry when I added them to the cookie dough. The cookie dough was also thick, so it was difficult to fold in the white chocolate and then "gently" fold the raspberries into it without crushing them too much. My baking helper and taste-tester Anthony approved of these cookies, and that is all that matters in my book!

These cookies would make a great dessert for Valentine's Day. They would also pair very nicely for any spring or summer gathering with the Lemon Burst Cookies that I posted a while ago (and have yet to make myself, but hope to soon). These were delicious, so give them a try!


White Chocolate and Raspberry Cookies

Recipe courtesy Cookie Dough Diaries website


These white chocolate and raspberry cookies are soft and chewy and so easy to make! They're ready in under 20 minutes, there's no chilling required, and they can be made using fresh, frozen, or freeze-dried raspberries!


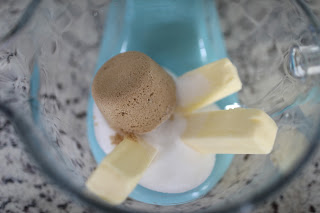
¾ cup butter, softened

½ cup light brown sugar

½ cup white sugar

½ Tablespoon vanilla extract

1 egg

¾ teaspoon baking soda

2 cups + 2 Tablespoons all-purpose flour

¾ teaspoon salt

½ cup raspberries, roughly chopped (fresh, frozen, or freeze-dried)

½ cup white chocolate, chopped (or white chocolate chips)


Preheat oven to 350°F and line two baking sheets with parchment paper.


In a medium bowl, combine flour, salt, and baking soda.


In the bowl of a standing mixer with the paddle attachment or a handheld mixer, combine butter and both sugars, mixing until light and fluffy, around 2 minutes.


Add in the egg and vanilla extract, and mix until combined.


Mix in the dry ingredients (flour, salt, baking soda) until combined. Do not over-mix! Fold in the white chocolate.


Gently fold in the raspberries. (Careful not to squish them too much into the dough!)


Use a cookie scoop or your hands to form 1.5 tablespoon sized balls of dough. Place the dough onto the baking sheets, around 3-4 inches apart and bake one sheet at a time, for 8-10 minutes.


Refrigerate remaining cookie dough while the first baking sheet is in the oven. The edges will be slightly golden brown and the tops will look set, but soft.


Let the cookies cool on the baking sheet for 10 minutes, then transfer to a wire rack to cool completely.


Makes about 40 cookies.


NOTES:

WHITE CHOCOLATE: You can use white chocolate bars chopped up, or white chocolate chips. This can be regular white chocolate or dairy free white chocolate. For gooey puddles of white chocolate in your cookies, press a couple more pieces of white chocolate into each cookie before baking.


RASPBERRIES: This recipe calls for fresh raspberries, but you can also use frozen or freeze-dried raspberries. If using fresh raspberries, I don't recommend adding more than the recipe calls for, or else your dough may be too wet.


Storage and Freezing: Store the cookies in an airtight container or ziploc bag at room temperature for 3-5 days.


The baked cookies can be frozen in a freezer bag for up to 2 months. Thaw at room temperature when you're ready to eat them.


White chocolate chips

Alternative - white chocolate bar


My helper sneaking some chips!


He approves!