Monday, August 26, 2024

Easy Soft Italian No Knead Bread

One of my favorite recipe websites and Instagram pages to follow is Cucina by Elena. Her recipes all look so good and are authentic Italian. She always posts about this recipe she refers to as "Mom's bread" that she makes all the time, an Italian no knead bread that her mom taught her how to make. There is a video here of her making it.

She has various Instagram reels and posts with links to ingredients and tools she uses, but to simplify I'll link them below. Her mom recommends using a "bread box" to store all the ingredients so it's easy to just pull it out and mix the dough. The amount of the needed ingredients are written right on the containers as well, to make it even easier. Here are her links to:

I don't find it necessary to buy these items, as all of my baking ingredients are in the same general area of my kitchen and I would have nowhere to store a bread box, but I wanted to link them for anyone who might want to do what she does. However, I did buy one of the Mason Cash mixing bowls in the Turquoise color - yes, from Home Depot, of all places. They give a 10% military discount and I had a gift card so it hardly cost me anything. It's big, lightweight, pretty and perfect for many recipes that I make. I also bought a dough hook because it looks perfect for mixing not only bread and focaccia dough, but also pancake, cake and muffin batter. I might try the Kamut flour at some point, but right now I will use what I already have - either King Arthur All-Purpose or Anna 00 flour.

She didn't link the steel cut oats or ground flaxseed that she uses, but I used Bob's Red Mill Organic for both of them. The ground flaxseed meal comes in both golden and regular - she says to use either one (I used golden so the color would blend into the bread more, in the hopes my picky eater would not notice!). I was able to find these at the commissary we shop at, and once I had them, I mixed a batch of dough that same night to bake in the morning.

For my first loaf, I baked it in a small round dutch oven. It was so delicious! My boys said "Mom's bread is the best bread!" after they first tried it. My dough came out pretty wet and did not look like hers does in the videos, so next time I will weigh my flour and see if it comes out more shaggy like it should. Other than that, it was very quick and easy to make and very good.

For my second loaf, I baked it in a new bread loaf baker that I recently bought. This was my first time using it - to avoid sticking, I used lightly floured parchment paper and it worked perfectly. This time around, I weighed my flour instead of measuring it in measuring cups and my dough was a lot easier to work with, so recommend doing that if you have a scale. I also used my new dough hook which made mixing very easy. After making it in both shapes, I definitely prefer the loaf pan. The bread again was very delicious.

If you enjoy homemade bread, give this recipe a try!


Thursday, August 22, 2024

Ankarsrum Assistent Original

I've been making more pizza and bread dough lately and noticed my KitchenAid struggling a bit to knead it. When I was younger I made my grandmother's pizza dough by hand all the time, but once I moved out of my parent's house and no longer made a big batch using my grandmother's recipe, I started trying other smaller recipes that said to use a stand mixer to mix the dough. I had never even thought of that as an option before, but that is how I mix my dough now. I am usually only making pizza for my small family of 4, but occasionally make pizza for more people and have to make more than one batch of dough at a time in my KitchenAid. Most recently, I made 16 pizzas (4 recipes of Ooni pizza dough) on the 4th of July. It took me an hour, as it took about 15 minutes per batch to make and knead the dough in the mixer. I love my KitchenAid mixers and don't want to burn out the motor in either of them, so I started looking into what might be a better option. Of course, spiral mixers are the most obvious answer as the best mixer for pizza dough, but they are also huge, very heavy, and very expensive. I don't have a place to store one permanently, or want to spend that kind of money on a mixer that can really only do one thing (even if it does that one thing very well). It is overkill for my needs.

The other mixer that I kept coming across is called the Ankarsrum Assistent Original (Ankarsrum Original Kitchen Machine - formerly known as Verona, Magic Mill, Electrolux Assistent, DLX). It's a mixer that has been made in Sweden since 1940 and is very popular among bread bakers. You can read a little about the history of it here and here. Other than a few name changes over the years, little has changed from the original design. Unlike the KitchenAids, the motor is in the bottom of the mixer rather than overhead, and the bowl rotates. This leaves the bowl widely accessible from the top to easily add ingredients in and see the progress of the mixed batter or dough, which is very nice. It weighs less and since it's not top-heavy, it is easier to move. It comes with a 7-liter (7.4 quarts) stainless steel bowl, which is larger than both of my KitchenAids (I have a 6-quart bowl lift and a 5-quart tilt head). It also comes with a 7-year warranty, which is almost unheard of these days!

The mixer comes in 13 different colors (not as many options as KitchenAid offers, but still a good variety to choose from). I chose the color Royal Blue which has a matte finish. The only other blue option is Ocean Blue, but it has a very sparkly look to it which I don't like.

Royal Blue

The biggest complaint I've heard about this mixer is that there is a big learning curve. I have used KitchenAid mixers my whole life, so I imagined there would be a slight learning curve when moving to a new mixer that is this different, but I didn't think it would be impossible to use. I'm guessing that most people who have issues with this mixer either are not using it correctly, don't bake much to begin with, or don't have much patience. I've watched lots of videos and tutorials and it doesn't seem that difficult to use, but it is definitely very different from how the KitchenAid works. There are also some helpful tips on kneading dough. From what I've read, you have to always start with your liquids first in the mixer bowl, and salt should be added last (salt and yeast should not be added together). Oftentimes, you don't need as much flour as you would normally use when using a different mixer, so it's recommended not to mix other dry ingredients in the same bowl as your flour in case you don't use all of the flour.

The attachments are very different from the KitchenAid ones, so you have to learn how to use them. There is a dough roller and dough knife that can do every task. In fact, this is all the mixer came with when it was first sold, although they were made out of wood back then instead of plastic like they are now. Now they also include a dough hook, which was a later addition to this mixer once they started selling it in the USA. A lot of people don't seem to like or use their dough hook. The mixer also comes with a smaller plastic bowl, balloon whisks and cookie whisks that have plastic gears and look rather flimsy compared to the KitchenAid ones. You can purchase a stainless steel bowl that is the same size to use with the whisks, if you prefer to not use a plastic bowl. You also cannot use cold butter with the whisks because they and the plastic gears could break - you have to either use room temperature butter or cold butter that has been grated (not cut into chunks, for things like biscuits and pie dough). I plan to keep both of my KitchenAid mixers and continue using them for cookie dough, cakes, frosting, whipped cream, etc. so the smaller bowl and whisks don't matter as much to me, but I will probably try them out at some point. Most people say they use the roller and scraper for everything but whipping egg whites and whipped cream. One important thing to note when using either of the whisks is that they work faster than other mixers because there are two of them, so you should pay extra close attention to things that can easily get over whipped or over mixed. Another nice feature of this mixer is that the plug is removable from the machine.

7-liter stainless steel bowl with cover


Baking accessories for stainless steel bowl - dough roller, dough knife and spatula (included with mixer)


Dough hook for stainless steel bowl (included with the mixer)


Double beater set with 3.5-liter bowl (included with mixer)

Beater bowl in stainless steel (sold separately)

Another factor I considered that has annoyed me about my KitchenAids as I've gotten older is the sound of the mixer running. I developed Tinnitus (ringing in my ears) a few years ago, and certain sounds like a mixer running for 8-10 minutes (or much longer if making pasta!) make it worse. I read that the Ankarsrum is a lot quieter, which intrigued me, especially since I run my mixer the longest when mixing bread and pizza dough. Since the KitchenAid tends to "walk" (move on the countertop) as I'm making dough in it, I have to stay by the mixer which means that sound is right in my ear the entire time the dough is mixing. The Ankarsrum doesn't have that issue and won't move around, so you can go do other things while it is mixing or kneading dough. It also comes with a timer and will turn itself off once the timer runs out, which is pretty great!

KitchenAid also recently placed time and speed constraints on their mixers to prevent motor damage, especially for heavy kneading, which is wild to me. They say not to exceed speed 2 for kneading, not to exceed a total kneading time of 2 minutes per interval, and a total mixing and kneading time of 4 to 6 minutes, with a 20 minute wait period between batches. There are no such constraints with the Ankarsrum.

Speaking of pasta, the Ankarsrum has a lot of optional accessories you can buy for it, including a pasta roller and a few different pasta cutters. It does not have nearly as many accessories as KitchenAid, but there are some interesting ones. Unlike the KitchenAid where you attach these to the top of the mixer, on the Ankarsrum, you turn the mixer on the side and attach them. It looks pretty odd in my opinion, but I've read that the attachments work very well. I'm not sure that I would buy any of them, as I plan to use this primarily for mixing bread and pizza dough, but the pasta roller does intrigue me since this mixer is not as loud as the KitchenAid. You can also easily buy spare or replacement parts.

Pasta Roller Attachment

Now, for the price. It is $749.95 at the time of writing this review. This mixer is not cheap!  It is considerably less than a spiral mixer though. I have also heard of people who have owned this mixer for 20 or 30+ years and it is still like new. The motors don't burn out and they don't break the way KitchenAids do. These mixers also sell for the same price everywhere and seem to never go on sale. Luckily I found a company named The Bread Beckers that gives a 10% military discount and does not charge tax, so that is where I ordered mine from. I also earned $22.47 in "Bread Bucks" to use on a future order since I made an account on their website. The only other option I found to get one of these for a lower price (other than buying a used one, in which case there would be no warranty), is to buy a factory serviced machine, which is $124 less than a new one and comes with a 5-year warranty rather than a 7-year warranty.

I ordered this on July 9th and it arrived via UPS on July 12th. It was packaged very well (in a box inside a box inside a box - my kids were laughing at me opening 3 boxes before we got to the actual mixer). I'm happy with the pretty blue color I chose and the matte finish will help keep things looking clean. I washed everything right away so we could use it the next day. While washing the bowl I realized that one downside to the big stainless steel bowl that rotates is there is no handle on it, and I will definitely miss not having a handle because it really helps. On the other hand, using a bowl with a flat bottom will be really nice. Everything seems well-made and the included hardcover recipe book is a nice touch. Since this mixer is so different from anything I've ever used before, I read through the manuals and the tips in them, looked through the recipes and registered my mixer.

I initially thought this mixer was ugly, but it has grown on me, mostly because I have come to the sad realization that the KitchenAids are really not meant for making bread.

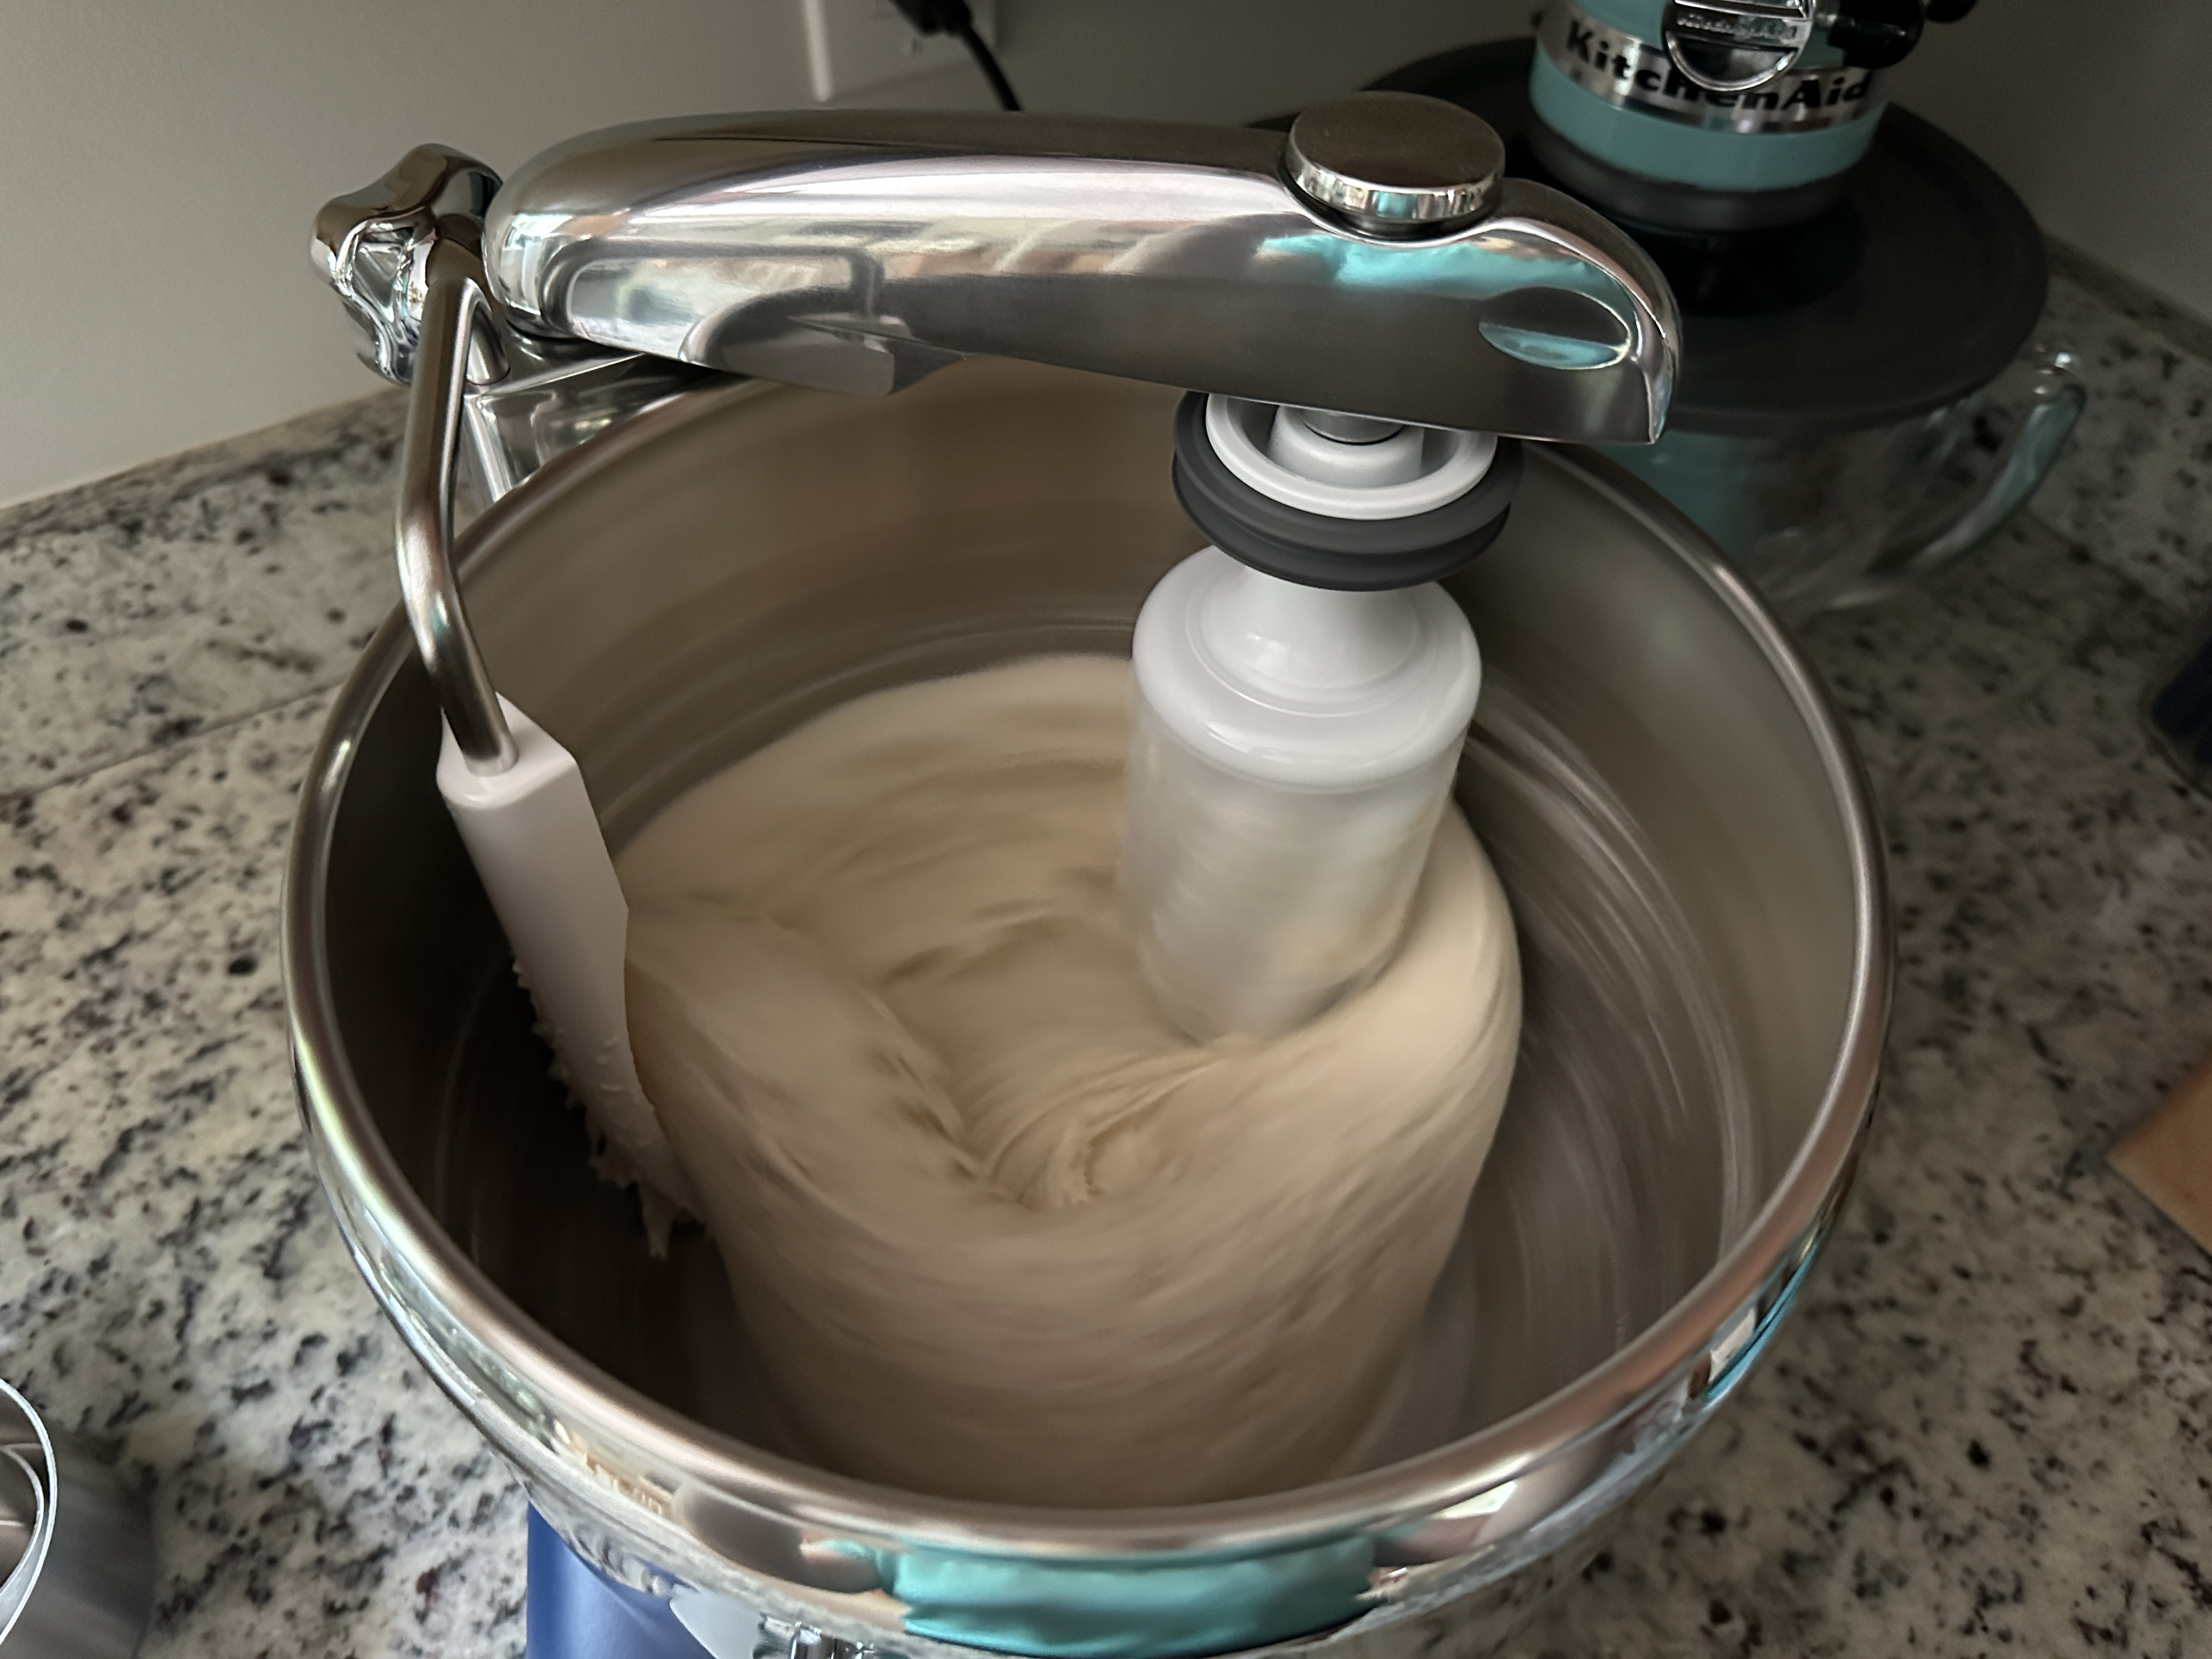
The day after I received this mixer I made a double recipe of Giada's pizza dough in it (using the large stainless steel bowl, roller and dough knife). The dough came out great and the pizza was delicious! I had never made this recipe in anything other than my KitchenAid before. I usually only make a double recipe but will be able to easily fit at least 4 recipes of this dough in this mixer!

I didn't intend to use this for baking other things like cookies and cakes, but I was curious how it compared to my KitchenAid, so the same day I made the pizza dough, I also made a pound cake (using the smaller clear plastic bowl and cookie beaters). It also came out great! The cake had a different consistency than I've ever gotten before from my KitchenAid mixer. It was really light and delicious. The next day I made two recipes (I made them separately, not in the bowl at once) of coffee cake, which also came out very well. It takes a little getting used to using a mixer bowl that is in the shape of a bundt pan, but I can confirm after using this bowl and these beaters three times that is does an excellent job with cake batter! If I continue to use it, I'll probably upgrade to the stainless steel beater bowl (edit: I ended up buying this bowl when it was on sale and using my "Bread Bucks" and it is great!). It's nice using a clear bowl, but it is not the most sturdy material and I've heard some complaints of the plastic cracking.

So far I've also used this mixer to make Homemade French Bread, which came out delicious! I really love how open the bowl is which makes it easy to add more flour when the mixer is already running.

I'm excited to use this mixer for so many things. If you're an avid baker and are having some issues with your KitchenAid, I highly recommend switching to this mixer!


Wednesday, August 21, 2024

Fresh Peach Muffins with a Pecan Crumb Topping

A few days ago my sister Maria was talking about a peach muffin recipe that my niece Emma gave her. I had a few peaches in my fridge and wanted to give it a try so today I made it and they were so good! I didn't have pecans so I used walnuts, but pecans would definitely taste better. I would even omit the nuts in the crumb topping and it would still be good, or omit the crumb topping all together.

This recipe does require you to soften the butter, and you have to let the cut up peaches and sugar sit for 1 hour before making the batter, so you do have to plan ahead a little bit. I used 1.5 big peaches for this recipe.

The recipe is easy to make and I will definitely be making this one again!


Fresh Peach Muffins with a Pecan Crumb Topping

Recipe courtesy Emeril Lagasse


MUFFINS:

2 cups finely chopped fresh or frozen peaches

1¼ cups sugar, divided

½ cup (1 stick) butter, at room temperature

2 eggs

1½ cups milk

3½ cups flour

4 teaspoons baking powder

1 teaspoon salt


PECAN CRUMB TOPPING:

½ cup flour

¼ cup brown sugar

¼ cup ground pecans

¼ teaspoon ground cinnamon

4 tablespoons cold butter, cut into pieces


Preheat the oven to 400°. Lightly Grease 24 (2 3/4-inch by 1 3/8-inch) muffin cups.


Place the peaches in a bowl and cover with ½ cup of the sugar. Mix thoroughly. Allow the peaches to sit for 1 hour.


Using an electric mixer, fitted with a paddle, cream the butter and remaining ¾ cup of sugar until smooth and pale in color, about 3 minutes. Add the eggs, one at a time, and beat until fluffy, about 2 minutes. In a mixing bowl, combine 3½ cups of the flour, baking powder, and salt. Remove the bowl from the mixer and alternately fold in the milk and flour mixture, being careful not to over mix. Fold in the peaches. Spoon ¼ cup of the filling into each prepared muffin cup.


In a small bowl, combine ½ cup flour, brown sugar, pecans, and cinnamon. Mix well. Add the butter. Using your hands, mix until the mixture resembles coarse crumb-like mixture. Sprinkle 1 tablespoon of the crumb mixture over each muffin cup.


Place in the oven and bake for about 15 to 20 minutes or until golden brown. Serve warm with butter.


Yield: 24 muffins.


Wednesday, July 24, 2024

Alfa Forni Moderno 1 Gas Pizza Oven

I recently posted an Ooni Pizza Dough recipe and linked the Ooni pizza oven and accessories that we have. I bought the Ooni as a Christmas gift for my husband about 2.5 years ago. It turns out that my husband likes to use the oven for more than just pizza (wings, steak, fish, etc.) and the size of the oven is a bit limiting since he can't fit his cast iron skillet inside. I recently looked into upgrading to something bigger, perhaps a larger Ooni, but it wasn't quite what I was looking for. I wanted something we could keep outside all the time and use for more than just pizza.

I started looking at Alfa Forni, which are made in Italy. My cousin has an Alfa Brio and loves it, however it's much larger than we need for our small family of 4 and way too expensive for us. Alfa makes various ovens that can hold anywhere from 1 to 5 pizzas at a time - some are wood burning only, some are gas only, and others are hybrid and can use either wood or gas if you purchase the hybrid kit. My husband has used both wood and gas in his Ooni, but gas is much faster and easier and doesn't make a mess.

Alfa makes two small ovens - the smallest is called the Portable and the next size up is called the called the Moderno 1 Pizza (previously called the One and the Nano). These used to come in either gas or wood - there was no option for a hybrid kit with these two smaller ovens, however it looks like a newer version of the Moderno 1 Pizza can now be ordered with a hybrid option. After some research, I decided to go for the Alfa Moderno 1 gas only oven. It makes one 12-14" pizza at a time. Since they only take about 90 seconds to bake, cooking one at a time is fine for us. It is larger than our Ooni, but not so big that it's overkill for us. It's also not so small that it can't crank out 16-20 pizzas when we have larger parties. The oven will easily bake the pizzas faster than we can prepare them. I prefer the smaller size oven so it won't use as much propane and it will heat up quicker than the larger ovens would. The smaller footprint will work better on our deck and not take up as much space. There is also a very big difference in price between this oven and the next size up, the Moderno 2 Pizze, which can hold 2 pizzas at a time. If I could have swung it financially and we had a better outdoor food prep set up, this is the largest oven I would have considered. However, it was both too expensive and too big and heavy for us considering we want to keep it on our deck. The base for this is also a lot more expensive than the base for the Moderno 1. The next size up from that is the Moderno 3 Pizze (this replaced the Brio and can hold 3 pizzas), and then the Moderno 5 Pizze. Alfa also makes professional ovens and other lines of domestic ovens including the ClassicoFuturo, and some Limited Edition, however I only looked at the Moderno ovens.

Some of the Alfa Moderno ovens come in a choice of colors (Antique Red, Fire Yellow, Ardesia Grey), but the Nano gas oven only comes in a dark brown color called Copper. We plan to keep the oven on our Trex deck, which is also a dark brown color, so the oven will look nice there. This oven has a base with casters on it that is available for an additional cost in the same Copper color or in Black.

Once I knew which oven I wanted, I started looking around for the best price. I found two online retailers that were offering the coordinating base/stand for free with the purchase of the oven. This was great since I would have had to purchase a steel table or something else to keep the oven on. The base looks nicer, hides the propane tank, and has very good casters that lock, which will make it easy to move around. They both also offered a 5% discount. While trying to see if I could find a better deal anywhere else, I found a website for a small family-owned business in Oregon called Smokey Mountain Fireplaces and they do not charge sales tax. I reached out to them to ask if they would match the promotion for the free base and 5% discount. They were happy to do so, and even offered to send me some firewood for free. It was really nice to communicate with someone from a small business, and not just an online chat with someone in another country who did not really know much about these ovens. I always prefer to spend my money at a small business, so I was very happy that I came across this one - and because they don't charge sales tax, they had the best price! If you are looking to purchase one of these ovens, I highly recommend contacting them.

I ordered the oven on a Tuesday and it arrived the following Tuesday. It is large and heavy and is delivered like an appliance, on a pallet. The delivery company, Custom Global Logistics, called me from Dulles International Airport to schedule a 4-hour window to deliver it and I was asked by the company I purchased it from to open and inspect everything for damages before the delivery company left, in case I needed to refuse the delivery. Luckily, everything looked great.

The base was very easy to install and looks nice!


There's not much to assembling the oven. All of the pieces that come with it are stored inside the oven, so we just removed those and unwrapped them, and then placed the oven on top of the cart and secured it. We removed all of the protective film. We don't need the 4 feet since we are putting it on a cart, but if you are placing the oven on a table you will need to install those. Lastly, my husband hooked up the propane tank, turned the oven on to preheat it and then prepped dinner! Since this oven is smaller and lighter weight than the others, it was pretty easy for my husband to do most of this by himself. I only helped lift the oven on to the base.


Since all of our deck furniture is Polywood (made out of recycled material, similar to Trex material) and I don't want any of it to melt or get damaged, I bought a folding stainless steel table we can use as a prep table and to keep the pizza peels on and the hot items that come out of the oven. We will have to store this inside so it doesn't rust, but it is small and lightweight enough that carrying it inside and out shouldn't be an issue. We'll put it to the right of the oven that should still leave plenty of space for us to keep all the furniture where we've had it the past few years.


As far as accessories go, we already have most of what we need from using our Ooni. Since the oven will stay outside on our deck year-round and there are trees above our deck that make a mess with leaves and pollen, I wanted a good cover for it. Alfa sells their own covers which cover either just the oven or cover the oven and the base, but neither option covers the smokestack. I also read that they are not the best quality covers and expensive given the lack of quality. My husband wanted a cover that would go over the smokestack so he wouldn't have to attach and remove it every time we use the oven. I read that Coverstore makes good custom covers (they offer a free swatch kit) and their reviews were better than the ones on Covers&All (they offer a free swatch kit as well). Coverstore was having a 40% off Memorial Day weekend sale, but I wanted to wait and measure the oven, smokestack and base (with propane tank connected) myself once we put it all together to make sure I had accurate dimensions for the cover, and they offered to apply the discount for me once I was able to measure it myself and place my order, even though the sale would be over by then. I contacted both companies, and was definitely more impressed with the customer service responses from Coverstore. Because of the 40% off sale price, I decided to order the most expensive material which carries a 10 year warranty. This cover is much better quality and cost less than the Alfa one! I'm also glad I waited to measure everything myself, because the dimensions were slightly different from what the manufacturer provided.

The only other accessory I decided to get was an Alfa 3-piece set with a medium (12") pizza peel, turner and brush. The brush would be helpful for cleaning the pizza stone, and having a second pizza peel would be helpful too. Unfortunately, this set is made in China, not in Italy like the ovens, so I initially hesitated to buy it, but it looked like a much nicer set than the Ooni peels we have and we don't have a brush, and it has adjustable handles for all 3 pieces which is nice. I didn't want to pay full price for this set and could not find any sales on it, but luckily, I found someone selling a brand new, sealed set on Facebook Marketplace and decided to buy it.

We will use our Lodge cast iron 12" skillet and 10.25" skillet in this oven to make all sorts of things. We've had both of these skillets for over 10 years and they are indestructible. I prefer to cook with my Le Creuset enameled cast iron, but I won't be putting those in an outside oven! The Lodge cast iron is perfect for it though and my husband prefers to use those when he cooks. For our first meal in the Alfa, we used the 12" skillet for sausage and peppers and made hot dogs in the 10.25" skillet. It was delicious and cooked pretty fast! We also made wings in the skillet and they were delicious as well!

First meal from our pizza oven - sausage and peppers!

and hot dogs for the kids

The first time we used it for pizza was on the 4th of July when I made 4 recipes of the Ooni pizza dough - enough for 16 pizzas. We had 3 of my sisters and their families over for dinner (23 people total) and I unfortunately did not take any pictures once I started putting the pizzas together, but my husband took one photo. The pizzas were delicious and everyone loved them. We only had 1 slice of pizza left!

4 recipes of Ooni pizza dough

Divide each recipe into 4 dough balls after the first rise


After the second rise - ready to use!


The only pizza picture my husband took

This oven is built like a tank (it's made in Italy!), looks nice, and cooks delicious meals. While most people who buy these ovens probably go for the larger sizes, the Moderno 1 is the perfect size for a small family like ours, and it is certainly a major upgrade from any Ooni oven! We are looking forward to using it year-round for many years.