I recently splurged on a Lello 4080 Musso Lussino, a commercial quality, home use 1.5-quart compressor gelato maker, made entirely in Italy! I came across this machine last fall, but didn't buy it because I knew I wouldn't be making or eating ice cream as much in the colder months. I saved up for it throughout the year and after my 40th birthday in March and my 1-year work anniversary at my part-time job at the end of April, I decided to go for it. I'm sharing some items I bought to go along with it and some tips on how to use and clean the machine.


I purchased my Lello Lussino from Sur La Table because I had $50 "SLT Perks". This made the price cheaper than Amazon or anywhere else I could find a new one. I also didn't want to gamble with ordering something like this from Amazon. My package was shipped directly from the USA distributor in NJ and arrived 2 days after I ordered it. UPS delivered it and put the box by my front door on its side, not upright as it should have been, so I unpackaged it and let it sit for 24 hours before I used it (because of the compressor). It was perfect right out of the box - no issues at all (all the legs were even and the blade did not scrape the bowl - two things I read others have had issues with).


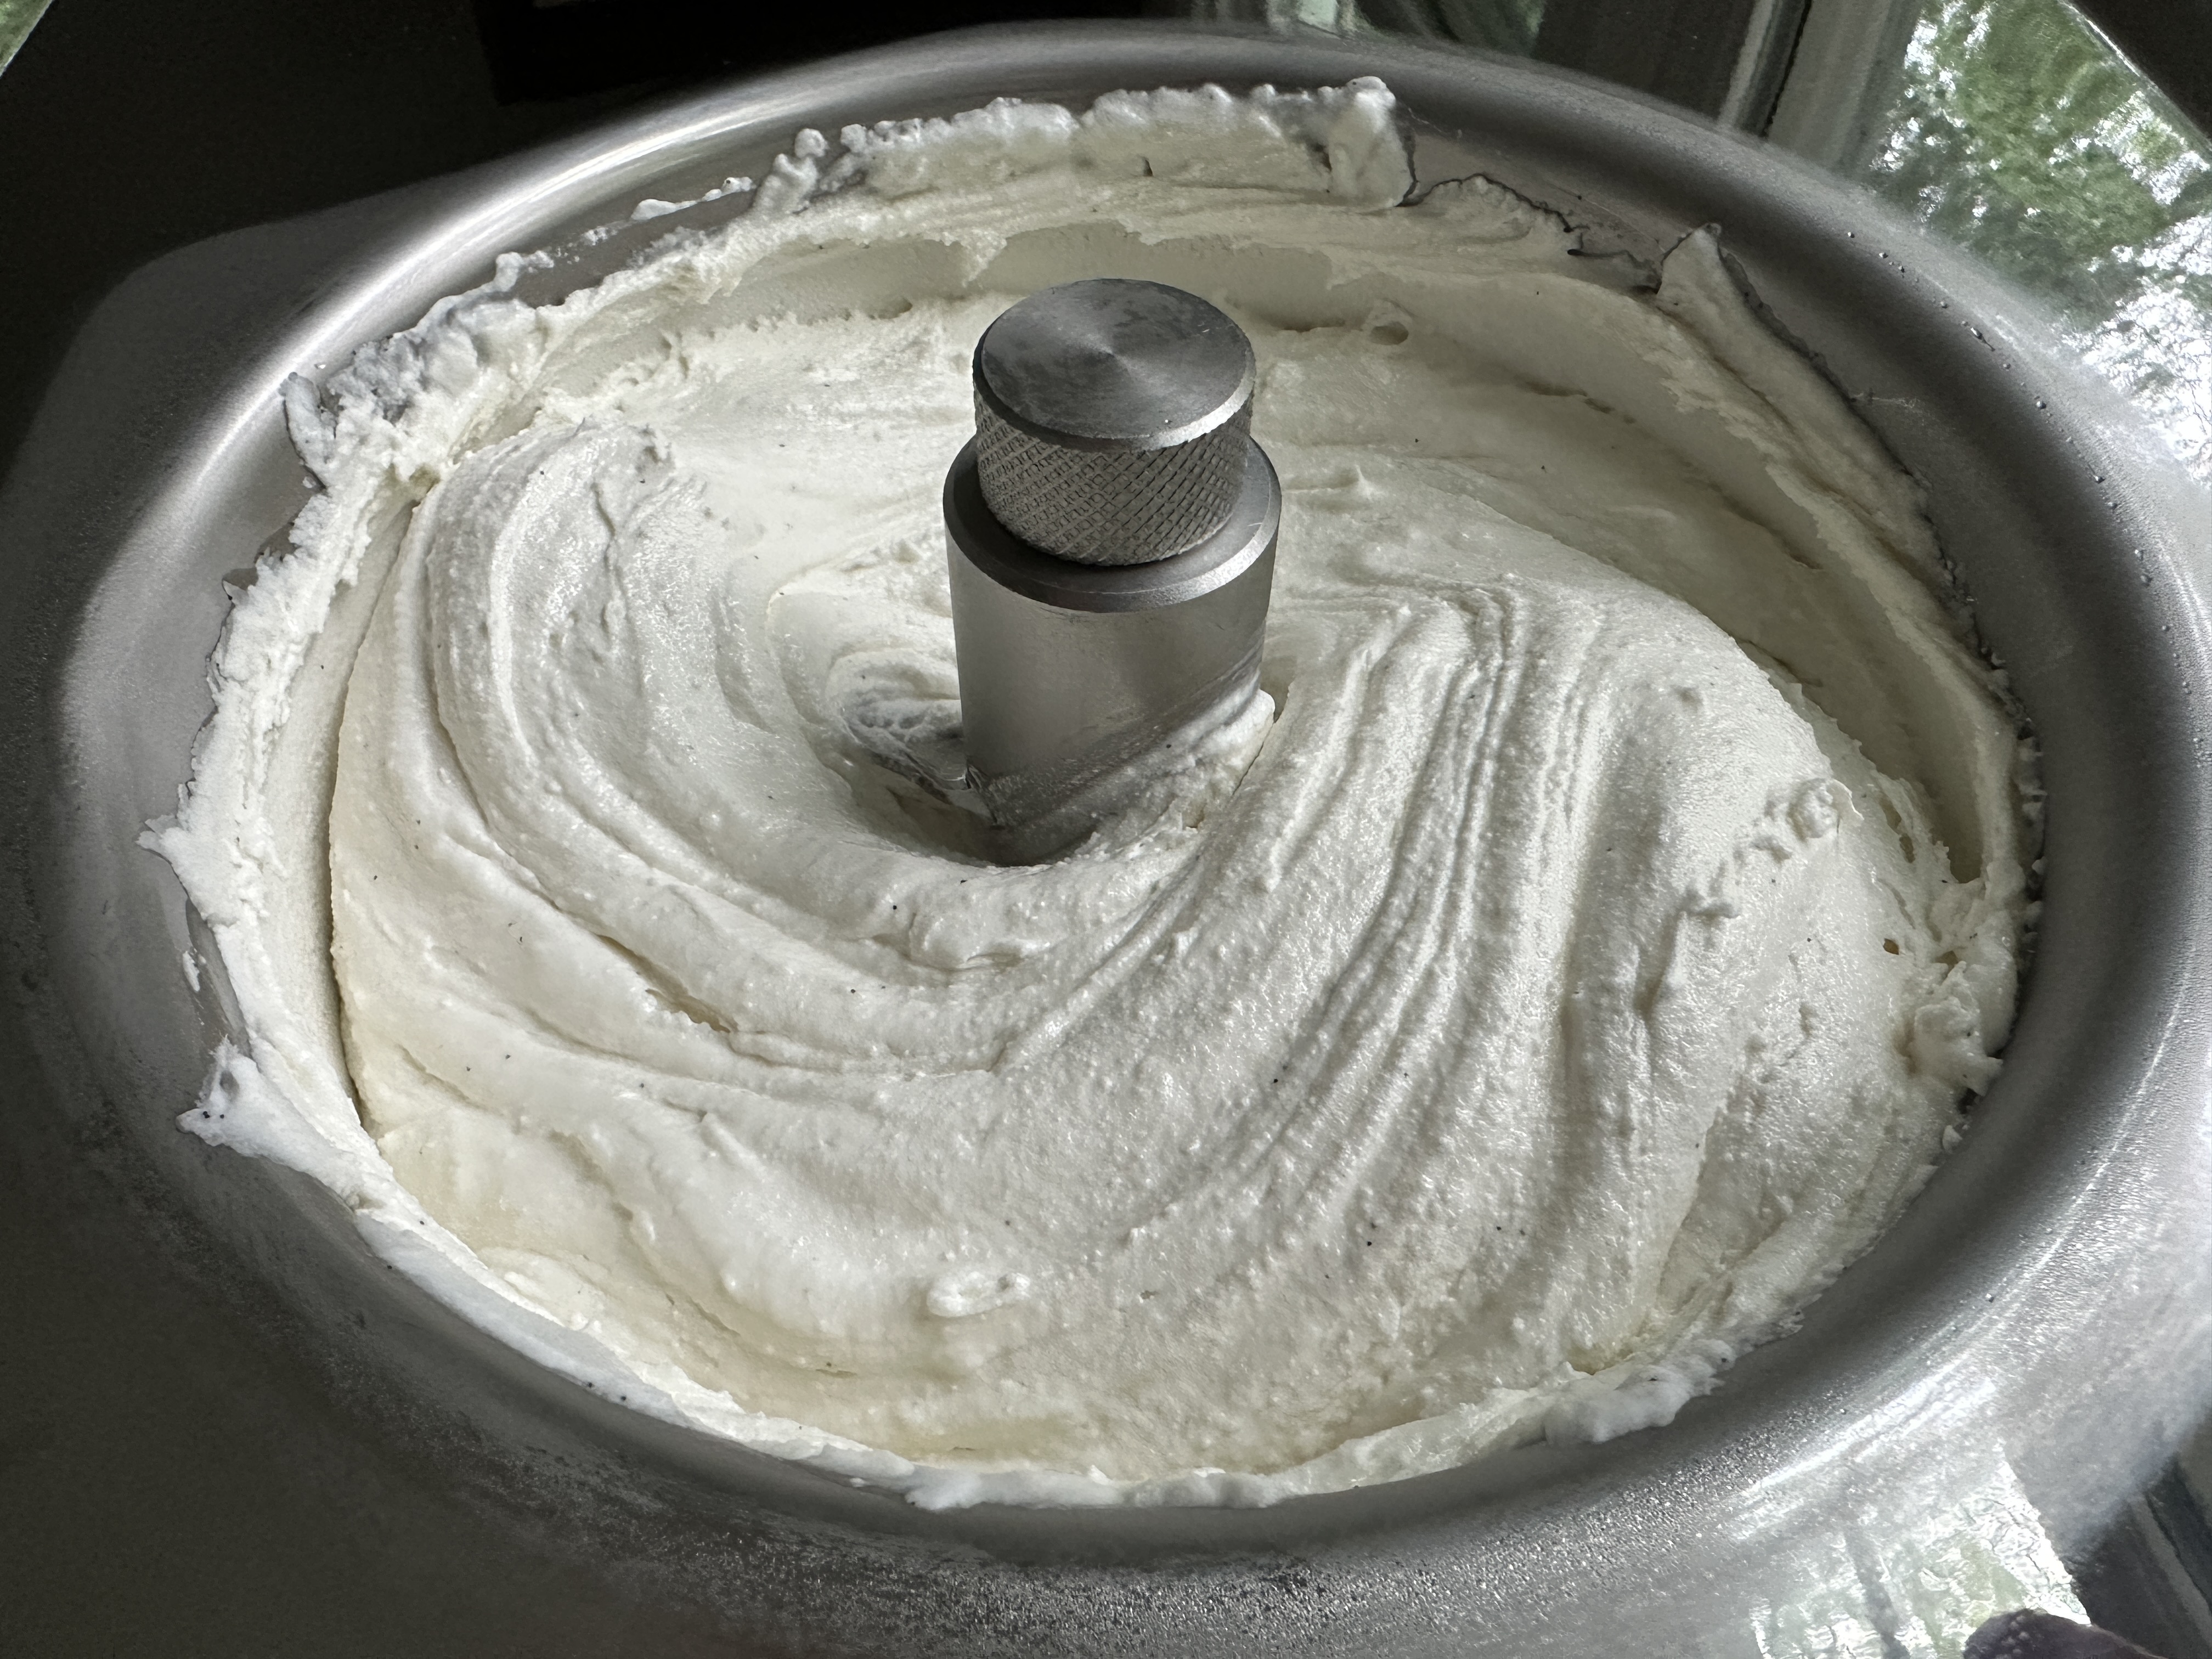
I've used it a few times so far and I absolutely love it! It is built like a tank, with high quality materials and few, simple controls (a timer knob, churn switch and chill switch - that's it!). The only plastic items included are the lid and the spoon. All the parts of the gelato maker itself are stainless steel. Unlike other ice cream makers, the bowl is non-removable. The top of the ice cream maker is just one piece of steel and the bowl is part of it. While some people do not like that aspect of this machine, I love it - it is part of what makes this ice cream maker perform so much better than all the others and produce such delicious frozen desserts!


Since it's large and heavy and I don't have a good place to store it in my kitchen, I decided to purchase this microwave cart and store it in a corner of my dining room that has been empty for years. Luckily there is an outlet right behind the cart so this was the perfect spot for it! The cart is solid wood and was very easy to put together. I put 3 coats of Minwax Matte Polycrylic on it, lightly sanded between each coat, attached the wheels and it was ready to use. It is the perfect size cart for this machine!

I ordered a custom-made appliance dust cover from this lady on Etsy. She lets you pick your own fabric design, orders the fabric for you and makes the cover. The cover arrived only a few days after I ordered it. I gave her the exact dimensions of the Lello, and the cover is slightly big but that's how she makes her covers, and it makes it very easy to put on and take off. My dining room has an Italian theme so I chose this beautiful Mediterranean fabric. I absolutely love it!

The cart also has plenty of room to store my ice cream containers and mason jars (more info on those below). In the past I had some Tovolo insulated ice cream tubs and I hated them. They are the ones with the bottom portion that is in two pieces. They were a pain to clean and the lid did not stay completely closed. I looked around and ordered a few new containers and bought colors that coordinate with the fabric I chose above. I bought the BALCI Ice Cream Container - 2 Quart, in Blue & Mint and the Tovolo Sweet Treat Ice Cream Tub - 1 Quart in Raspberry & Lemon. Since this machine is 1.5-qt capacity, I'll use the 2-qt. containers when I add mix-ins to my ice cream base and I'll use the 1-qt. containers when we eat some of the ice cream right away and freeze the rest. I like these containers so much more than my old ones. Some people like to freeze the empty containers before they put their freshly made ice cream in them, but I have never done that, mostly because I never think to do it. Tip - keep the top of the ice cream covered with plastic wrap touching it to prevent ice crystals and to keep the ice cream fresh for a long time in the freezer. If you're like my family though, you will eat the ice cream faster than ice crystals can form!

My favorite ice cream scoop to use is a Zeroll Ice Cream Scoop (I use this with the containers, not to get ice cream out of the ice cream maker). I've had this for many years and it's still good as new. I also have a Zeroll XL Ice Cream Scoop which I only purchased because I had some sort of coupon or rewards to use and could not find anything else to use it on. I prefer the regular size scoop but at times it does help to have two scoops. Lastly, I just purchased the Zeroll Ice Cream Spade. As you can see, it is quite a bit larger than the scoops but it also serves a different purpose. I have not used it yet so I can't comment on how much I like it. All of these Zeroll items are high quality and made in the USA. Hand wash only - do not put them in the dishwasher or they will get ruined.

I make eggless ice cream bases and like to refrigerate them overnight. Once I mix a batch, I put the mixture in a wide mouth quart-sized mason jar, which holds 4 cups - the perfect amount for this machine. Because of the air that is whipped into the ice cream during the churning process, you will end up with more volume of ice cream than what you started with in your base, so it's important not to overfill the bowl with mixture or it will overflow beyond the mixer bowl. Using the mason jars, I know that if I have more mixture than will fit in there, it's too much to put in the machine. I refrigerate the filled mason jar in my basement refrigerator, which gets opened a lot less than the one in my kitchen so items in there stay colder. I refrigerate it for 4-6 hours or overnight (I read somewhere that it's OK for up to 3 days but the most I ever do is overnight). Of course, you can skip this step if you want to make the ice cream right away, especially since this machine has a compressor and gets very cold quick!

Using the Lello, when it's time to make the ice cream, I set the timer for 30 minutes, turn on the "chill" switch, pour the ice cream base from the mason jar into the machine, put the clear plastic lid on, turn on the "churn" switch and let it churn for about 20-25 minutes. I always set more time on the timer than I think I will need, because with this machine, if the chill function turns off, you need to wait a few minutes before turning it back on (because of the compressor, or you could damage the machine). There is no way to turn the timer off - you have to let it run out and then it turns off on its own. If I'm adding any mix-ins to the ice cream (chocolate chips, Oreos, cookie dough, etc.), I add it after the ice cream has completely finished churning. I don't put the mix-ins directly into the ice cream maker bowl and continue churning for the last few minutes like I used to do with my Cuisinart machine - I add them in the container I'm storing the ice cream in. The only exception to this would be when making Stracciatella and drizzling the melted chocolate into the ice cream as it's churning so the chocolate can freeze. I like the soft consistency of ice cream when it's freshly made so we usually eat some of the ice cream right then and freeze the rest for later, but not always.
 |
| Vanilla bean ice cream |
 |
| Chocolate ice cream |
 |
| Vanilla ice cream |
 |
| Cheesecake ice cream |
Once the ice cream is ready, I either remove as much as I can into the container first or I remove the locking nut and stainless steel blade, being careful not to drop any ice cream into the exposed center piece. I cover the center pole of the ice cream maker bowl while removing the ice cream and cleaning the machine (to ensure no ice cream, soap, or water gets in there, which could reach the inside mechanics and damage them) with a rubber finger tip or thimble (after washing it well first). I saw from some reviews that other people used these but no one mentioned what size to use. The medium was too small but the large (size 13) works well. I put this on and then use the included plastic spoon to transfer the ice cream to a container, or I transfer as much ice cream as I can to a container while the blade is still attached, and then carefully remove the locking nut and blade and put the rubber finger tip on.
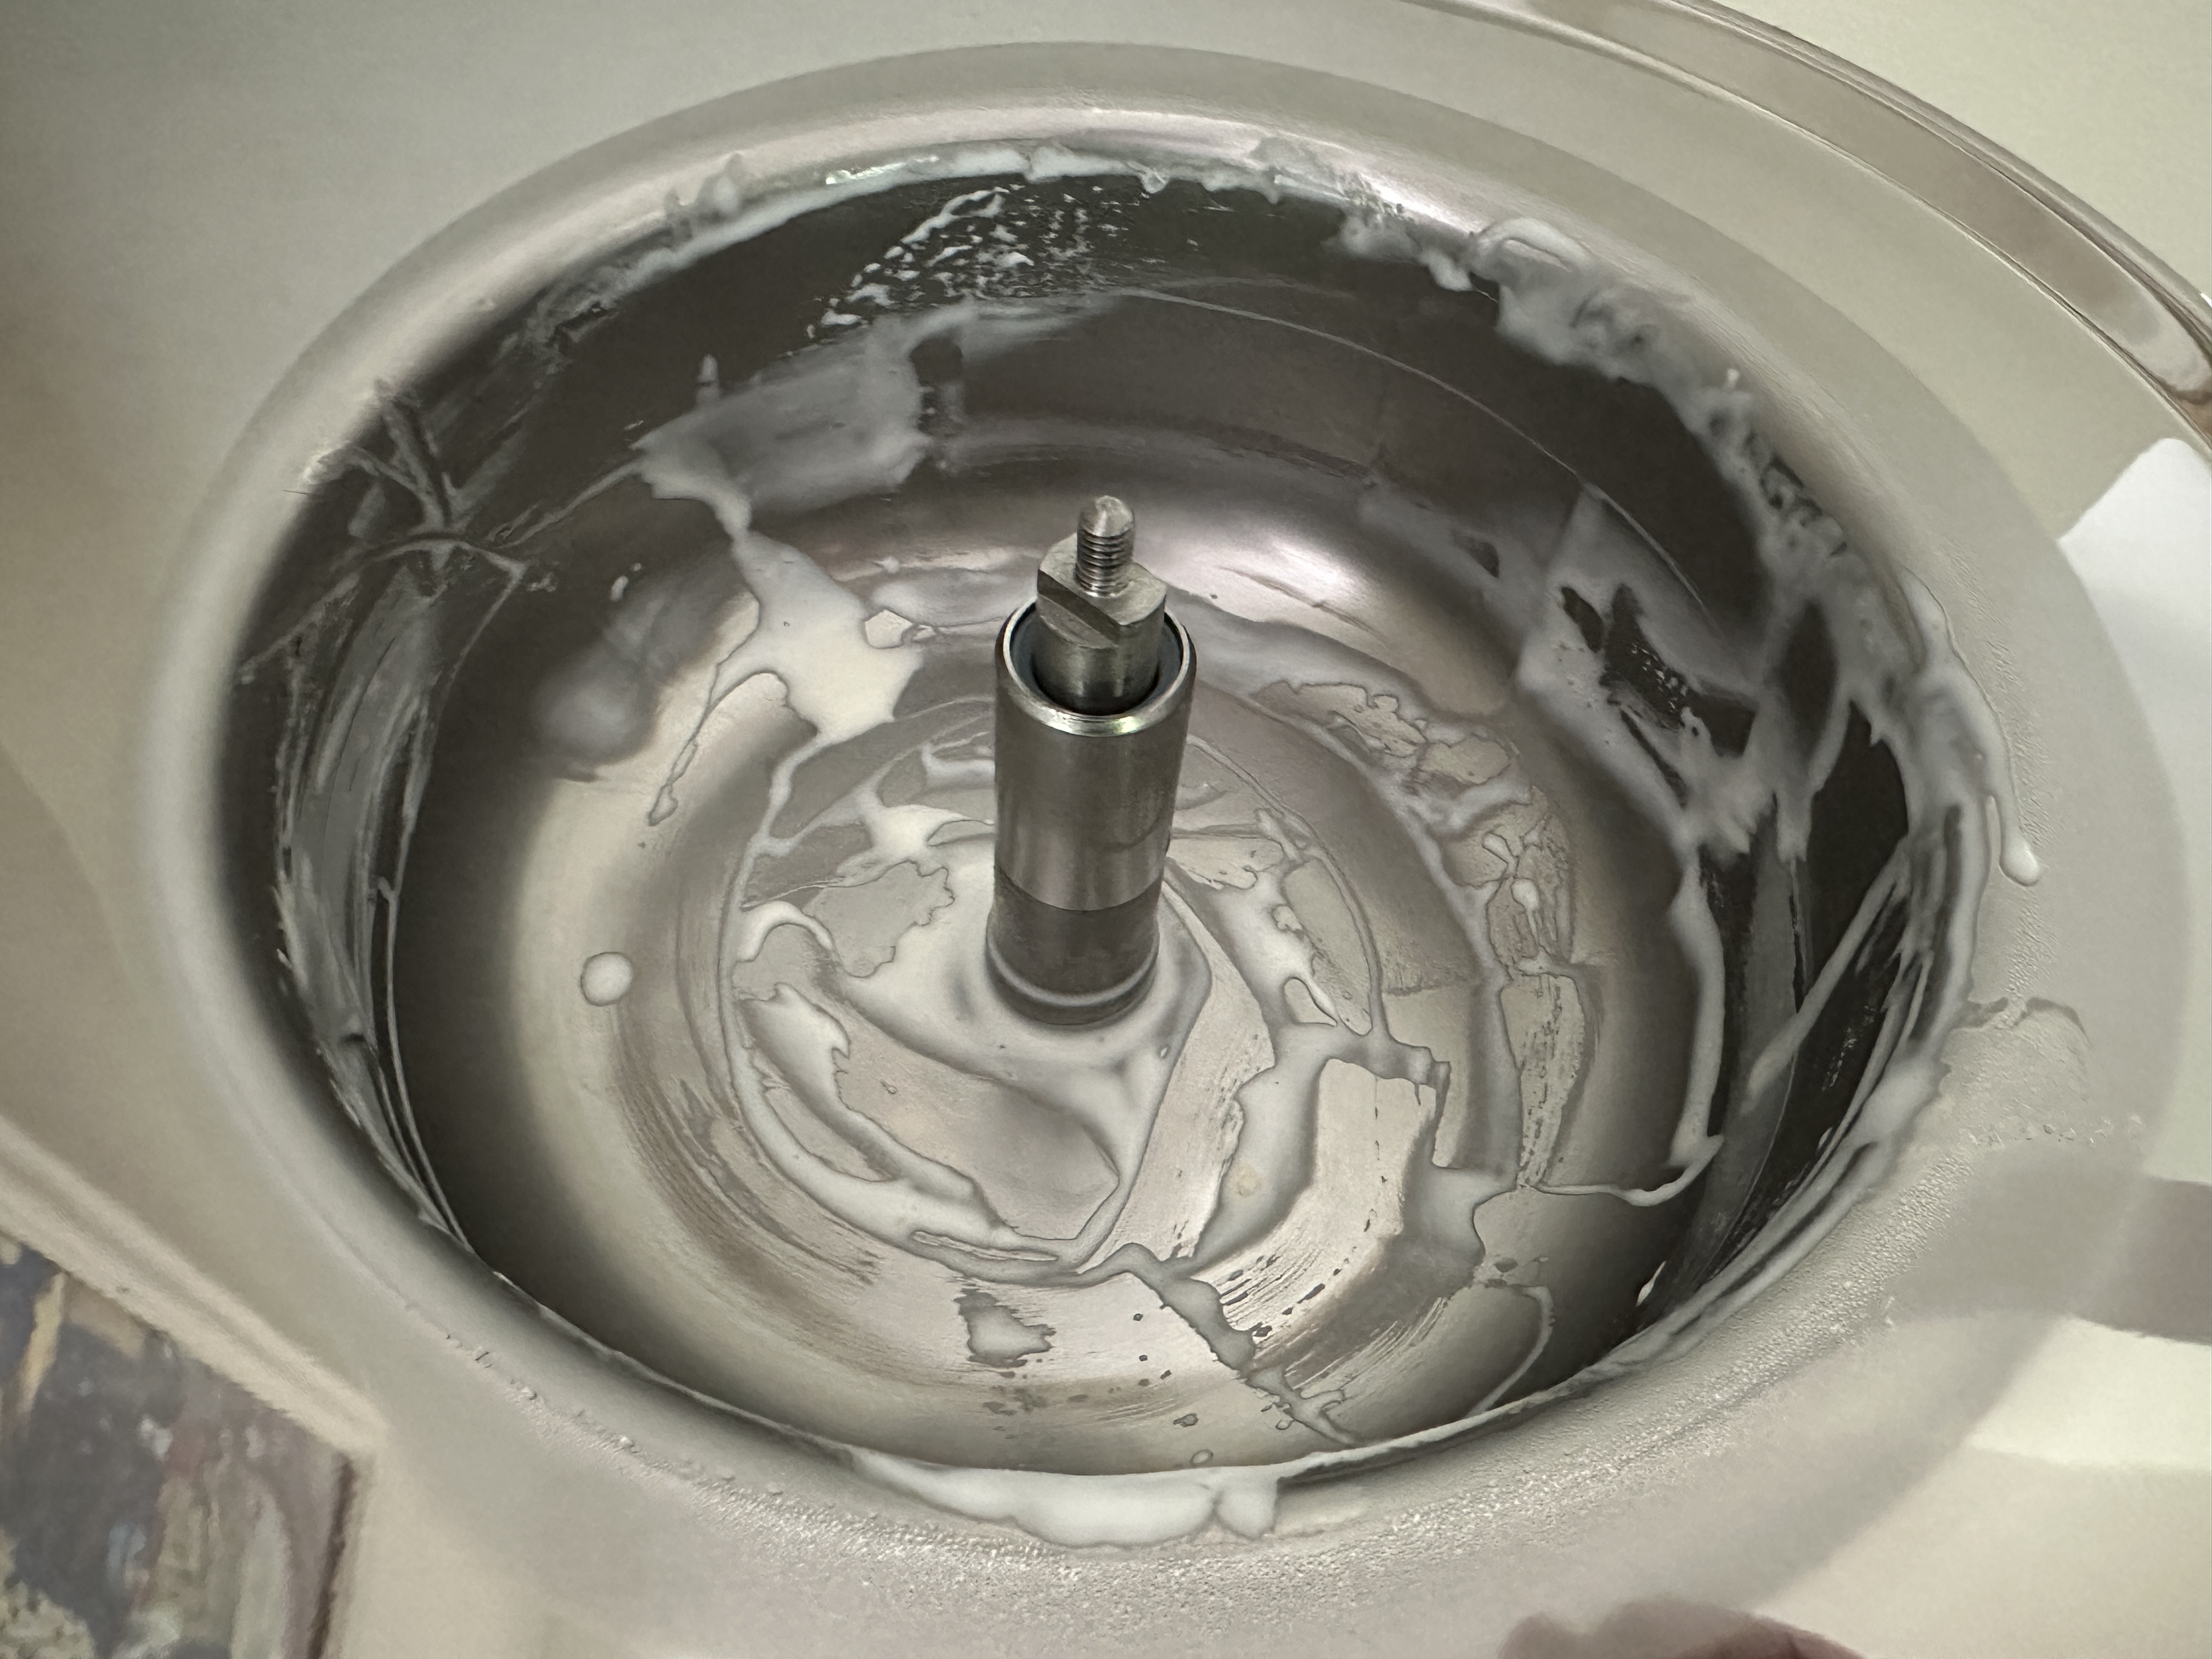 |
| This center area is what you don't want to get wet! |
 |
| This was the best solution I found to cover it up so I could clean around it |
Once I've removed all of the ice cream from the ice cream maker bowl, I use a silicone spatula to get any remaining ice cream out. Then I let it sit for a little while to get to room temperature before cleaning since it's hard to clean when everything is still cold. I wash and immediately dry the locking nut and stainless steel blade (being sure to dry the inside part of the blade as well, to prevent rust), along with the spoon and lid and set all of them aside. Cleaning the ice cream maker bowl is very simple - I use paper towels to clean out as much leftover ice cream residue as I can. Then I use a wet sponge with some dish soap on it to wipe everything out very well. Then I use a few more damp paper towels to get all of the soap out. I then remove the rubber finger tip and carefully clean around where it was. I do one final wipe of everything with a dry towel and it's perfectly clean!
 |
| I wipe out as much as I can with wet paper towels |
 |
| Then I use a soapy sponge to clean everything |
 |
| I use several more wet paper towels to get all the soap off and then a dry towel to dry everything |
 |
| Replace the washed and dried blade |
 |
| Replace the washed and dried locking nut |
 |
| Wash and dry the lid and spoon, and I'm done! |
I hope this information has been helpful to anyone who is considering or has already purchased the Lello Lussino. This machine was a big splurge for me, but it is great quality and a huge improvement over my previous Cuisinart ICE 21 which used a freezer bowl. I find this so much easier to clean and more convenient to use. I also love that I was able to find a good place in my house to keep it out at all times, and a beautiful cover for it! I had a lot of fun putting the cart and items together in order to make this corner of my dining room look nice.

I did a lot of research before I purchased this (I read every single review I could find - hundreds!) and the tips I read from others helped me so I am passing along some of the info I learned. I also read that many people have had this machine for over 20 years, which is amazing! More importantly, every batch of ice cream I've made so far has been incredible! It is more creamy and less icy than the ice cream produced by my old machine, even after having been in the freezer for a few days. I look forward to using this machine for many years to come so my family can enjoy delicious homemade gelato and ice cream made with fresh ingredients.
Note: Gelatiere Musso S.r.l. ("Musso") is the manufacturer, located in Mortara, Italy. Lello Appliances Corporation ("Lello") is the importer in the USA, located in East Rutherford, NJ. Musso makes two machines for home use and they go by various names depending on which country you are in or which online site you are browsing. This 1.5-qt. capacity model that I have is the L1, also known as 4080, Mini, Lussino, Piccolo, or Classica. This machine is 12" Wide x 18" Long x 11" High and 38 pounds. There is a larger 2-qt. capacity model, the L2 (L2A), which is also known as 5030, Stella, or Pola. This larger machine is 20" Wide x 14" Deep x 12" High and 66 pounds. Both machines have a 1-year warranty. There is a nice video on Musso's website that shows how these machines are made and some photos on their Facebook and reels on their Instagram.


