Friday, December 30, 2011

Honey Madeleines

I also had a chance to use my new madeleine pans today. I found a Honey Madeleine recipe on Williams-Sonoma website and since I was testing out both the pans and the recipe, I only made one batch (which gave me 20 madeleines). I was pretty happy with both, and will definitely be testing out more recipes in these pans soon!

Nonstick Madeleine Pan (photo from Williams-Sonoma


Honey Madeleines
Recipe courtesy Williams-Sonoma website

6 Tablespoons (3/4 stick) unsalted butter, at room temperature, plus more for brushing
¾ cup all-purpose flour
1 teaspoon baking powder
3 eggs
½ cup sugar
1 Tablespoon honey
Grated zest of 1 lemon
1 teaspoon vanilla extract


In a small saucepan over medium heat, melt the butter until it starts to brown and gives off a nutty aroma, about 3 minutes. Transfer to a small heatproof bowl and let cool.

Sift together the flour and baking powder; set aside. In the bowl of an electric mixer fitted with the whisk attachment, beat the eggs on high speed until pale yellow and thick, about 2 minutes. Add the sugar and honey and beat until thick, about 5 minutes.

Reduce the speed to low. Gradually add the flour mixture, then the lemon zest, vanilla and melted butter and beat until well blended. Cover the bowl with plastic wrap and let stand for 1 hour.

Preheat an oven to 375ºF. Butter and flour a madeleine pan.

Whisk the batter briefly. Fill each prepared madeleine well three-fourths full of batter. Bake until the madeleines are golden brown, 10 to 12 minutes.

Immediately invert the pan onto a wire rack and remove the madeleines, using a toothpick to gently loosen them, if needed. Let the pan cool completely, then repeat with more butter, flour and the remaining batter.

Makes about 24 madeleines.

Madeleine batter

Batter filled 3/4 of the way

I love how these pans look!


Photos by JoJo

Pin It

New Baking Pans!

Most of my Christmas gifts this year were baking related. I'm pretty excited to try them out, and I'll definitely post recipes and what I think of the pans once I get a chance to use them. But to share what they are...

I received Madeleine Pans so I can make Madeleine cookies! I actually got 3 of these pans - two Wilton ones and one from Williams-Sonoma. I'm still trying to decide which one I want to stick with. I have two recipes to try out and I can't wait to see how the cookies come out.

I also received some Wilton Cookie Sheets. I don't have any of my own and even with all the bakers in my house, there aren't any non-stick ones here, so these should be helpful.

The last two things I purchased with some money that was given to me. They are both things I have been researching online and I decided to just get them and see how I like them.

I just purchased a Maryann Cake Pan. This pan was pretty hard to find anywhere else but this website as the ones on Amazon were no longer available. Williams-Sonoma has a recipe with mascarpone cheese that I want to try. This recipe is actually how I found out about these pans in the first place, even though Williams-Sonoma no longer carries them. I thought this pan looked cool and it will make for great cakes in the summertime.

The last thing that I purchased last night is a Weber Poultry Roaster. I found a recipe a month or so ago for a lemon and rosemary chicken and it said to cook the chicken in a vertical roasting pan. I searched online, found many of these pans, and read lots of reviews. The one I purchased had great reviews. I like that I can use it in the oven and on the grill and that it has an area to place liquids such as beer or wine, which should give the chicken a great taste. I should have this pan in a week, and I'm excited to see how the chicken comes out.

Overall, I'd say I had a pretty great Christmas. I found time to bake four different kinds of cookies and give some away as gifts, and I now have more pans to bake and cook with!

Tuesday, December 27, 2011

Baked Brie

My aunt used to make baked brie with apricot for big family parties and it was so good. I haven't had it in a while so I decided to give it a try to bring to to Christmas dinner this year. I used raspberry preserves instead, but you could really use any kind you like. I also used a 15-ounce brie since my family is pretty big, but with this recipe you could use either that or the smaller 8-ounce brie. There are lots of different ways you can wrap the brie in puff pastry, but i just gathered it up and twisted it at the top. Next time I'll try to make it look a little nicer. Be sure that the puff pastry is completely covering the cheese and sealed well so nothing comes out when it is baking. This was a delicious appetizer and a big hit on Christmas. I'll definitely be making it again soon!


Baked Brie

1 sheet frozen puff pastry (from 17-ounce package), thawed
8-ounce or 15-ounce round packaged brie cheese
¼ cup apricot or raspberry preserves
1/8 cup toasted almond slices (optional)
1 egg yolk mixed with 1 teaspoon water
Water crackers or your favorite kind of crackers


Preheat oven to 375°. Lightly grease cookie sheet. Roll puff pastry out slightly so it will wrap around the entire brie wheel. Place brie wheel on top (leave rind on). Place preserves on top of cheese. Place almonds on top of preserves (optional). Bundle puff pastry up and around the cheese. Brush dough with egg wash.

Bake for 20-25 minutes. Let cool for 5 minutes. Serve with your favorite crackers. Refrigerate leftovers.

Brie wheel with raspberry preserves spread on top


Puff pastry bundled around brie wheel

Egg wash brushed on puff pastry

Baked and ready to serve!

Photos by JoJo

Pin It

Peanut Butter Blossoms

My older sister used to make Peanut Butter Blossoms every year around Christmas. I had never made them until this year. On Christmas Eve I decided to give them a try. I bought a bag of milk chocolate Hershey's Kisses and a bag of dark chocolate ones (I prefer the dark!). I used a medium cookie scoop, which worked well. For my first time making them they came out pretty good. If you love peanut butter, these are great cookies to make!

Edit December 2022: I made 1 recipe of these today. The medium cookie scoop looked like it would make them way too big, so I used a small cookie scoop (do not overfill the scoop, make it level). I got 48 cookies out of 1 recipe, just like I should have. One 10-ounce bag of dark Hershey's Kisses had 62 kisses in it, so I would not have been able to use one bag for a double recipe (I can never remember how many bags to get for 1 or 2 recipes, so this is my reminder for next year!).


Peanut Butter Blossoms (Hershey’s Kisses on Top)

48 Hershey’s Kisses Brand Milk or Dark Chocolates
½ cup shortening
¾ cup creamy peanut butter
1/3 cup granulated sugar
1/3 cup packed light brown sugar
1 egg
2 Tablespoons milk
1 teaspoon vanilla extract
1½ cups all-purpose flour
1 teaspoon baking soda
½ teaspoon salt
Granulated sugar

Heat oven to 375°. Remove wrappers from chocolates and put chocolates in freezer until needed.

Beat shortening and peanut butter in large bowl until well blended. Add granulated sugar and brown sugar; beat until fluffy. Add egg, milk and vanilla; beat well. Stir together flour, baking soda and salt; gradually beat into peanut butter mixture.

Shape dough into 1-inch balls. Roll in granulated sugar; place on ungreased cookie sheet. Bake 8 to 10 minutes or until lightly browned (be careful not to overcook them). Immediately press a chocolate into center of each cookie; cookie will crack around edges. Transfer from cookie sheet to another cookie sheet that is not warm and freeze immediately so the chocolate does not melt.

Makes about 4 dozen cookies.

Hershey's Kisses!

Dark Chocolate

Milk Chocolate


Cookie dough

Cookie dough rolled, before sugar was added

Cookie dough rolled in sugar

Dark chocolate Hershey's Kisses on these ones!

And milk chocolate on these!

Photos by JoJo

Pin It

Tuesday, December 20, 2011

Chocolate Crinkle Cookies

Another one of my favorite cookies that my grandmother would make around Christmas are Chocolate Crinkle Cookies. They are chocolate cookies rolled in powdered sugar. If made correctly they are soft and delicious! I say that because last year I must have over baked them a little because they didn't come out tasting as great as usual. But this year's batch were pretty good. I used a small cookie scoop and overfilled it a little bit so my cookies come out the same size. This cookie dough is much easier to work with when it's cold, so if you are taking any breaks while baking, put the dough back in the fridge when you're not working with it. Some years I sifted the powdered sugar before rolling the cookies in it but the cookies come out best if you do not sift it. Also, my cousin Vincent reminded me to NOT bake these on convection as that blows the sugar off the cookies! If you love chocolate, definitely give these a try!


Chocolate Crinkle Cookies

½ cup Mazola Corn Oil
4 squares unsweetened chocolate (melted) (4 ounces)
2 cups sugar
4 eggs
2 teaspoons vanilla extract
½ teaspoon salt
2 cups sifted flour
2 teaspoons baking powder
1 cup confectionary sugar

Mix oil, chocolate, and sugar. Blend in one egg at a time until well mixed. Add vanilla. Stir in salt, flour, and baking powder.

Chill several hours or overnight.

Heat oven to 350°.

Drop teaspoonfuls of dough into confectioners’ sugar.  Roll around and shape into a ball.  Place about 2 inches apart on ungreased baking sheet.

Bake 10-12 minutes. Do not overbake.

Makes about 50 cookies.

Baking squares

Oil, melted chocolate, and sugar

Mixed with egg


All ingredients mixed together

Chilled dough

Roll dough into balls and then roll in powdered sugar


Right out of the oven!


Photos by JoJo

Russian Teacakes

Every year around Christmas my grandmother would make tons of different kinds of cookies. My favorite kind are called Russian Teacakes. They are little butter cookies with chopped walnuts that are baked and then covered (twice) in powdered sugar. They are simple but so delicious! I make them sometimes around Christmas and luckily had time to make them this year. It's been a while since I had made them but since it's fresh in my memory I have a few tips. Make sure you let the butter soften so the consistency of the cookies comes out right (not too crumbly which makes them difficult to shape). There is a lot of butter in this recipe so that is pretty important and really makes a difference in how the batter comes out. I also couldn't remember how big to make them and I think they ended up a little larger than they should have been. If you have a small cookie scoop, that size seems to work well (don't overfill the scoop, because that makes them too big since they grow a bit while baking). Also, there is no need to sift the powdered sugar before rolling the cookies in it. They come out best if you do not sift it. All in all, they were delicious as always!


Russian Teacakes
(Also called Mexican Wedding Cakes)

1 cup margarine or butter, softened
½ cup confectioner’s sugar
1 teaspoon vanilla
2¼ cups Gold Medal Flour
¼ teaspoon salt
¾ cup finely chopped walnuts
Powdered sugar

Preheat oven to 400°.  Mix thoroughly butter, sugar, and vanilla. Work in flour, salt, and nuts until dough holds together. Shape dough into 1-inch balls. Place about 1 inch apart on ungreased baking sheet.

Bake 10 to 12 minutes or until set but not brown. Remove from cookie sheet. Cool slightly on wire rack. While warm, roll in confectioner’s sugar. Cool. Roll in sugar again.

Makes about 4 dozen cookies.

Mix butter, vanilla & powdered sugar


Add flour & salt

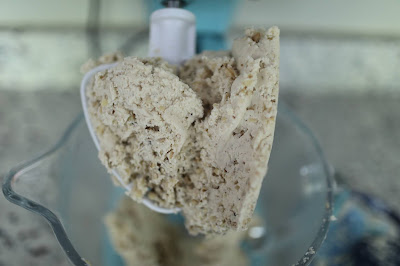
Add chopped walnuts

Shape dough into 1-inch balls


Bake until set


Roll in powdered sugar twice


Updated photos from July 2021: