Sunday, October 1, 2023

Stracciatella Ice Cream

Stracciatella gelato has always been my favorite flavor. Today I made Stracciatella ice cream for the first time. It is so easy and very delicious! I used my vanilla ice cream base, which I let chill in the fridge for a few hours before adding to the ice cream maker, but you don't have to do that. While it was in the ice cream maker, I melted a bar of 70% dark chocolate and let it cool a bit until the ice cream was almost finished (25 minutes in the ice cream maker). Then I used a small spatula to lightly drizzle the melted chocolate into the ice cream while the ice cream maker was still on. The melted chocolate freezes on impact with the ice cream and it breaks into shreds as the ice cream maker keeps churning it. I reserved a little bit of chocolate to drizzle on top of the ice cream container that I put in the freezer to make it look nice.

The ice cream was so good, and I don't know why I waited so long to make this! To me it tastes so much better than just adding chocolate chips to ice cream. This is not an official recipe and the steps are so easy but I just wanted to make note of what I did and what chocolate I used so I can remember the next time I want to make it. If you enjoy making your own ice cream, I highly recommend you give this a try with your favorite chocolate bar! This would taste good in other flavors of ice cream as well instead of vanilla (chocolate, strawberry, coffee, etc.), but this way is my favorite!


Sunday, July 30, 2023

Cornbread

This cornbread recipe came from my sister Paula. I make it often and always have to go looking for it, so I thought I should post it here to find easily (and to share it!). It's so easy to make and so delicious. I usually pair it with chili but tonight I'm making stuffed peppers and my sisters who make the stuffed peppers recipe I'm using also make cornbread with it, so that's what I'm doing as well.


Cornbread


This cornbread is sweet and light.  Makes 12 servings.


1 cup milk

¼ cup (½ stick) margarine or butter, melted*

1 large egg

1¼ cups yellow, white or blue cornmeal

1 cup all-purpose flour**

½ cup sugar

1 Tablespoon baking powder

½ teaspoon salt


Heat oven to 400ยบ.  Grease bottom and side of round pan, 9” x 1½” or square pan, 8”x 8” x 2”, with shortening.


Beat milk, margarine and egg in large bowl.  Stir in remaining ingredients all at once just until flour is moistened (batter will be lumpy.)  Pour batter into pan.


Bake 20 to 25 minutes or until golden brown and toothpick inserted in center comes out clean.


*Spreads with at least 65% vegetable oil can be substituted.

**If using self-rising flour, omit baking powder and salt.


For Corn Muffins: Grease bottoms only of 12 medium muffin cups, 2½” x 1¼”, with shortening, or line with paper baking cups. Fill about ¾ full.


Sunday, February 12, 2023

White Chocolate Raspberry Cheesecake Bars

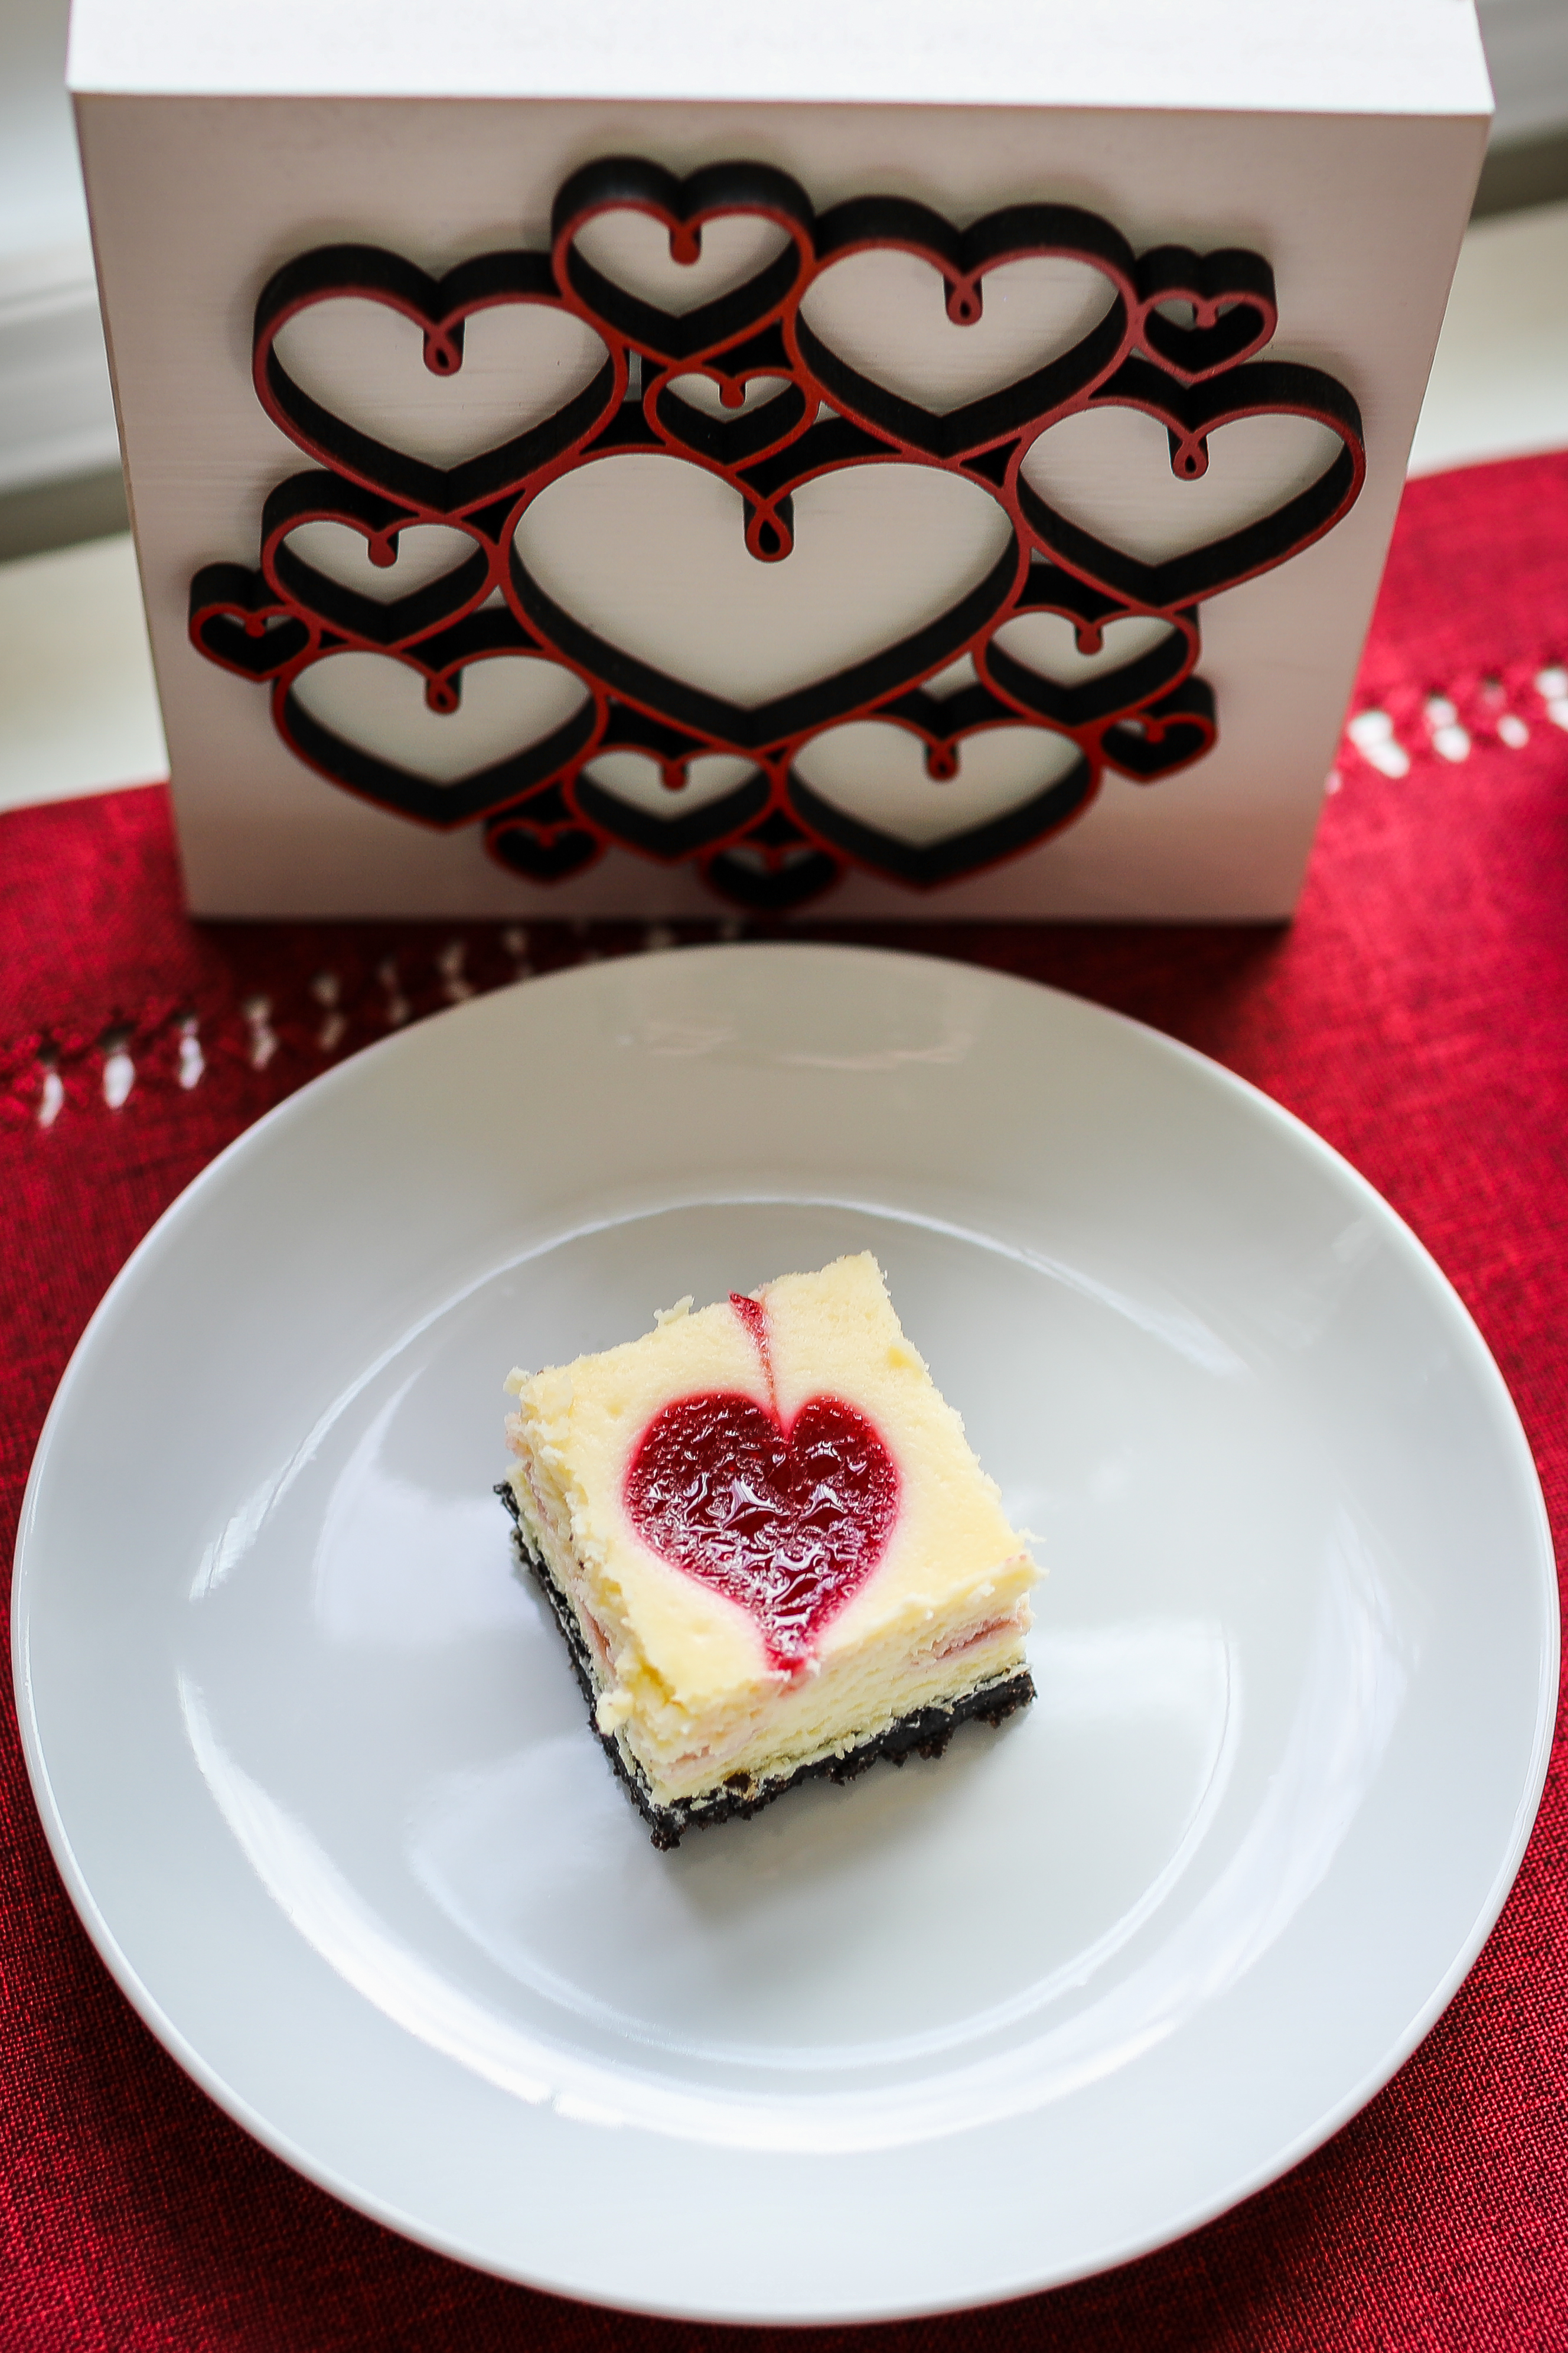
Valentine's Day is coming up and I have the perfect recipe for you! Try these White Chocolate Raspberry Cheesecake Bars. You can swirl the raspberry sauce to look like hearts!

This recipe has a few steps to it so it takes a little bit of time to assemble, but it is not difficult at all. A few tips for you and things I want to remember for next time - strain the raspberries as soon as you finish with them on the stove while they are still warm so they do not thicken too much and remember to scrape down the outside of the strainer to get all of the raspberry sauce off of it. I used frozen raspberries which worked very well since you cook them. I could not tell any difference from the sauces I've made with fresh raspberries. Make sure you use white chocolate baking chocolate bars, not white chocolate chips. Chill the melted white chocolate in the fridge while making the rest of the cheesecake batter so it is not still hot when it's time to add it to the batter. When pressing down the Oreo crumb mixture, don't press down too much or the crust will be hard to cut through. These took a little longer to bake because my square pan is an 8x8, not a 9x9 as the recipe calls for.

The next time I want to make the raspberry sauce in heart shapes, I will try to make 16 hearts spaced out well enough so each slice has a heart in it, and I'll use a thicker cake tester rather than a toothpick. Here is a short video showing how to make the hearts - so easy!

If you don't have or don't like white chocolate, you can leave it out. If doing so, leave out the flour as well. The bake time will be similar. I'm not a huge fan of white chocolate and couldn't even taste it in these bars, so I will likely omit it next time to see how it tastes without it.

There are lots of helpful notes below and also on the link above from the original recipe.

I love cheesecake but since I have a small family, I rarely make them because a whole cheesecake would be way too much for us. I love making bars like these that I can cut and easily freeze to enjoy whenever I want one! These are also perfect for a small get together or to add to a larger dessert spread.


White Chocolate Raspberry Cheesecake Bars

Recipe courtesy “Sally’s Baking Addiction” Website


Exceptionally quicker and easier than a full cheesecake, these white chocolate raspberry cheesecake bars are luxuriously creamy, perfectly sweet, and swirled with layers of homemade fresh raspberry sauce.


RASPBERRY SAUCE:

2 teaspoons room-temperature water, divided

1 teaspoon cornstarch

1½ cups fresh or frozen raspberries (do not thaw)

2 Tablespoons granulated sugar


CRUST:

22 regular Oreo cookies (not Double-Stuf)

5 Tablespoons unsalted butter, melted


FILLING:

6 ounces Bakers or Ghirardelli white chocolate baking bars, finely chopped

2 8-ounce blocks full-fat cream cheese, softened to room temperature

1/3 cup granulated sugar

1 Tablespoon all-purpose flour

1 teaspoon lemon juice

1 teaspoon pure vanilla extract

1/8 teaspoon salt

2 large eggs, at room temperature


Make & cool the raspberry sauce: The raspberry sauce must cool down completely before using, so I recommend making it first. Mix 1 teaspoon water with 1 teaspoon cornstarch in a very small bowl. Set aside. Combine raspberries, granulated sugar, and remaining 1 teaspoon of water together in a small saucepan over medium heat. Stir the mixture as it begins to cook, breaking up some of the raspberries as you stir. Once simmering, add the cornstarch mixture. Continue to stir and allow to simmer for 3 minutes. Remove the pan from heat and press through a fine mesh strainer to remove the seeds, remembering to scrape down the outside of the strainer to get all of the sauce off. Allow the thin raspberry sauce to cool completely before using. Cover and store for up to 1 week in the refrigerator.


Preheat oven to 350°. Line the bottom and sides of a 9-inch square baking pan (8-inch is too small) with parchment paper, leaving an overhang on the sides to lift the finished bars out (makes cutting easier!). Set aside.


Make the crust: In a food processor or blender, pulse 22 Oreos (including the cream filling) into a fine crumb. You should have about 2 cups (packed) crumbs. Pour crumbs into a large bowl. Add the melted butter and stir to combine. The mixture will be thick and quite wet. Try to smash/break up any large chunks. Pour the mixture into prepared pan. With medium pressure using your hand (or the flat bottom of a glass), pat the crumbs down into the bottom to make a compact, thick crust. Bake for 8 minutes. Remove from the oven and set aside. Leave oven on.


For the filling: Melt the chopped white chocolate in a double boiler or the microwave. If using the microwave: place the white chocolate in a medium heat-proof bowl. Melt in 20 second increments in the microwave, stirring after each increment until completely melted and smooth. Let the warm chocolate cool as you work on the other cheesecake filling ingredients. You can place it in the refrigerator, but just don’t let it solidify!


Using a handheld or stand mixer fitted with a paddle attachment, beat the cream cheese and granulated sugar together on medium-high speed in a large bowl until the mixture is smooth and creamy, about 2 minutes. Add the flour, lemon juice, vanilla extract, and salt, then beat until fully combined. On medium speed, add the eggs, one at a time, beating after each addition until just blended. After the second egg is incorporated into the batter, stop mixing. A few small lumps can remain. Pour in the cooled (but still liquid) white chocolate. Beat on low speed just until combined.


Pour half of the cheesecake filling onto the crust. It’s ok if the crust is still slightly warm. Drizzle half of the raspberry sauce all over the top. Spread remaining cheesecake filling on top. (It’s ok if the raspberry sauce has spread to the sides or slightly incorporates into the top layer of cheesecake.) Drizzle remaining raspberry sauce on top, then use a toothpick or knife to gently swirl everything together. (TIP: for Valentine’s Day, drop the top layer of raspberry sauce by spoon in small circles, then run a toothpick or a cake tester through the centers of the circles to make them look like hearts!)


Bake for 32–36 minutes or until the cheesecake appears set on top and the edges are lightly browned. The bars will be puffy, but will sink slightly down as they cool. Place pan on a wire rack. Cool for 45 minutes at room temperature, then chill in the refrigerator for at least 3 hours (and up to 1 day) before slicing. If you plan to chill the bars for longer, loosely cover with aluminum foil after 3 hours of chilling.


To slice, lift the bars out of the pan as a whole using the parchment overhang on the sides. Cut into squares with a sharp knife. For extra neat squares, wipe the knife clean between each cut.


Cover and store leftover cheesecake bars in the refrigerator for up to 1 week.


NOTES:

Make-Ahead & Freezing Instructions: Prepare the raspberry sauce up to 1 week in advance. Cover and refrigerate until ready to use. Prepare recipe through step 6 up to 2 days in advance. Cover unbaked cheesecake bars and store in the refrigerator until ready to bake. Continue with step 7. Since they’re cold, bars will take a few extra minutes to bake. To freeze: cool, chill, and slice bars as instructed. Freeze bars between layers of parchment paper for up to 3 months. Thaw overnight in the refrigerator before serving.


Oreo Cookies: You need about 22 whole Oreos, which pulse down into about 2 packed cups of crumbs. 


Graham Cracker Crust Instead: If you want to use graham crackers instead of Oreos, use this graham cracker crust recipe. Same pre-bake time.


White Chocolate: Use 6 ounces of “baking chocolate” bars, found in the baking aisle. They’re sold in 4-ounce bars, so you’ll need 2. (You’ll have 2 ounces leftover for another use.) I prefer Bakers or Ghirardelli brands. Do not use candy melts, white chocolate dipping wafers, or white chocolate chips; all contain stabilizers or added ingredients preventing them from combining evenly with the cheesecake filling.


Lemon Juice: This recipe does not taste like lemon. The 1 teaspoon of lemon juice brightens up the otherwise flat white chocolate flavor.


Raspberry Jam: You can try using raspberry jam instead of the homemade sauce. I recommend 3 Tablespoons for each layer (6 Tablespoons total).


9×13-inch or Full Cheesecake: For a 9×13-inch pan, you can double the filling recipe. Do not double the raspberry sauce or crust ingredients. For the sauce, use 3 teaspoons of water (1.5 teaspoons with the cornstarch, 1.5 teaspoons with the raspberries & sugar), 2 cups fresh or frozen raspberries, and 3 Tablespoons of sugar. For the crust, use 30 Oreos and 1/2 cup (8 Tablespoons) of melted butter. Bake time is closer to 45–50 minutes. Cool for 1 hour at room temperature, then chill for at least 4–5 hours before slicing. Use these same amounts for a full cheesecake in a 10-inch springform pan (no smaller). I recommend following the baking and cooling instructions, including using a water bath, as found in my regular cheesecake recipe. I found the edges rose up and burned quickly, so tent with aluminum foil after about 30 minutes. (I found the cheesecake then stuck to the foil, creating a bit of a mess on top.) For these reasons, I strongly recommend using this recipe for bars instead of a full cheesecake.


Mini Individual Cheesecakes: Use the baking and cooling instructions found in my mini cheesecakes and use this recipe as written. Recipe makes about 2 dozen cheesecakes in a muffin pan. Line 2 12-count muffin pans with liners. Firmly press 1.5 Tablespoons of crust mixture into each. Pre-bake for 5 minutes. Pour filling on top, about 1 Tbsp filling for each. Drizzle each with raspberry sauce. Swirl with a toothpick. Again, use the baking and cooling instructions found in my mini cheesecakes. Feel free to top cooled mini cheesecakes with whipped cream.


Raspberries, water and sugar

Cooked raspberries

Strained raspberries

Melted butter & Oreo crumbs


Finished crust

Make sure you use good quality baking chocolate!

Broken up chocolate bars

Melted white chocolate

Finished cheesecake batter

First layer of cheesecake batter

First layer of raspberry sauce

Second layer of cheesecake batter

Spoonfulls of raspberry sauce dropped in circles, then swirled once
through the middle with a toothpick to make hearts!

Finished bars!

Ready to cut after refrigerating


Wednesday, January 18, 2023

Hershey's 5-Minute Deep, Dark Chocolate Cake & Hershey's One-Bowl Buttercream Frosting

These two recipes have been used in my family for years. It's the only chocolate cake I've ever made, and also works well for cupcakes. The buttercream frosting is also delicious - if you want a double chocolate cake/frosting recipe, look no further! I oftentimes make this with a different frosting though because an all-chocolate cake is pretty rich.

A few things that I want to remind myself when making this (since I only bake 1 or 2 cakes a year and I always forget), if making two 9" rounds, the layers will be pretty thin. This cake looks better if it's made with thicker frosting, as opposed to cream cheese frosting that is also pretty thin. I prefer to make this cake in a 9x13 rectangular pan because then it is not such a thin cake. It's also a lot easier as it doesn't need removed from the pan!

I've made this with various frostings - chocolate buttercream (recipe below), vanilla buttercream, cream cheese, whipped cream frosting (and ricotta filling), whipped frosting (the recipe I just posted earlier today).

Below are a few photos from various times I've made this cake. It's always delicious!


Hershey’s 5-Minute Deep, Dark Chocolate Cake


1¾ cups unsifted all-purpose flour

2 cups sugar

¾ cup Hershey’s Cocoa

1½ teaspoons baking soda

1½ teaspoons baking powder

1 teaspoon salt

2 eggs

1 cup milk

½ cup vegetable oil

2 teaspoons vanilla

1 cup boiling water


Combine dry ingredients in large mixing bowl.  Add remaining ingredients except boiling water; beat at medium speed 2 minutes.  Remove from mixer; stir in boiling water (batter will be thin).


Pour into two greased and floured 9” or three 8” layer pans or one 13 x 9” pan.


Bake at 350˚ for 30-35 minutes for layers, 35-40 minutes for 13 x 9” pan, or until cake tester (inserted in center) comes out clean.


Cool 10 minutes on rack.  Remove from pans; cool completely.


Top with your favorite frosting.


Hershey’s One-Bowl Butter Cream Frosting


6 Tablespoons butter or margarine, softened

Hershey’s Cocoa:

            1/3 cup for light flavor

            ½ cup for medium flavor

            ¾ cup for dark flavor

2 2/3 cups confectioner’s sugar

1/3 cup milk

1 teaspoon vanilla extract


In small mixer bowl, cream butter.  Add cocoa and confectioner’s sugar alternately with milk; beat to spreading consistency (additional milk may be needed).  Blend in vanilla.


Make about 2 cups frosting.


9x13 Cake

Made with "Not-So-Sweet Whipped Frosting"

Made with Vanilla Butter Cream Frosting

Batter in pans

Two 9" round cakes

Made with with Ricotta Filling

Made with with Ricotta Filling and Whipped Cream Frosting

Made with with Ricotta Filling and Whipped Cream Frosting

Made with with Ricotta Filling and Whipped Cream Frosting

Made with Cream Cheese Frosting

Cupcakes

Cupcakes with Vanilla Buttercream Frosting


Not-So-Sweet Whipped Frosting

I'm always on the hunt for new frosting recipes as I just haven't found one that I love. My twin boys turned 5 years old yesterday and I was looking for something new to try. In past years I've made them vanilla cake with vanilla buttercream frosting, chocolate cake with cream cheese frosting, chocolate cake with butter cream frosting, and chocolate cannoli cake (ricotta filling and a whipped cream frosting). All of those cakes were delicious but I wanted something new for this year. I came across this Not-So-Sweet Whipped Frosting Recipe on one of my favorite baking blogs, and it looked perfect!

I made a Hershey's chocolate cake two days ago and I made the frosting yesterday. It was very easy to make. I followed the tips on the blog and my frosting whipped up perfectly. Everyone at my boys' birthday party loved it!

There are a few important things to remember when making this recipe so your frosting turns out the right way. Always use a brick of cream cheese for baking (not the kind in a tub that is meant to spread on bagels). Let it get to room temperature before starting the frosting - I usually leave mine out for 2 hours. I recommend using the paddle attachment for the cream cheese as it kept getting stuck in my whisk attachment; then switch to the whisk attachment when you are ready to whip in the heavy whipping cream. Make sure you are using heavy whipping cream and not just whipping cream, so it will firm up the right way. When you start making the frosting, put your heavy whipping cream in the freezer so it can get really cold by the time you need to add it. Make sure there are no lumps at all in the cream cheese before you add the heavy cream. When you add the heavy cream, slowly add it. After it's all in and you start to whip it on high speed, do not walk away! There is such a thing as whipping the heavy cream for too long - you avoid it by paying close attention to the formation of the soft peaks that you want - and immediately stop whipping at this point. Even a few seconds longer can result in a liquid-y mess which is difficult to salvage. Once your cake or cupcakes are frosted, refrigerate them uncovered for at least 30 minutes to set the frosting. I forgot to uncover mine, but it still ended up fine!

Lastly, the original recipe amounts were for 6 ounces of cream cheese and are listed at the end of the recipe below. I wanted to use the full 8 ounce brick of cream cheese so I put those amounts in this recipe. There was a lot of frosting on my 9x13 cake, but it was so good! This recipe is a keeper for sure!

You can also flavor this by adding some Freeze Dried Raspberry Powder (or whichever flavor you prefer) to the frosting.


Not-So-Sweet Whipped Frosting

Recipe courtesy “Sally’s Baking Addiction” Website


Made from only 4 ingredients, this lightly sweetened whipped frosting is creamy and fluffy, yet holds its shape when piped with a piping tip. For best results, review the success tips above and recipe notes below before you begin.


8 ounces block full-fat cream cheese, softened to room temperature

1 cup confectioners’ sugar

2 teaspoons pure vanilla extract

2 cups cold heavy cream or heavy whipping cream (very cold!)

Tip: Freeze the heavy whipping cream when you start making the icing so it is super cold when you add it in - it needs to be very cold!


In a large bowl using a hand-held mixer or stand mixer fitted with a whisk or paddle attachment, beat the cream cheese on medium-high speed until creamy, about 1 minute. Scrape down the sides and up the bottom of the bowl and beat again as needed until creamy. Add the confectioners’ sugar and vanilla extract, and then beat on medium speed until combined and completely smooth (absolutely no lumps), at least 2 full minutes. Scrape down the sides and up the bottom of the bowl and beat again as needed to smooth out.


Switch to a whisk attachment (if you haven’t already been using it). Turn the mixer to low speed and with the mixer running, carefully pour in the cream in a slow and steady stream. After all of the cream has been added, turn the mixer up to high speed and whip until thick and stiff peaks form, about 1-2 minutes. This time can vary depending on the exact temperature of ingredients, temperature in the kitchen, and even the humidity. Do not walk away during this time and do not be concerned if your frosting takes longer to whip. You’re looking for a thick, airy consistency with stiff peaks. If you were to shimmy and shake your bowl, the frosting would hardly move. If your frosting appears soupy now or at any point you are working with it, it needs more whipping to introduce more air. If your frosting appears chunky or curdled, it’s over-whipped. To fix, stir 1 tablespoon of heavy cream into the frosting by hand to smooth out again. Use more heavy cream if needed to smooth out.


Use it: After you make the whipped frosting, it’s ready to frost your cupcakes, cake, or other confections. After frosting a cake or cupcakes with this frosting, I strongly recommend refrigerating them uncovered for at least 30 minutes to help “set” the frosting (especially when using it on a layer cake). Then you can serve or set out for a few hours before serving. And please note that you’ll notice the frosting becomes thicker and airier the longer it sits in your mixing bowl. This is not a problem and can easily be fixed by gently stirring it to pop any air bubbles. Likewise, if you notice the frosting really airy and looking over-whipped as you pipe it with piping tips, either “massage” the frosting while it’s in the piping bag (sounds weird, but this can help deflate air bubbles) or pipe back into the mixing bowl and gently stir it. You can even stir in a splash of heavy cream to thin/smooth out if needed.


Serve or Make Ahead: After the 30 minutes of refrigerating to “set” the frosting as instructed in step 3, frosted confections are fine to serve or sit out at room temperature for a few hours. If you plan to serve later than that, such as the next day, I recommend storing in the refrigerator. Lightly cover as best you can. Confections topped with this frosting can be made ahead and refrigerated for up to 2 days.


NOTES:

Freezing Instructions: This whipped frosting freezes and thaws surprisingly well. For best results, I recommend freezing the frosting after you’ve already frosted your cake or cupcakes– as opposed to freezing the frosting in your mixing bowl or other container. Frost your baked good(s), refrigerate for at least 1 hour to really set the frosting, and then cover and freeze for up to 3 months. (Note that covering this frosting can get messy and I haven’t found a workaround for that.) Thaw your frosted baked good(s) at room temperature.


Can this frosting sit out at room temperature or in a warm environment? A few hours at room temperature is fine. If you’re serving your frosted confections outside on a hot day (I’ve done this a few times), refrigerate your frosted cake/cupcakes for up to 1 day. Remove from the refrigerator 30-60 minutes before serving them. This way they start out a little colder and can last longer in the heat.


Can I leave out or replace the cream cheese? No. Instead, I would try a different recipe.


Can I tint this frosting a color? Yes. This frosting holds onto food coloring nicely and I strongly recommend using gel food coloring or natural food coloring powder. If you plan to tint the frosting, it’s best to add the food coloring when you add the heavy cream. If you need to add more food coloring after the frosting is done, gently stir it in by hand. If the frosting becomes too thick, stir in a splash of heavy cream to thin out again.


Can I flavor this frosting? Yes. Feel free to replace up to 1 teaspoon of vanilla extract with another extract of choice such as lemon or coconut extract. If it’s a potent extract such as peppermint extract, I would only use 1/2 teaspoon. You can also turn this into a whipped strawberry frosting by replacing 1/4 cup confectioners’ sugar with 1/4 cup freeze-dried strawberry crumbs/dust.


If your frosting begins losing shape: If your frosting becomes unstable or thins out/loses shape overtime, whip it on high speed until stiff peaks form to reintroduce more air.


Quantity: This recipe yields about 4-5 cups of frosting. This is enough to heavily frost 12-16 cupcakes (as pictured), a 9×13 inch quarter sheet cake, or a 2 layer cake.

6 ounces block full-fat cream cheese, softened to room temperature

3/4 cup confectioners’ sugar

1½ teaspoons pure vanilla extract

1½ cups cold heavy cream or heavy whipping cream (very cold!)


For a 3 layer cake, I recommend slightly scaling up the recipe by using one 8-ounce block cream cheese, 1 cup confectioners’ sugar, 2 teaspoons vanilla extract, and 2 cups heavy cream. After adding the heavy cream, you may need to whip the mixture for slightly longer.

8 ounces block full-fat cream cheese, softened to room temperature

1 cup confectioners’ sugar

2 teaspoons pure vanilla extract

2 cups cold heavy cream or heavy whipping cream (very cold!)


This recipe is very easy to scale up or down. Use 2 ounces of cream cheese per 1/4 cup confectioners’ sugar and 1/2 cup heavy cream. Add more or less vanilla extract. When you are whipping in the heavy cream, reduce or extend that length of time based on the volume. Whip shorter if you scaled down the recipe and whip longer if you scaled up the recipe.