Monday, May 20, 2024

Cheesecake Ice Cream & Cherry Topping

I've been trying out some new ice cream flavors lately and came across one for Cheesecake Ice Cream in the cookbook "The Perfect Scoop" by David Lebovitz. I love cheesecake so I had to try this recipe out! I made a few changes to it though so the below recipe is adapted from his, but I'm including the original recipe from his cookbook as well, at the very bottom of this post.

I used lemon zest this time but I didn't use all of the the zest from the lemon because I read a review that it was too tangy, and it still was pretty tangy. Next time I'll just use a little bit of lemon juice instead of the zest because I didn't love the zest being in the ice cream, but that's just my personal preference. I changed the recipe below to reflect that change.

I also increased the amount of half-and-half from the original recipe to 1 cup because I wanted 3 cups total of liquid and I thought it might help the ice cream not taste so rich. This ice cream base is very thick, so I'm glad I added the extra liquid to help thin it out a little bit.

I added 1/2 teaspoon of vanilla to the original recipe, which had none, because my cheesecake recipes always have vanilla in them, but next time I will increase the vanilla to 1 teaspoon, as is reflected in the recipe below.

After blending the ingredients together, I refrigerated the mixture for 4 hours (in a quart-sized mason jar - it fits perfectly) and then it was in my ice cream maker for 15 minutes before I heard it struggling to churn and turned it off. I usually churn my ice cream for 20-25 minutes, so that should tell you how thick this is! I put it in the freezer and tried it about 3 hours later. It was delicious! It's thick, rich, lemony, cream-cheesy and just so, so good!

I love putting cherries on top of homemade cheesecake, so I also made a cherry topping using a 12-ounce bag of frozen cherries. The final topping is crushed graham crackers reminiscent of a graham cracker crumb crust, which makes this cheesecake ice cream really taste like homemade cheesecake!

As much as I liked this, I might make a few more changes next time to try to thin out the mixture a little bit - maybe use 2 cups of half-and-half (or a mixture of whole milk and heavy cream) and no sour cream. I think first I'll try the recipe as it is written below and see how that comes out with substituting the lemon zest for lemon juice and increasing the vanilla and then make additional changes another time if need be.

If you love cheesecake and ice cream, you should definitely give this a try and adjust it according to your preferences!


Cheesecake Ice Cream

Recipe adapted from “The Perfect Scoop” by David Lebovitz


8 ounces cream cheese
1 cup sour cream
1 cup half-and-half or light cream
2/3 cup sugar
1/8 teaspoon of sea salt

1 teaspoon lemon juice

1 teaspoon pure vanilla extract


Cut the cream cheese into small pieces. Add the cream cheese, sour cream, half-and-half or cream, sugar, salt, lemon juice and vanilla directly into a blender or food processor and puree until smooth.


Chill the mixture thoroughly in the refrigerator (at least 4-6 hours or overnight), then freeze it in your ice cream maker according to the manufacturer’s instructions. The mixture is very thick and may stop churning after about 15 minutes.


Top the ice cream with cherry topping and crushed graham crackers.


After mixing and before putting in the fridge for 4 hours. It is very thick!

The perfect size jar for the amount of mixture that fits in my 1.5-qt. ice cream maker

Ready to churn!

15 minutes later, it's done!

Ready for the freezer


Cherry Topping

Recipe adapted from “Vintage Kitchen” Website


This easy cherry sauce recipe takes minutes on the stove and keeps for days in the refrigerator and frozen for at least a month. Use fresh cherries when in season, but frozen ones also work. It's great as a topping for waffles and cheesecake, and as a sauce over ice cream.


12 ounces whole cherries (fresh or frozen)

2 tablespoons brown sugar

2 tablespoons lemon juice

2 tablespoons water

1 teaspoon cornstarch


If using fresh cherries, wash and pit the cherries. You'll have about 1½ cups of cherries. Alternatively, use a 12-ounce bag of frozen cherries.


Put the cherries in a medium saucepan and add the sugar and lemon juice. Mix. 


Cook fresh cherries over medium heat (or frozen cherries over low heat) until it breaks a boil, stirring gently once in a while. 


Dissolve the cornstarch in the water until no lumps remain and drizzle over the berries. 


Stir constantly and cook for 1 more minute. 


Remove from the heat, transfer to a bowl and let cool down. 


Store in the refrigerator for up to a week in a glass mason jar with a tight-fitting lid or another type of airtight container. It can also be frozen for up to a month in a plastic container. Defrost at room temperature.


Frozen cherries with brown sugar and lemon juice

Boiling and ready for the water and cornstarch

Finished and cooling down

In a mason jar and ready for the fridge

Broken up graham crackers

Cheesecake ice cream and toppings


Delicious!


Cheesecake Ice Cream

Recipe from “The Perfect Scoop” by David Lebovitz


8 ounces cream cheese
1 lemon, preferably unsprayed
1 cup sour cream
1/2 cup half-and-half
2/3 cup sugar
Pinch of kosher or sea salt


Cut the cream cheese into small pieces. Zest the lemon directly into a blender or food processor. Add the cream cheese, sour cream, half-and-half, sugar, and salt, and puree until smooth.


Chill the mixture thoroughly in the refrigerator, then freeze it in your ice cream maker according to the manufacturer’s instructions.


Makes about 3 cups.

Sunday, May 19, 2024

Chocolate Chip Cookie Dough Ice Cream

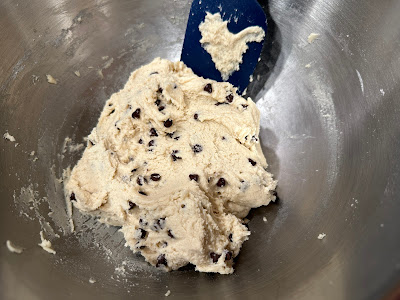
Since I'm on an ice cream kick, I decided to try this edible chocolate chip cookie dough recipe that my sister Diana sent me a few months ago and make chocolate chip cookie dough ice cream, but using my own vanilla ice cream recipe with it.

I made the cookie dough last night and froze little portions of the dough (1/2 teaspoon each, but next time will make them a little smaller) in a single layer on a plastic wrap lined baking sheet. Once they were frozen, I transferred them to a container and put them back in the freezer. This made enough for two batches of ice cream, so I used half for this batch and froze the rest to use another time.

I also mixed and refrigerated my vanilla ice cream base (refrigerated in a quart-sized mason jar - it fits perfectly), so that everything would be ready to make today.

After I churned the vanilla ice cream, I transferred it to a container a little at a time, adding some of the frozen cookie dough in between spoonfuls/layers of ice cream, then topped it with one final layer of ice cream. I then froze the container of ice cream for a few hours. When I tried some later, it was so good!

Skip the store-bought ice cream that is full of junk ingredients and give this easy and delicious recipe a try!


Eggless Edible Cookie Dough

Recipe courtesy “Joy Food Sunshine” Website


This is the best Edible Cookie Dough Recipe ever! It's easy to make and safe to eat without baking! Eat it with a spoon, toss it in homemade ice cream, or use it as a filling for cakes or cupcakes! There's no wrong way to enjoy this sweet treat!


½ cup salted butter softened

½ cup granulated sugar

½ cup light brown sugar packed

3-4 Tablespoons whole milk

1 teaspoon pure vanilla extract

1½ cups all-purpose flour (heat treated)*

½ teaspoon baking soda

¼ teaspoon baking powder

½ teaspoon sea salt

½ cup mini chocolate chips


In a small bowl, mix together the heat-treated flour, baking soda, baking powder and sea salt. Set aside.

In a medium bowl, cream together butter, granulated sugar and brown sugar with a hand-held mixer (or standing mixer) until well combined (about 60 seconds). Be sure to start on low speed and increase it as the ingredients begin to stick together.

Add 3 Tablespoons milk and vanilla extract and beat on medium speed until combined.

Add dry ingredients and mix, starting on low speed and increasing to medium-high, until all ingredients are combined. If necessary, add an extra 1 Tablespoon milk to reach your desired consistency.

Add mini chocolate chips and stir until evenly distributed.

(If using a hand-held mixer, the cookie dough may look crumbly. It’s ok! Simply press it together into a ball with your hands and it will stick together nicely)!

NOTES:

The FDA recommends avoiding the consumption of raw flour because there is a risk that it could be contaminated with bacteria. If you are worried about eating raw flour, you can heat treat the flour used in this eggless cookie dough recipe. The main goal of warming up (or heat-treating) the flour is to ensure that it reaches 160°, the temperature that kills bacteria! There are two methods to heat treat flour to make it safe to use in this edible cookie dough recipe. 

*How to heat treat flour: 

Bake it. Preheat your oven to 350°and spread the flour evenly on a large baking sheet. Bake for 5-10 minutes or until the temperature reaches 160°.

Microwave it. Place the flour in a microwave-safe bowl and heat it on high for 60-65 seconds, or until it reaches 160°.

Let the flour cool while you’re mixing the wet ingredients, and once your flour is safe to use, you can move on to making this eggless cookie dough recipe.

Store/Freeze: Store in an airtight container in the refrigerator for up to 5 days, or in the freezer for up to 2 months. You can store it in one portion or roll it into balls/individual portions.


Vanilla Ice Cream


1 cup whole milk, very cold

1/8 teaspoon sea salt

¾ cup granulated sugar

2 cups heavy cream, very cold

2 teaspoons pure vanilla extract


In a cold bowl, whisk together milk, salt and sugar until sugar is dissolved. Stir in heavy cream and vanilla.


Pour into the ice cream maker's freezer bowl. Let it run for about 20-25 minutes or until ice cream is thick and done.


Transfer to a container and place in the freezer for about 2 hours to completely firm up.


Monday, May 13, 2024

No Knead Italian Focaccia Bread

My father-in-law stayed with us for a few nights last week and I always try to make something special when he stays here. I made stuffed shells (which I know he loves) and salad and wanted to make an easy bread recipe. I saw this Focaccia recipe on Instagram and it looked easy enough so I gave it a try. It was so delicious!

I did not refrigerate the dough - I did the "short rise option" on the website and adapted the recipe below to reflect what I did so I'll remember next time. I mixed the dough, let it rise for 2 hours, put it in an oiled 9x13 glass baking dish (next time I will oil and flour it because it was a little hard to get out), let it rise another 30 minutes (uncovered), poked the dough, topped with some sea salt flakes and baked for 22 minutes.

My cousin Marina also made this recipe (she refrigerated the dough overnight) but she made the focaccia thin and used two quarter sheet pans (12.5"x9").

The recipe uses a lot of olive oil and you could probably cut back a little bit on that, but it is also probably what makes it so good. I did not put oil on top when I added the salt and I did not put oil on top when it came out of the oven.

I used 00 Flour for this recipe as I always do when I make bread or pizza.

Overall, this is a very good and easy recipe. Everyone at my house loved it! It also makes a lot, so I was able to have a few pieces leftover for the next night's dinner and freeze an entire half of it!


Sunday, May 12, 2024

Chocolate Ice Cream

The second recipe I made in my new ice cream maker is this Chocolate Ice Cream recipe. I don't usually care for chocolate ice cream but one of my sons has been asking me to make it. I made a chocolate recipe a few years ago and didn't like it (neither did my husband, so it wasn't just me!), so this morning I searched for a new one to try. I came across this recipe, which looked good. After reading through the comments, I discovered the mixture overflowed in most commenter's 1.5-qt. ice cream makers, which is the size I have. I also read that it helps make the ice cream less gritty if you sift the cocoa and sugars first. I used these two suggestions and adapted the amounts as best I could to come up with the recipe below, which we all loved! Everyone had a second helping, even me. I put some cut up fresh strawberries on top of mine which made it even better.

I used some half & half in place of some of the heavy whipping cream, but if you don't have it or don't want to use it, use 1 cup of whole milk and 2 cups of heavy whipping cream - or any combination of milk and cream to equal 3 cups.

I'm happy I found a chocolate recipe that tastes good and we can now use this as a base for other recipes (chocolate chocolate chip, chocolate peanut butter, rocky road, etc.) or just have it as plain chocolate!


Chocolate Ice Cream

Adapted from Chew Out Loud Website


2/3 cup cocoa powder, good quality, unsweetened

¼ cup brown sugar, firmly packed

½ cup white sugar

1 cup whole milk, very cold

1 cup half and half, very cold

1 cup heavy cream, very cold

2 teaspoons vanilla extract


Sift the cocoa powder, brown sugar and white sugar together to enable a finer mix into the cold ingredients - it makes the ice cream taste less gritty.


In a chilled bowl, combine the sifted cocoa and both sugars, whisking to combine well. Add cold milk and whisk until the sugars are dissolved. Stir in cold heavy cream and vanilla. The colder everything is, the better.


Optional: Refrigerate mixture for at least 4-6 hours or overnight for better results (using a quart-sized mason jar works well to store this amount of mixture).


Pour mixture into the freezer bowl of ice cream maker. Let it run for 20-25 minutes, or until the mixture is thick, soft, and creamy. Churned ice cream should increase in volume, reaching the top of the machine's freezer bowl.


If adding something extra, mix for 15-20 minutes and then add 1/4 cup (or up to 1 cup):

·      Mini chocolate chips

·      Oreos

·      Snickers

·      Reese's cups

and mix for 5 more minutes.


Transfer to an airtight container and freeze for at least 2 hours or until ice cream is desired consistency.


Prior to serving, let ice cream sit at room temp for a few minutes just to soften enough for easy scooping.


Vanilla Bean Ice Cream

I just bought a new ice cream maker and the first recipe I made in it was this one. I prefer simple flavors and eggless recipes, also known as Philadelphia style (as opposed to custard or French style which contain eggs).

I've always used vanilla extract in my ice cream before but decided to try Vanilla Bean Paste and I loved the results.

I also used some half & half in place of some of the heavy whipping cream, mostly just to see if it made any difference since whipping cream has been so expensive. I thought it tasted great so I will likely use it in more recipes, but if you don't have it or don't want to use it, use 1 cup of whole milk and 2 cups of heavy whipping cream - or any combination of milk and cream to equal 3 cups.

This is the perfect base recipe to add various mix-ins to (chocolate chips, crushed Oreos, peanut butter cups, cookie dough, etc.) or just have it as plain vanilla! 


Vanilla Bean Ice Cream


1 cup whole milk, very cold

1/8 teaspoon salt

¾ cup granulated sugar

1 cup half and half, very cold

1 cup heavy cream, very cold

2 teaspoons vanilla bean paste


In a cold bowl, whisk together milk, salt and sugar until sugar is dissolved. Stir in half and half, heavy cream and vanilla bean paste.


Optional: Refrigerate mixture for at least 4-6 hours or overnight for better results (using a quart-sized mason jar works well to store this amount of mixture).


Pour cold mixture into ice cream maker's freezer bowl. Let it run for about 20-25 minutes or until ice cream is thick and done.


If adding something extra, mix for 15-20 minutes and then add 1/4 cup (or up to 1 cup):

·      Mini chocolate chips

·      Oreos

·      Snickers

·      Reese's cups

and mix for 5 more minutes.

Transfer ice cream to a container and place in the freezer for about 2 hours to completely firm up.


Saturday, May 11, 2024

Ooni Classic Pizza Dough

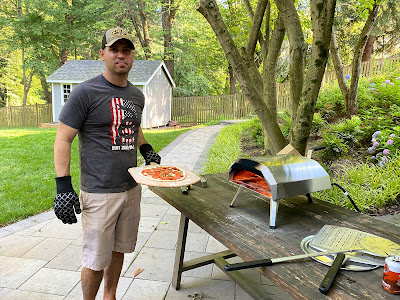
I gave my husband an Ooni pizza oven for Christmas a few years ago and this is the pizza dough recipe we use. This makes four 12" pizzas or three 16" pizzas (we make the 12" ones). I've made anywhere from one to four recipes of dough at a time and it has always come out delicious!

Ooni changed the recipe on their website since the first time I made this (they adjusted the amounts of the ingredients). I've made both recipes - either one works fine and both versions are below. I recommend using a scale to measure the ingredients (at least the water and flour) by weight for this recipe.

I use Anna Tipo 00 Flour whenever I make pizza, bread or pasta, so I can't say how the dough comes out using any other flour, but it has always come out perfect for me. Since the pizza is baked at a very high temperature compared to pizza baked in a regular oven, I recommend using Anna or another brand of 00 flour rather than All Purpose Flour or Bread Flour. Antimo Caputo Pizzeria Flour is another highly recommended one that my cousin uses. It's more expensive but I've heard it's even better for pizza oven pizza, so I plan to try it out.

We have the Ooni Karu 12" Multi Fuel Oven along with the Gas Burner attachment and the following accessories. The Ooni accessories are more expensive than others and they do go on sale, but you can use any brand of accessories.

Carry Cover

Pizza Turning Peel

Perforated Pizza Peel

Digital Infrared Thermometer

Some additional items I've found helpful:

Food Scale

Pizza Dough Proofing Box

Grill Gloves

Pizza Wheel

You'll also need a large cutting board. I use my 12" pizza pans that my mom gave me to keep the pizzas on once they are finished baking.

I usually make a single recipe in my 5-qt. KitchenAid mixer or a double recipe in my 6-qt. KitchenAid mixer. My cousin Andrew has a 7-qt. KitchenAid mixer and he said a triple recipe just fits in his.

If you have a pizza oven and you're looking for a good dough recipe, give this one a try!


Ooni Classic Pizza Dough

Recipe Courtesy Ooni


Flour, salt, water and yeast: what do these simple ingredients have in common? They come together to create the perfect foundation for any good Italian pizza. Say hello to our classic pizza dough recipe, which is sure to become a beloved staple for your household. The beauty of making your own dough is the delicious texture and flavor, coveted puffy crust, a soft, easy-to-fold slice and, of course, the fragrant, freshly-baked-bread aroma. Think of it as your pizza canvas, the base for any topping your culinary heart desires, from burrata and steak to crème fraîche and basil.


1½ cups plus 1 tablespoon (368 grams) lukewarm water

1 heaping teaspoon (3 ½ grams) active dry yeast, or 1 teaspoon (2.7 grams) instant dried yeast, or 1 tablespoon (8 ½ grams) fresh yeast

5¼ cups (613 grams) “00” flour, plus extra for dusting

3 teaspoons (18 grams) sea salt


Tip: We recommend using your Ooni Dual Platform Digital Scales for maximum accuracy.


Add the water and yeast to a large bowl (or the bowl of a stand mixer) and whisk until thoroughly blended. Combine the flour and salt in a medium bowl, then add the flour mixture to the wet ingredients.


If using a mixer: Fit the mixer with the dough hook and pour the flour and yeast mixture into the mixer bowl. Turn the machine on at a low speed for 5 to 10 minutes, or until it’s firm and stretchy. Cover the dough with a dish towel and leave to rise in a warm place for about 2 hours, or until doubled in size.


If mixing by hand: Stir with a wooden spoon until a dough starts to form. Continue mixing by hand until the pizza dough comes together in a ball. Place the dough onto a lightly floured surface and knead with both hands for about 10 minutes, until it’s firm and stretchy. Return the dough to the bowl. Cover with a dish towel and leave to rise in a warm place for about 2 hours, or until doubled in size.


Tip: Make more dough than you need, or just want to have some on hand in a pinch? No problem. The best time to freeze your homemade pizza dough is after the first rise (after it's doubled in size). Once your dough has doubled in size, divide it into equal dough balls. Make sure you've put a light layer of olive oil into your containers to prevent the dough from sticking. Place the dough balls into separate containers with lids, and place in the freezer. You can freeze your dough balls for up to 3 months.


When the dough is ready, divide it into 3 or 4 equal pieces, depending on the size of pizza you’re making – either 12 inches (30 centimeters) or 16 inches (40 centimeters) wide. Place each piece of dough in a separate bowl or tray, cover with a dish towel and leave to rise in a warm place for another 30 to 60 minutes, or until doubled in size.


Tip: Always start with a perfectly rounded ball of dough. This helps to keep the shape of the base circular during the stretching process.


Before stretching and topping your dough, fire up your oven and allow it to preheat for 15 to 20 minutes. Aim for 850 °F and 950 °F (450 °C and 500 °C) on your baking stone. You can check this quickly, accurately and from a safe distance with an infrared thermometer. 


When the dough is ready, place the ball on a lightly floured surface, flour your hands and use your fingertips to press the dough into a small, flat disc. Working from the center, push the dough outwards while spreading your fingers, making the disc slightly bigger. Pick up the dough and gently pinch it all around the edge, allowing gravity to pull it downwards into a circle. Neapolitan-style pizza bases are very thin, so you should be able to see through the base when you hold it up to the light. Take care when doing this, as you don’t want it to tear.


Once the dough is fully stretched, lightly flour your pizza peel and lay the base on it. If at this point you see any small holes in the dough, gently pinch them back together. Once you’re happy with the base, add your toppings.


When your oven is hot enough, launch your pizza and cook it for 1 to 2 minutes, turning every 20 seconds to ensure an even bake.


Remove from the oven, slice, serve and enjoy that pizza greatness!


Yield: Three 330-gram dough balls (for 16-inch or 40-centimeter pizzas) or four 250-gram dough balls (for 12-inch or 30-centimeter pizzas).


Note: Exciting news! We've enhanced our signature Classic Pizza Dough recipe for an even tastier experience. Our culinary team carefully refined the ingredients and methodology, and while we've made improvements, we've stayed true to the essence of the original. If, however, you loved the old recipe from December 2020 and still want to use it, here are the ingredient amounts (you can follow the same process) for four 250-gram dough balls for four 12-inch (30-centimeter) pizzas, or three 330-gram balls for three 16-inch (40-centimeter) pizzas with a dough hydration of 60%:


1½ cups or 12.8 ounces (364 grams) lukewarm water

3¼ teaspoons (9.2 grams) active dried yeast or 2 ½ teaspoons (7 grams) instant dried yeast or 2 tablespoons (20 grams) fresh yeast 

4¼ cups or 21.4 ounces (607 grams) “00” flour, plus extra for dusting

4 teaspoons (18 grams) sea salt


If you prefer fresh yeast, use 2 tablespoons (20 grams) and either mix the yeast into the water and let sit for 3 minutes (rehydration method) or crumble it over the flour and then add the water (dry blend). We always suggest checking the activation instructions on your yeast packets and testing accordingly.


First time making this recipe - initial dough rise

Separate into 4

Second rise in individual containers

Ready to use!

Before

After


I make the dough, he bakes the pizza


Kid approved!


4 recipes for 4th of July pizza party (2023)

Having these dough proofing boxes is really helpful!

Ready to use!


Checking the temp of the stone


Only 1 recipe for my small family

My happy boys!